Posted 01 September 2013 - 06:43 PM
This is a tutorial in the Ask a Pro Renewal Project series.
Prerequisite tutorial:
Computer Basics I
Next suggested tutorial:
Computer Basics III
In this tutorial, we will learn about several programs included with ComputerCraft: help, programs, label, id, copy, move, rename, mkdir.
Now that we have explored the shell and lua prompts a little bit, let's go deeper and learn some more about the computers and the command-line. Run the `help` program. A listing of help topics and options displays on the screen, much like this:
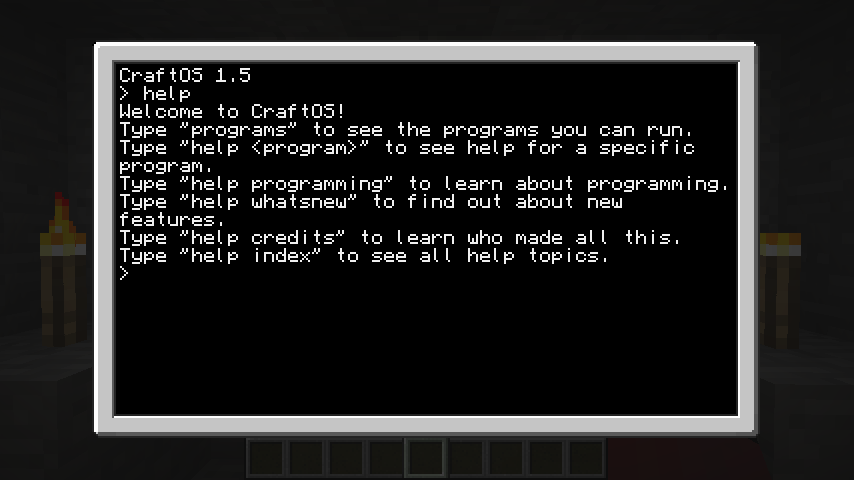
The first line tells us that we can run a program named "programs" to show us the available programs on the computer! Let's run that and see what all is available. When we run `programs`, we see this:
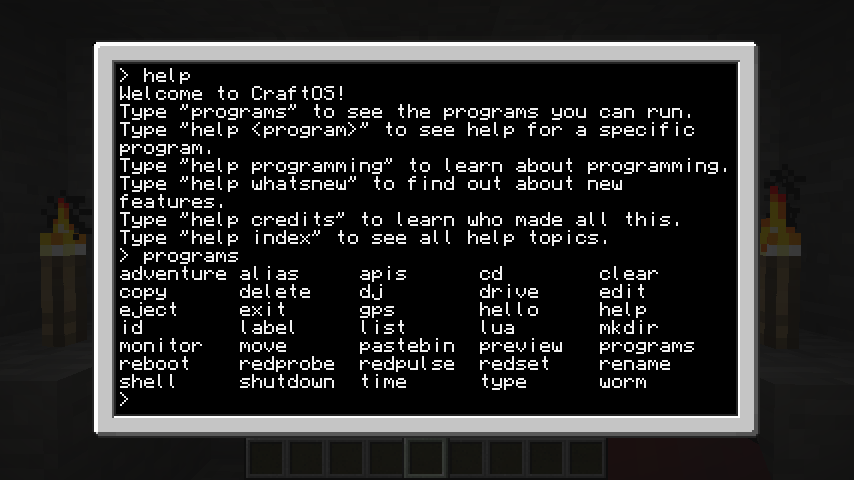
In that program list, we can see the "cd", "list", "lua" and "edit" programs we used in the previous tutorial, as well as the "help" and "programs" programs that we just ran. Don't worry if your programs listing doesn't look identical to the one in the screenshot, as a variety of things (such as type of computer or configuration options) can change which programs show up in this listing. Let's look at the "label" program next. When we ran the "help" program, it told us that we can run help with an argument to specify which program we want information for. Since we want to know about the label program, let's run `help label`.
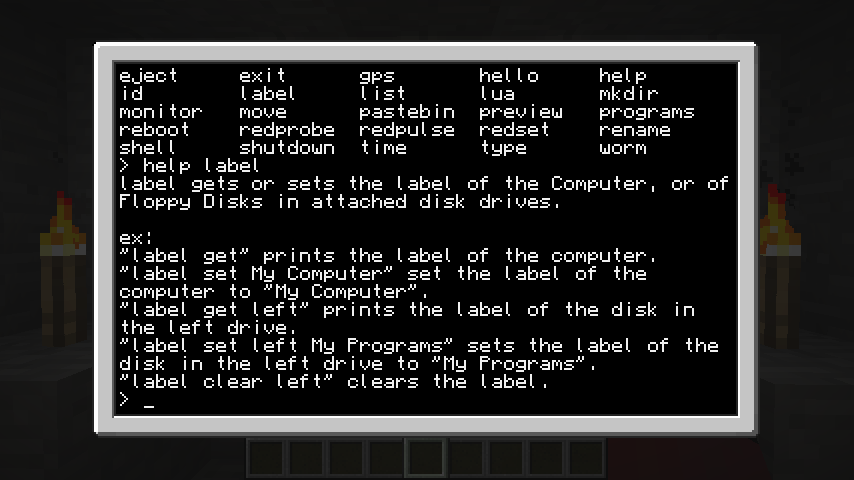
The help output tells us a little bit about the label program, that it gets or sets the label of the Computer, or of Floppy Disks. We'll cover floppy disks further in a later tutorial. We can see that "label get" would display the current label of the computer, and that "label set" with another argument sets the label for the computer. Labelling a computer is very useful. When a computer has a label, you can pick up the block by breaking it, and it will retain its ID and all of the programs that you've created on it. It's a good idea to label all of your computers right after you place them. We'll create a label for this computer now, by typing `label set tutorial`.
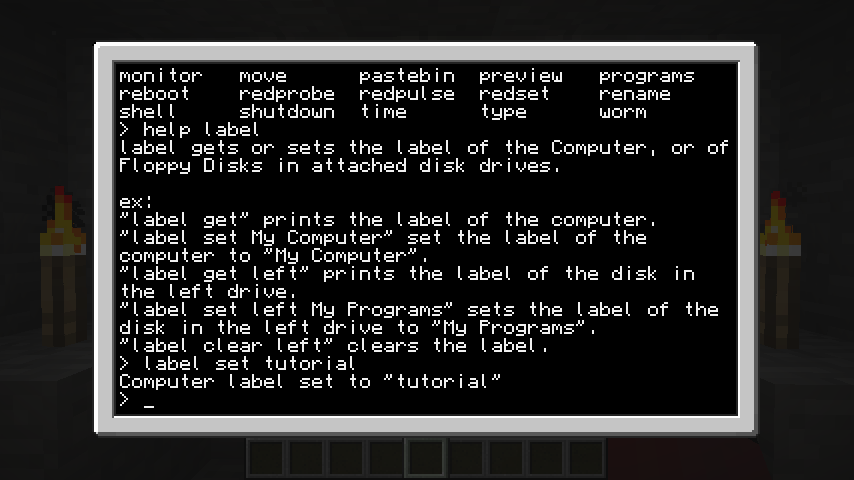
As you can see, the label is now set to "tutorial". Our programs listing earlier showed another interesting program, "id". Let's look up the help file for it by running `help id`.
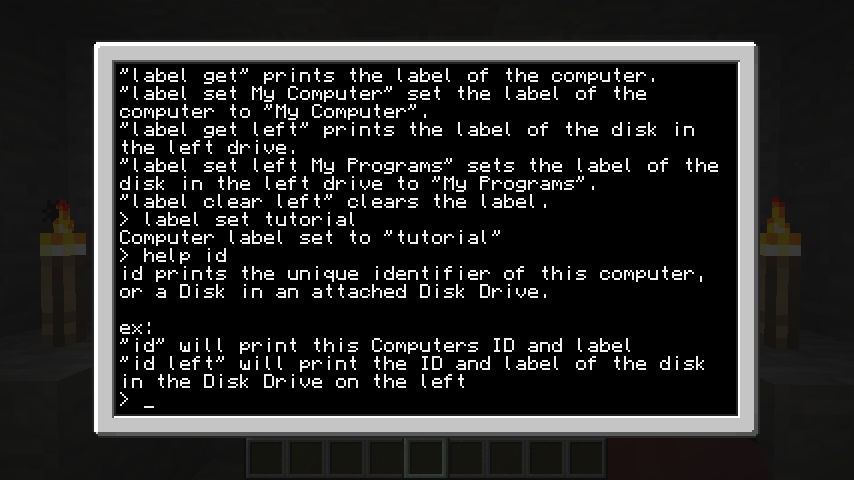
As it turns out, the id program is used to display the ID of the computer (or a floppy disk), as well as the label of the computer. Let's run it and see what the ID and label are. Hopefully the label is "tutorial", since we just set it to be that.
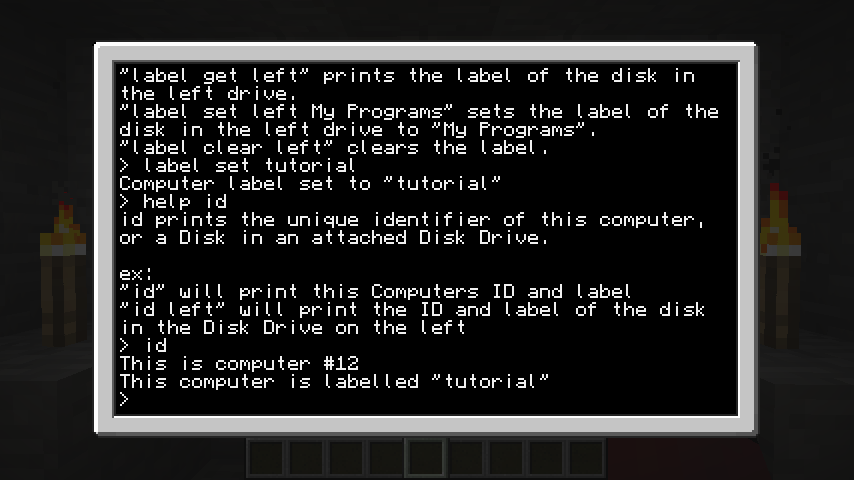
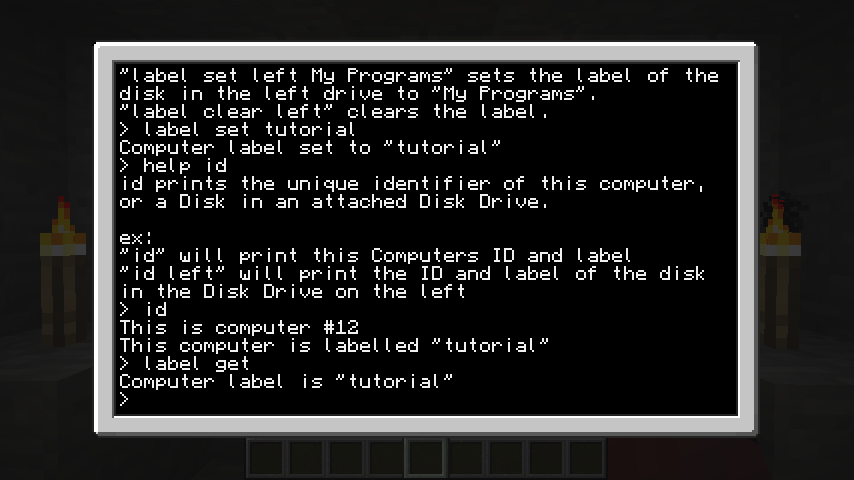
The computer ID will depend on how many other computers have been placed into the world. The computer in the screenshot is the thirteenth computer to be placed into the world (the first one was ID 0), and as you can see, it is labelled "tutorial". We could also run `label get` to see the label, but that won't display the computer ID:
The next program we'll look at is "mkdir". The meaning may be obvious if you're already familiar with command-line interfaces outside of ComputerCraft, but if not, let's run `help mkdir` to find out what it does:
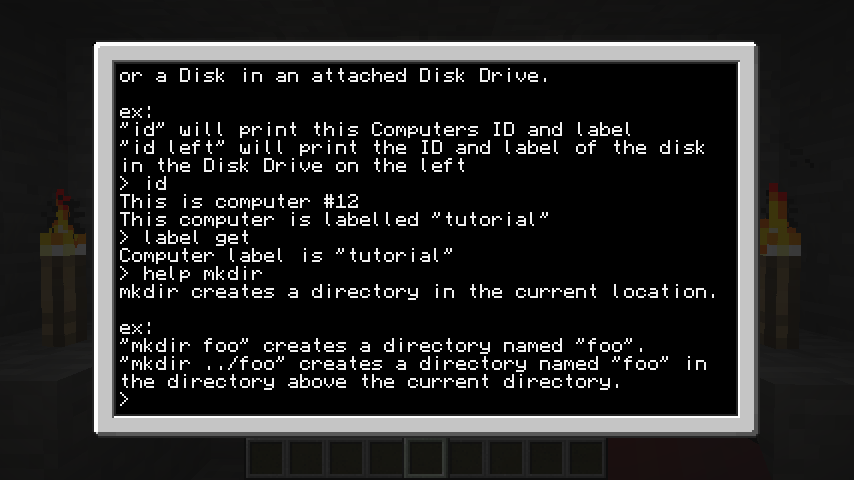
The help file says that it creates a new directory (the name is shortened from MaKe DIRectory). It will create a new directory inside the current directory. Let's try it out. Run `mkdir tutorial` to create a new tutorial folder in the root of the drive:
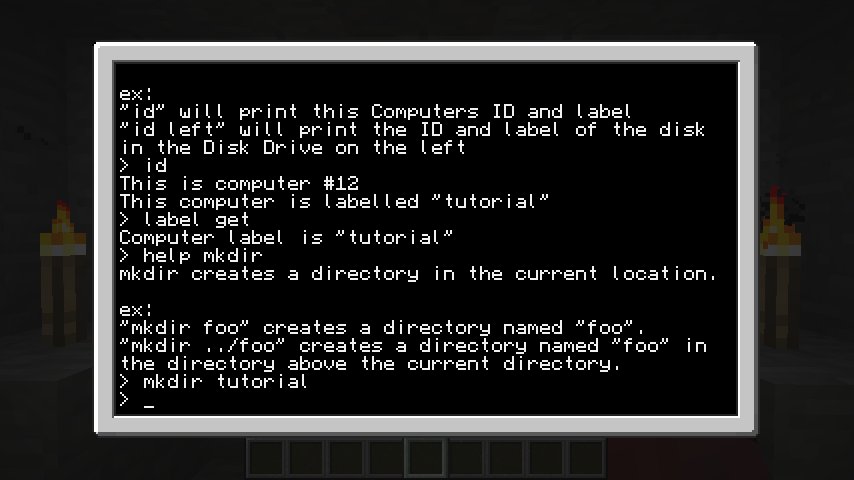
Let's run `list` to make sure it actually created the directory. Note that you can also use "dir" instead of "list" if you're already familiar with Windows commands, or "ls" instead of "list" if you're familiar with most other command lines. Both "ls" and "dir" are set up as aliases for the "list" program.
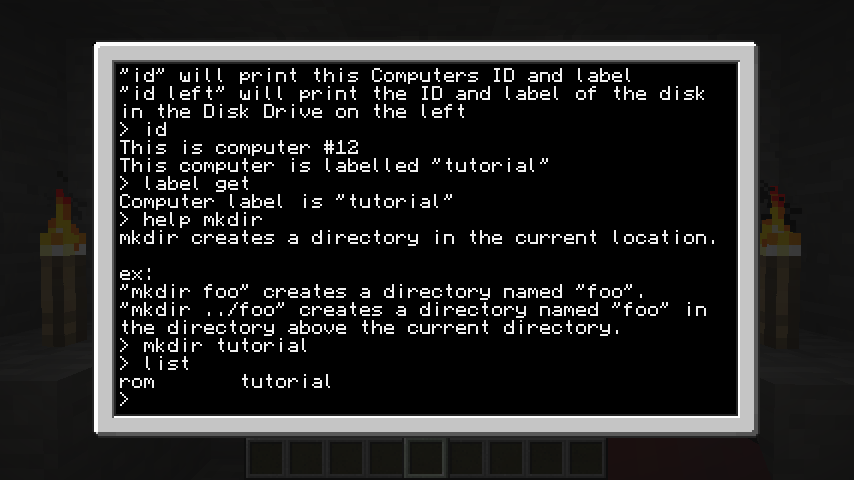
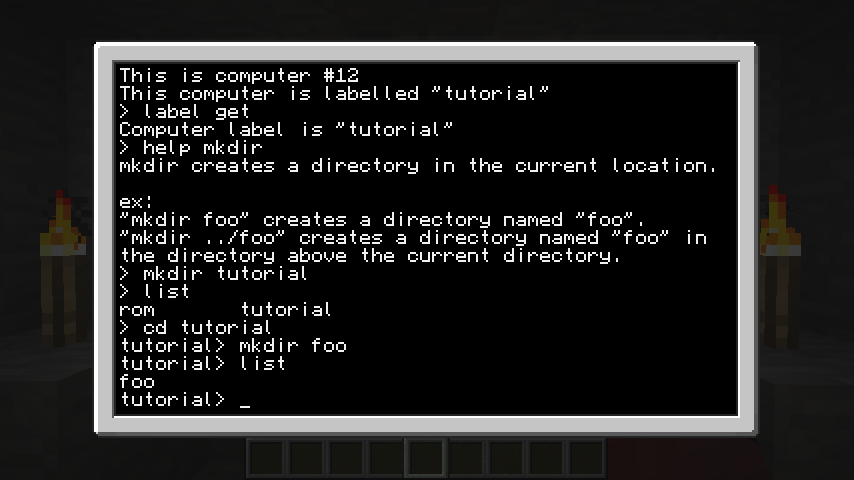
As you can see, we did create a new folder named tutorial. Let's change our current directory to our new tutorial directory with `cd tutorial`. As you can see, we have now set the current directory to the "tutorial" directory we just created. Let's create a new folder inside this one named "foo". We run `mkdir foo` and then `list` to see:
But foo isn't a great name for a folder. "bar" is a much better name. There was a "rename" program listed in that programs output earlier, let's see if it's what we need. Run `rename` to see its usage output.
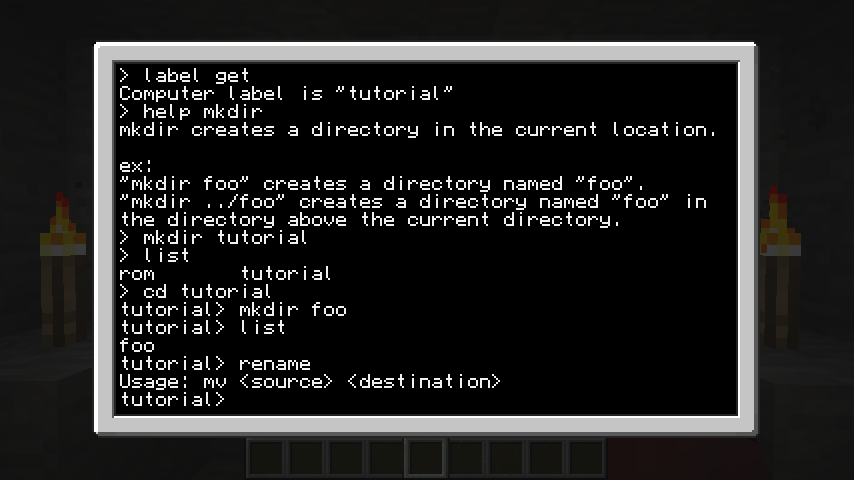
Wait, what? It shows the usage for a program named "mv"! We'd better check the help files to see what's going on! `help rename` shows us this:
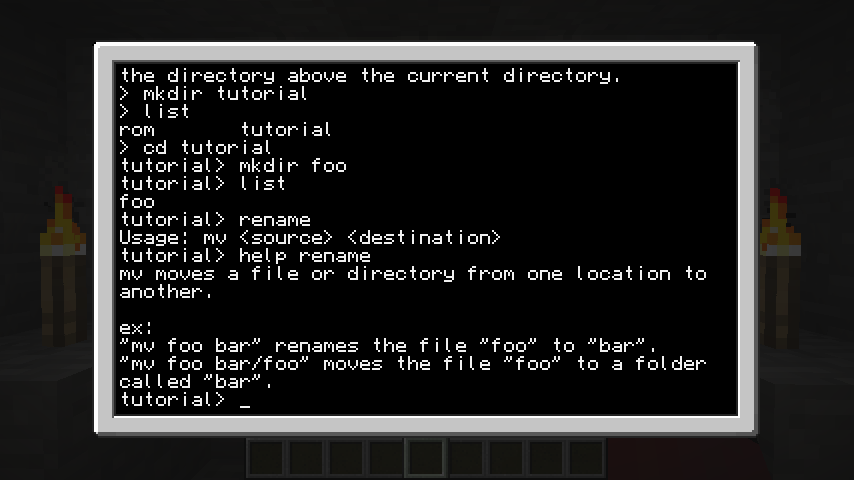
Hold on, this shows us the usage for "mv" again! What's going on here is that renaming a file and moving a file are essentially exactly the same thing (mv is short for MoVe). Since the file's data still only has to exist in one place (the destination), the computer just changes the name of the file, even if it has to change folders. Since moving and renaming do essentially exactly the same thing, there's only one program to do it on the computer, the "move" program. The "rename" program does exist too, but all it does is run the "move" program. "mv" is an alias for the "move" program, and is what the "move" program displays in its usage message.
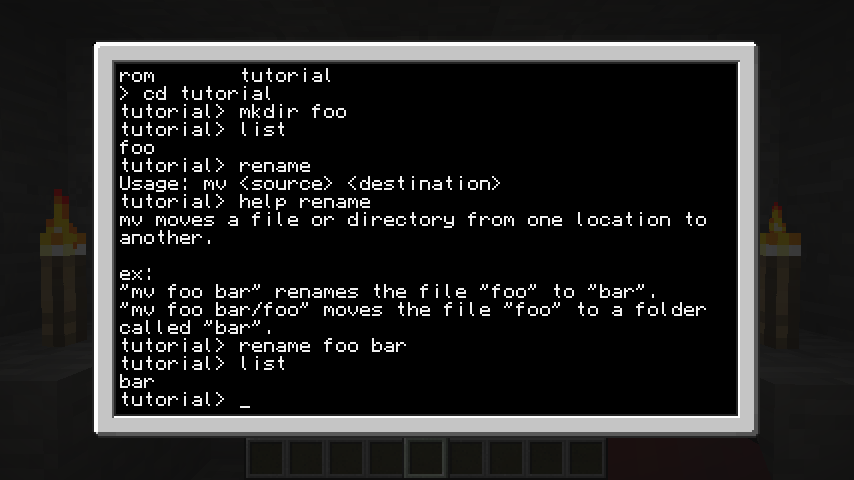
Now that that's explained, we can rename (or move, since they do the same thing) our folder to something else. Let's change our folder "foo" to be called "bar" by running `rename foo bar` or `move foo bar`. Then run `list` again to verify the change happened.
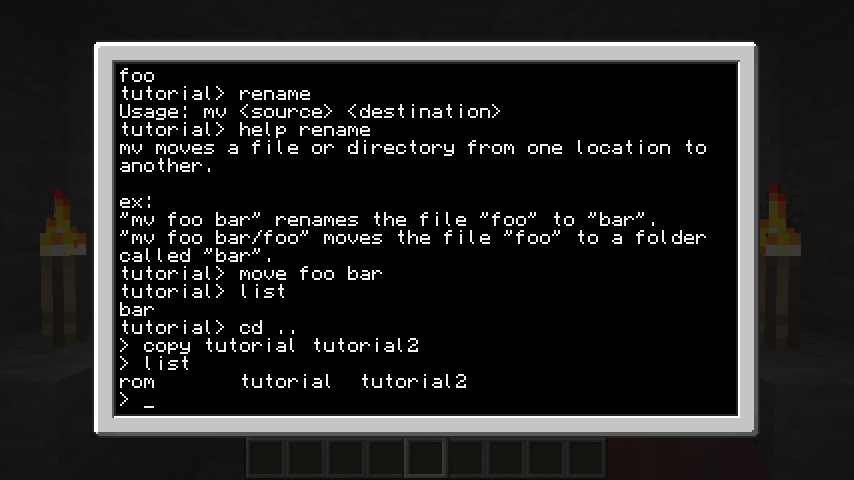
The last program we'll cover is "copy", which also uses the alias "cp". The "copy" program will create an identical copy of a file or folder. It must be provided with source and destination arguments just like the "move" program. Let's copy our whole tutorial folder. We'll use `cd ..` to change our current directory back to the root of the drive, then use `copy tutorial tutorial2` to create a copy of the folder. Type `list` again to see the new folder.
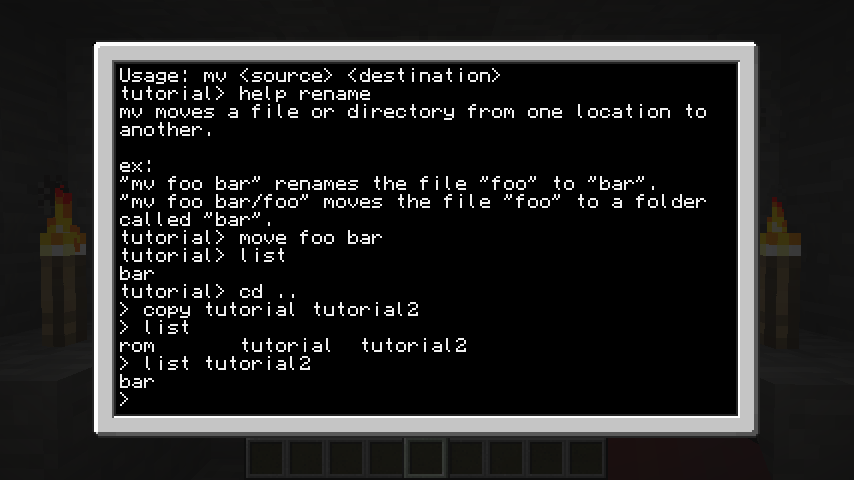
Let's see if our "bar" folder got copied with it with `list tutorial2`.
Note that we can also rename, move, and copy any files that we create as well, not just folders. The usage is exactly the same when copying files.
In this tutorial, we learned how to use the "help" and "programs" programs to learn more about the programs available on the computers. We discussed how to view the computer ID and how to view and set the computer label, as well as the importance of labelling computers. We also covered folder creation, renaming/moving and copying. Thanks for reading!
Prerequisite tutorial:
Computer Basics I
Next suggested tutorial:
Computer Basics III
In this tutorial, we will learn about several programs included with ComputerCraft: help, programs, label, id, copy, move, rename, mkdir.
Now that we have explored the shell and lua prompts a little bit, let's go deeper and learn some more about the computers and the command-line. Run the `help` program. A listing of help topics and options displays on the screen, much like this:

The first line tells us that we can run a program named "programs" to show us the available programs on the computer! Let's run that and see what all is available. When we run `programs`, we see this:

In that program list, we can see the "cd", "list", "lua" and "edit" programs we used in the previous tutorial, as well as the "help" and "programs" programs that we just ran. Don't worry if your programs listing doesn't look identical to the one in the screenshot, as a variety of things (such as type of computer or configuration options) can change which programs show up in this listing. Let's look at the "label" program next. When we ran the "help" program, it told us that we can run help with an argument to specify which program we want information for. Since we want to know about the label program, let's run `help label`.

The help output tells us a little bit about the label program, that it gets or sets the label of the Computer, or of Floppy Disks. We'll cover floppy disks further in a later tutorial. We can see that "label get" would display the current label of the computer, and that "label set" with another argument sets the label for the computer. Labelling a computer is very useful. When a computer has a label, you can pick up the block by breaking it, and it will retain its ID and all of the programs that you've created on it. It's a good idea to label all of your computers right after you place them. We'll create a label for this computer now, by typing `label set tutorial`.

As you can see, the label is now set to "tutorial". Our programs listing earlier showed another interesting program, "id". Let's look up the help file for it by running `help id`.

As it turns out, the id program is used to display the ID of the computer (or a floppy disk), as well as the label of the computer. Let's run it and see what the ID and label are. Hopefully the label is "tutorial", since we just set it to be that.

The computer ID will depend on how many other computers have been placed into the world. The computer in the screenshot is the thirteenth computer to be placed into the world (the first one was ID 0), and as you can see, it is labelled "tutorial". We could also run `label get` to see the label, but that won't display the computer ID:

The next program we'll look at is "mkdir". The meaning may be obvious if you're already familiar with command-line interfaces outside of ComputerCraft, but if not, let's run `help mkdir` to find out what it does:

The help file says that it creates a new directory (the name is shortened from MaKe DIRectory). It will create a new directory inside the current directory. Let's try it out. Run `mkdir tutorial` to create a new tutorial folder in the root of the drive:

Let's run `list` to make sure it actually created the directory. Note that you can also use "dir" instead of "list" if you're already familiar with Windows commands, or "ls" instead of "list" if you're familiar with most other command lines. Both "ls" and "dir" are set up as aliases for the "list" program.

As you can see, we did create a new folder named tutorial. Let's change our current directory to our new tutorial directory with `cd tutorial`. As you can see, we have now set the current directory to the "tutorial" directory we just created. Let's create a new folder inside this one named "foo". We run `mkdir foo` and then `list` to see:

But foo isn't a great name for a folder. "bar" is a much better name. There was a "rename" program listed in that programs output earlier, let's see if it's what we need. Run `rename` to see its usage output.

Wait, what? It shows the usage for a program named "mv"! We'd better check the help files to see what's going on! `help rename` shows us this:

Hold on, this shows us the usage for "mv" again! What's going on here is that renaming a file and moving a file are essentially exactly the same thing (mv is short for MoVe). Since the file's data still only has to exist in one place (the destination), the computer just changes the name of the file, even if it has to change folders. Since moving and renaming do essentially exactly the same thing, there's only one program to do it on the computer, the "move" program. The "rename" program does exist too, but all it does is run the "move" program. "mv" is an alias for the "move" program, and is what the "move" program displays in its usage message.
Now that that's explained, we can rename (or move, since they do the same thing) our folder to something else. Let's change our folder "foo" to be called "bar" by running `rename foo bar` or `move foo bar`. Then run `list` again to verify the change happened.

The last program we'll cover is "copy", which also uses the alias "cp". The "copy" program will create an identical copy of a file or folder. It must be provided with source and destination arguments just like the "move" program. Let's copy our whole tutorial folder. We'll use `cd ..` to change our current directory back to the root of the drive, then use `copy tutorial tutorial2` to create a copy of the folder. Type `list` again to see the new folder.

Let's see if our "bar" folder got copied with it with `list tutorial2`.

Note that we can also rename, move, and copy any files that we create as well, not just folders. The usage is exactly the same when copying files.
In this tutorial, we learned how to use the "help" and "programs" programs to learn more about the programs available on the computers. We discussed how to view the computer ID and how to view and set the computer label, as well as the importance of labelling computers. We also covered folder creation, renaming/moving and copying. Thanks for reading!
