Pre-requisite tutorials:
— Computer Basics I
— Computer Basics III
Leads onto:
— Peripheral Intermediate
— Modem Intermediate
— Monitor basics
Preface
In this tutorial, we will learn about interacting with peripherals in ComputerCraft via the Peripheral API. We will be covering the following peripheral functions: isPresent, getType, getMethods, call, and wrap. It is highly recommended that you follow along with the tutorial while going though it.
In ComputerCraft we are provided with several peripherals that we can use to our amusement. The image below shows what we can interact with like a peripheral as of ComputerCraft version 1.56
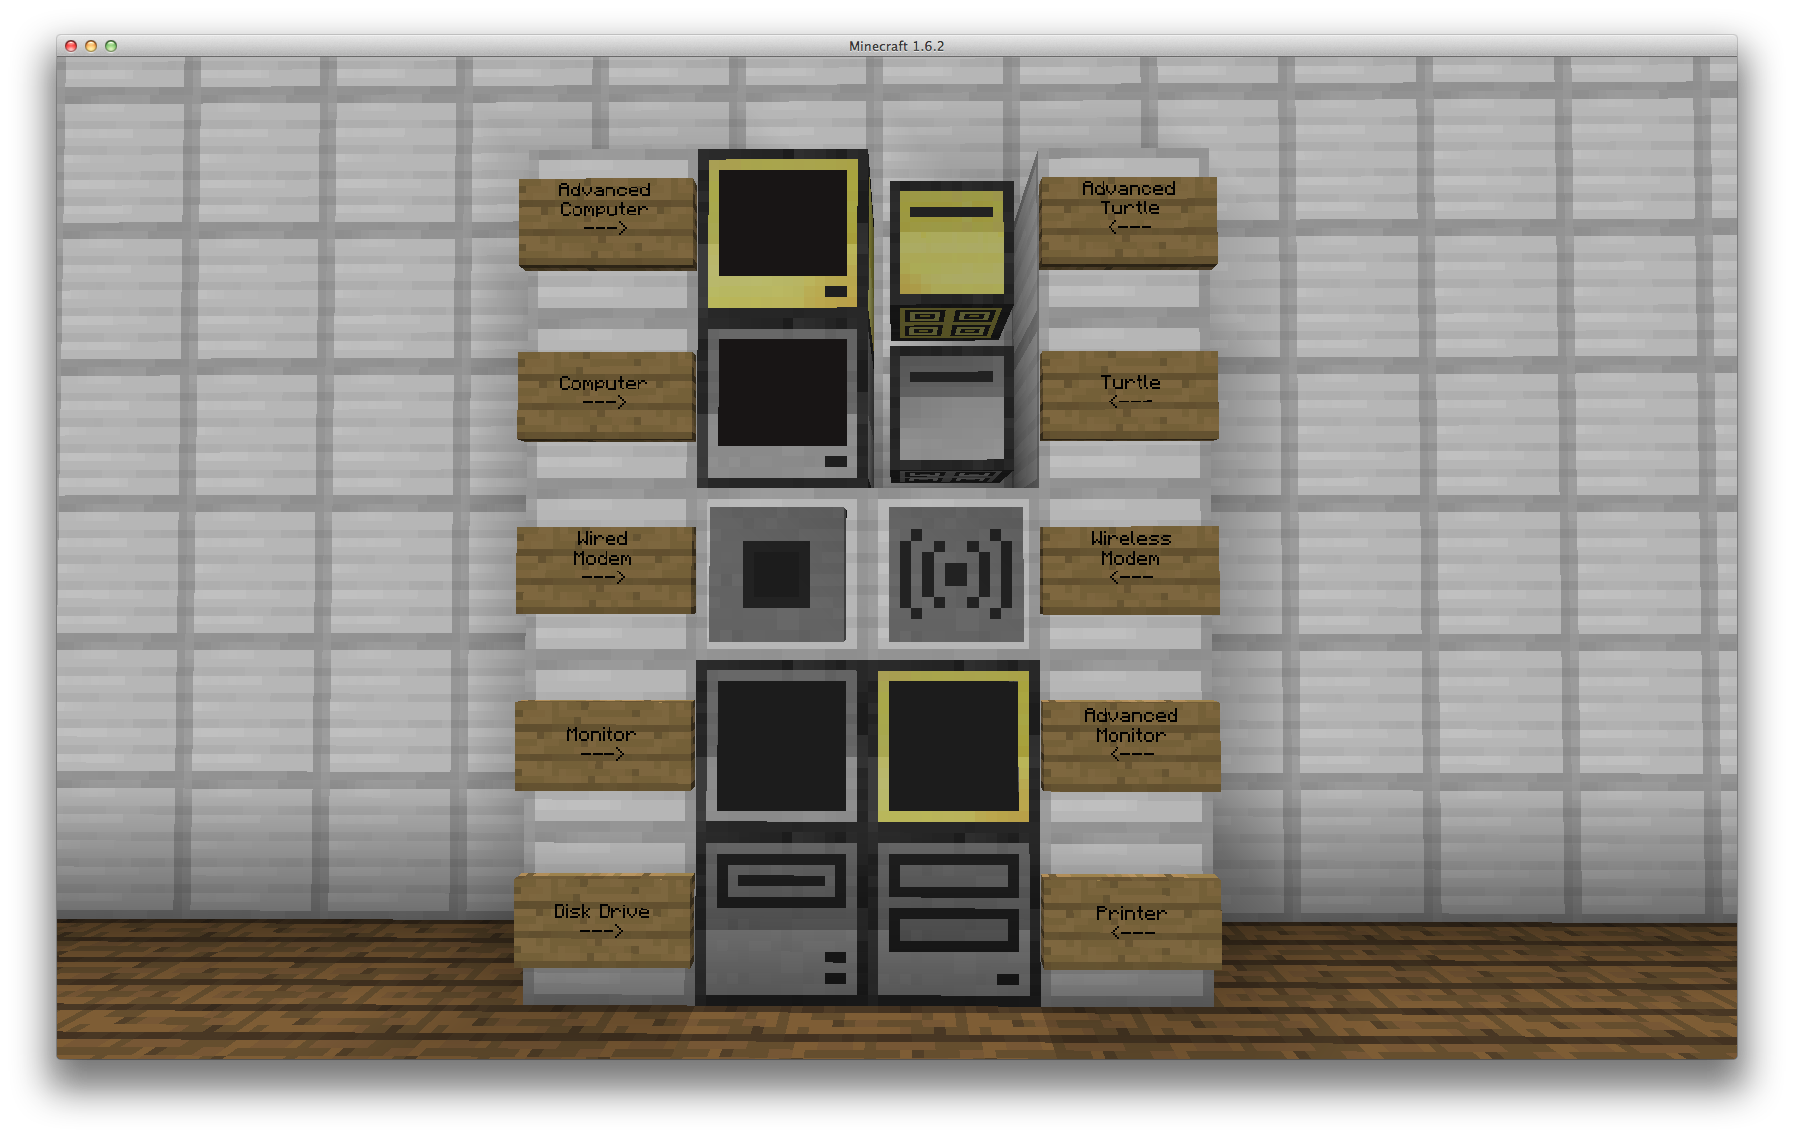
In order to interact with these peripherals we are provided with the Peripheral API.
Note: There are 100s other peripherals added by mods, to use these usage of the Peripheral API is no different, however in this tutorial we will only be dealing with the vanilla ComputerCraft peripherals.
Over the course of this tutorial we will be using a Computer with four (4) Advanced Monitors attached to the computer on the right. We will also later be attaching a Disk Drive anywhere on the computer. However for now your setup should look like this.
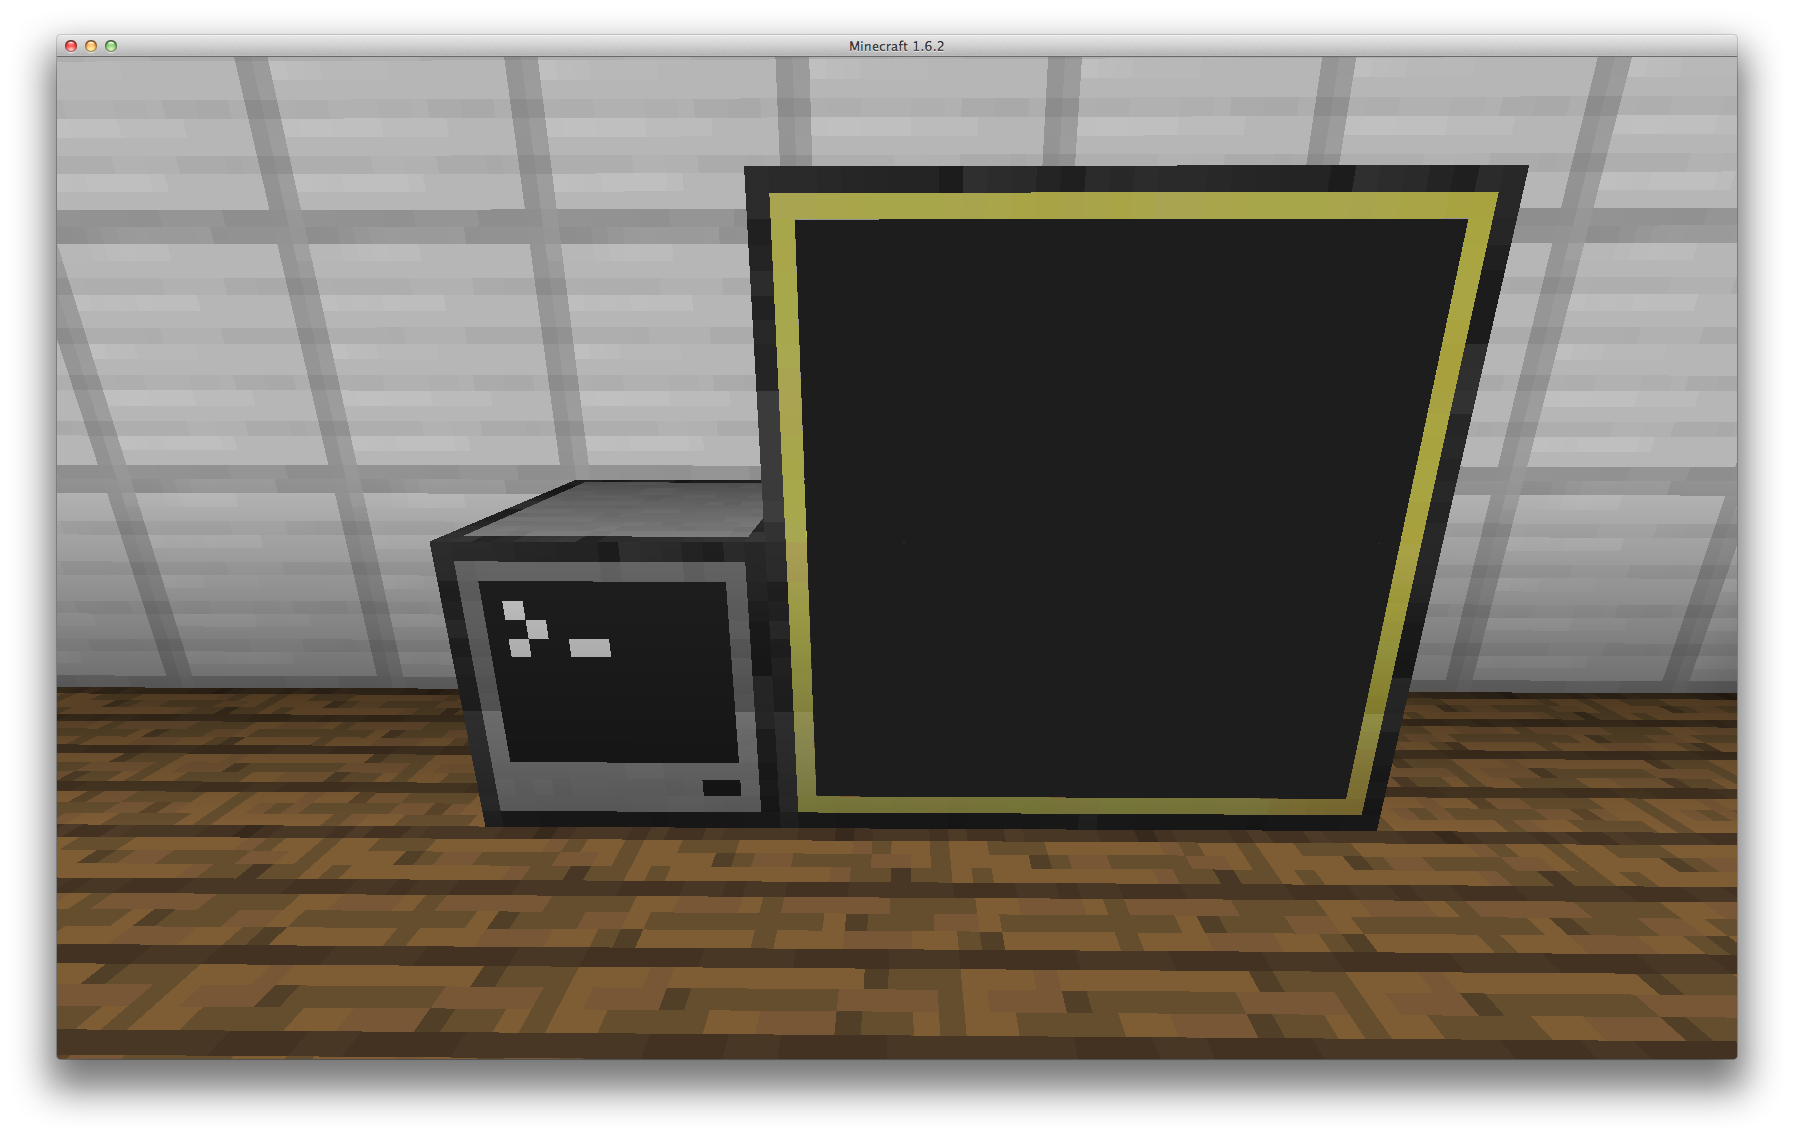
We will also be using the Lua Prompt to execute commands while learning how a function works, and the edit program to create some small programs to run once we have learnt how the function works. After you have setup the computer and monitors, and opened Lua prompt we can begin.
Lets begin…
Well Before We Begin
Before we cover the functions in the peripheral API just some information to be aware of while we are going through this tutorial.
A peripheral can be located in one (1) of seven (7) places:
- Top
- Bottom
- Left
- Right
- Front
- Back
- Network
When using the side a peripheral is located inside our code we enter the side that the peripheral appears on our screen when looking at the front of the computer.
Now lets move on to the Peripheral API…
isPresent
When we are making programs that will make use of peripherals, we can never be sure of where peripherals are attached to the computer, or even where the peripherals are located. For this purpose we are provided with the `isPresent` function. The function `isPresent` will return true or false depending on if something we can interact with via the peripheral API is located on that side. In the Lua prompt type in peripheral.isPresent("left") and press enter. You should have something like this
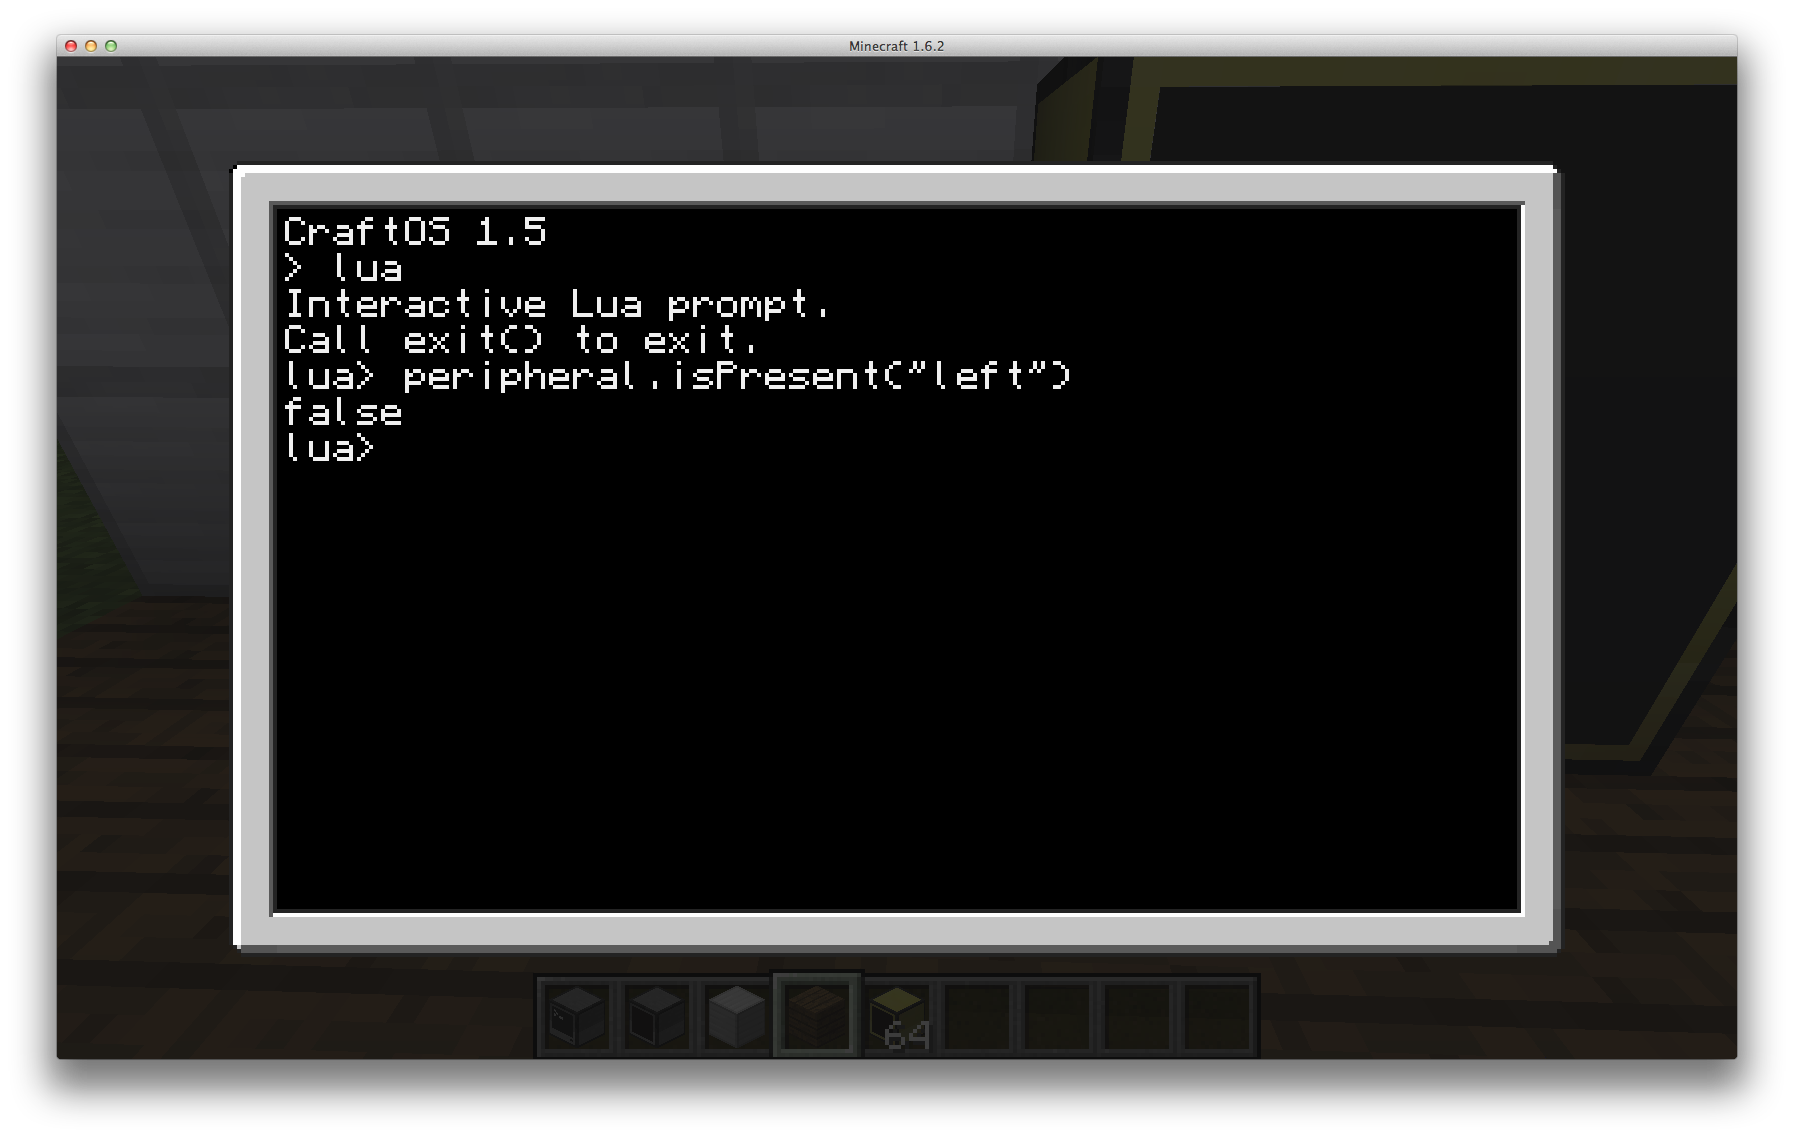
You will notice that it has printed false as there is no peripheral located on the left side of the computer.
Now if you type in peripheral.isPresent("right") you should have it print true (seen below), as that is the side the monitors are located.
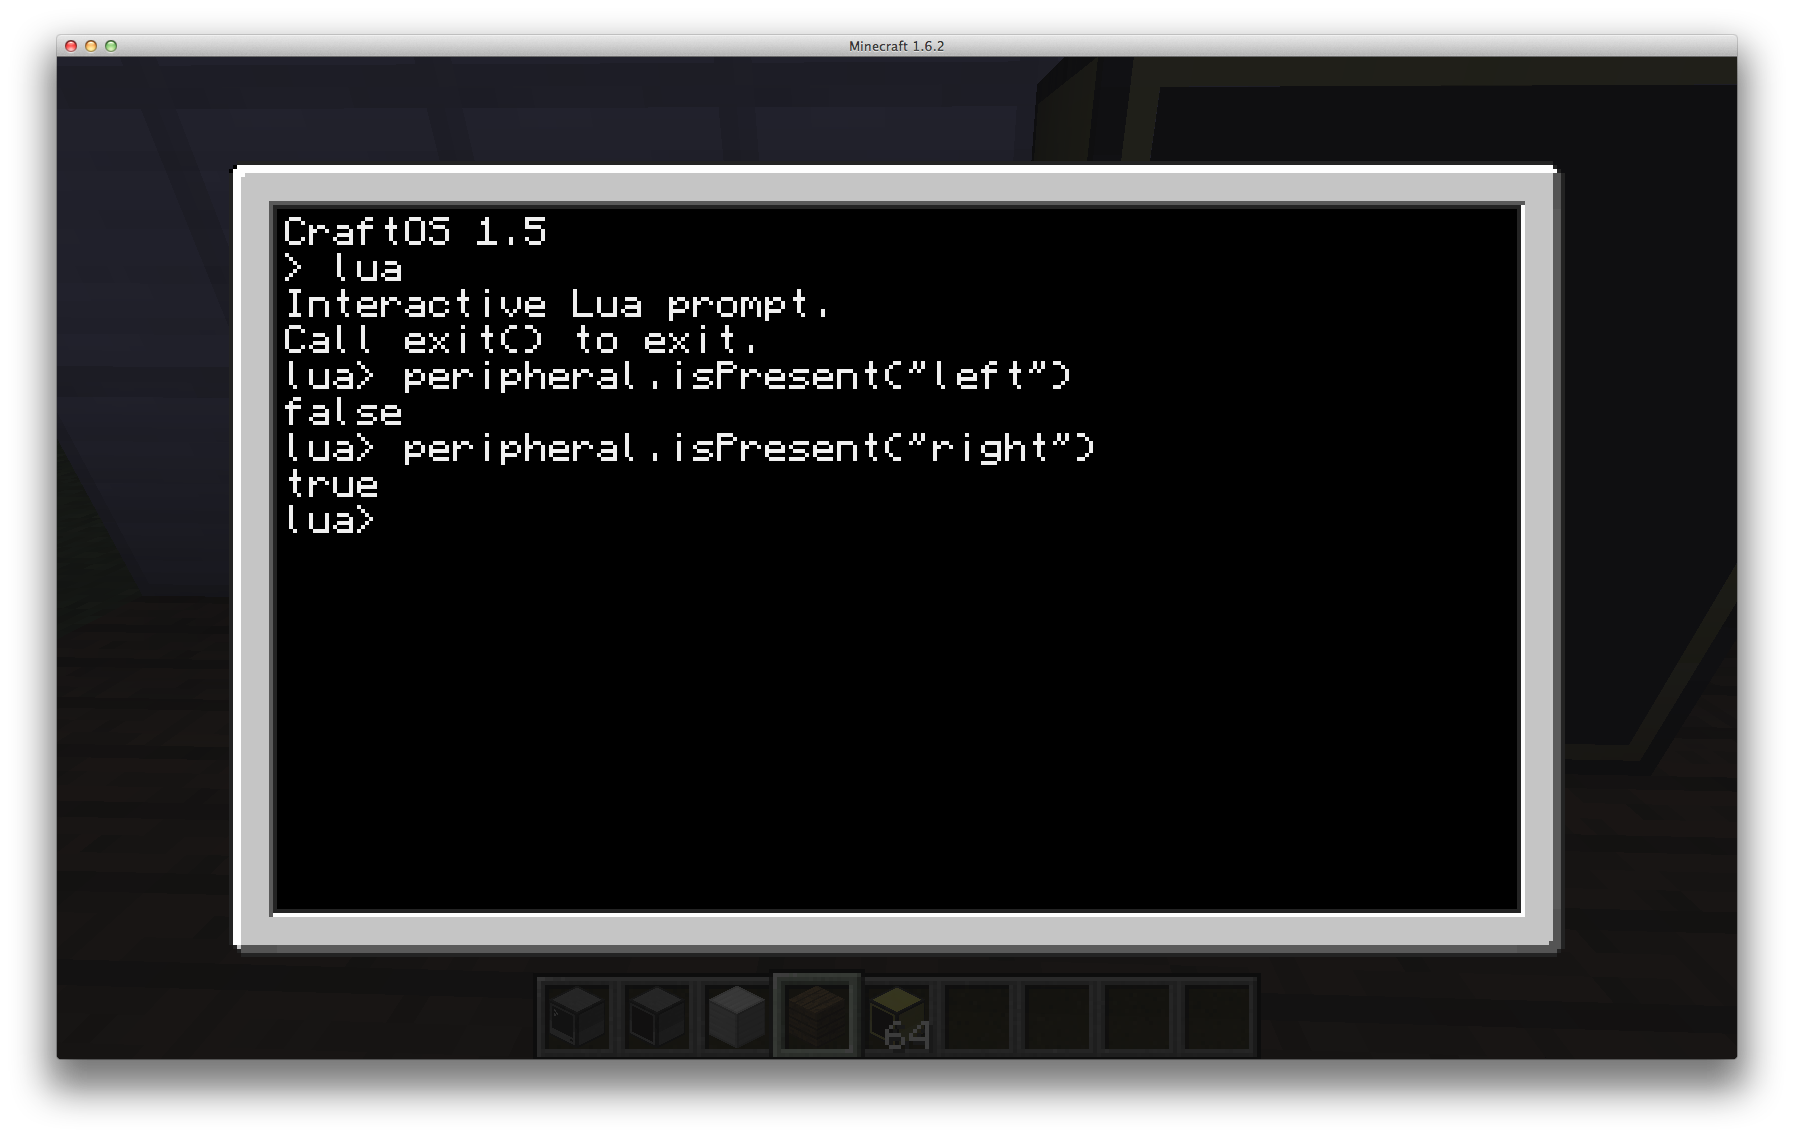
Now I will take a pause in the tutorial to allow you to have a play with the `isPresent` function with various peripherals on various sides.
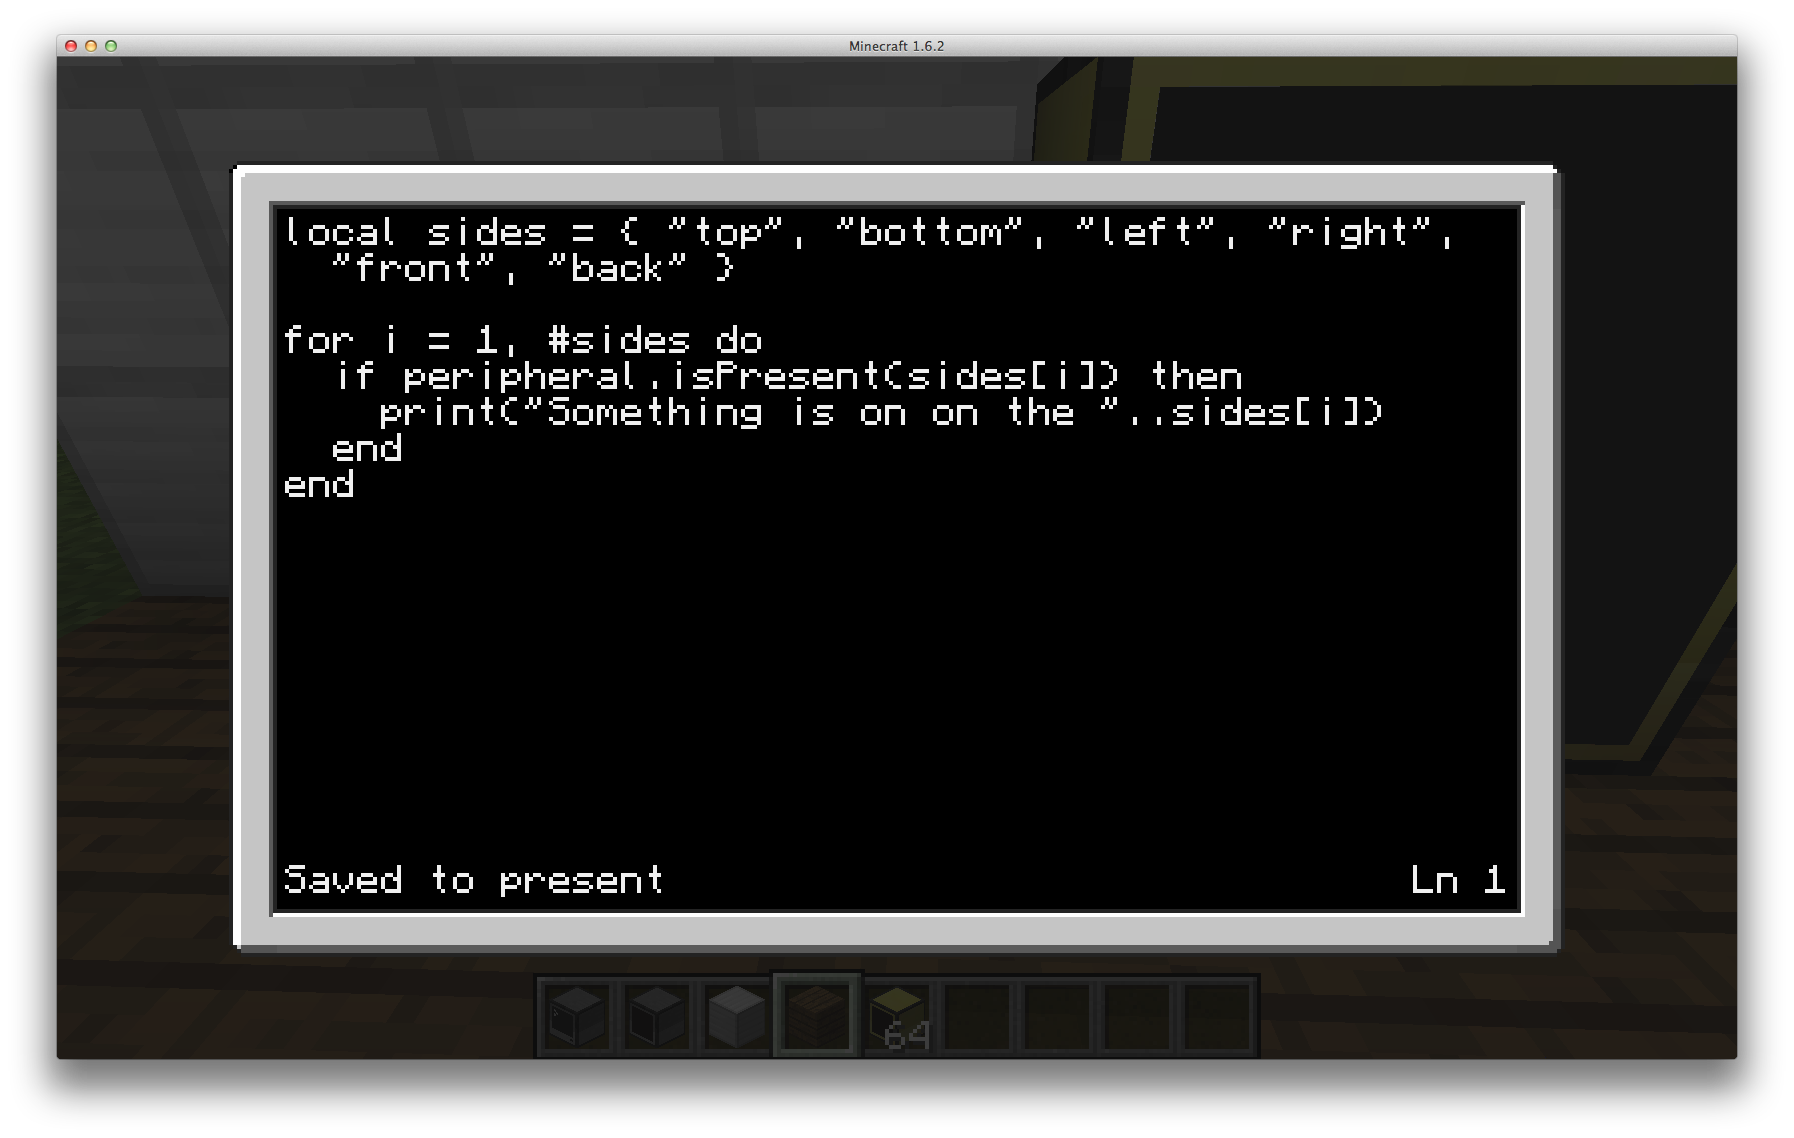
Knowing now how this function works we can write a small program in the edit program to print the sides that a computer is located. Exit Lua Prompt and create a new program called `present`, add the following code, and save the file.
local sides = { "top", "bottom", "left", "right",
"front", "back" }

for i = 1, #sides do
  if peripheral.isPresent(sides[i]) then
	print("Something is on the "..sides[i])
  end
end
As you can see in this block of code, we first define a table containing all the valid names of directions that the peripheral can appear. Next we then iterate through this table, checking if there is a peripheral on each of those sides with isPresent, printing a message if we find anything.
You should now have the following
Now run the file `present` and observe the results. It should say "Something is on the right", like so…
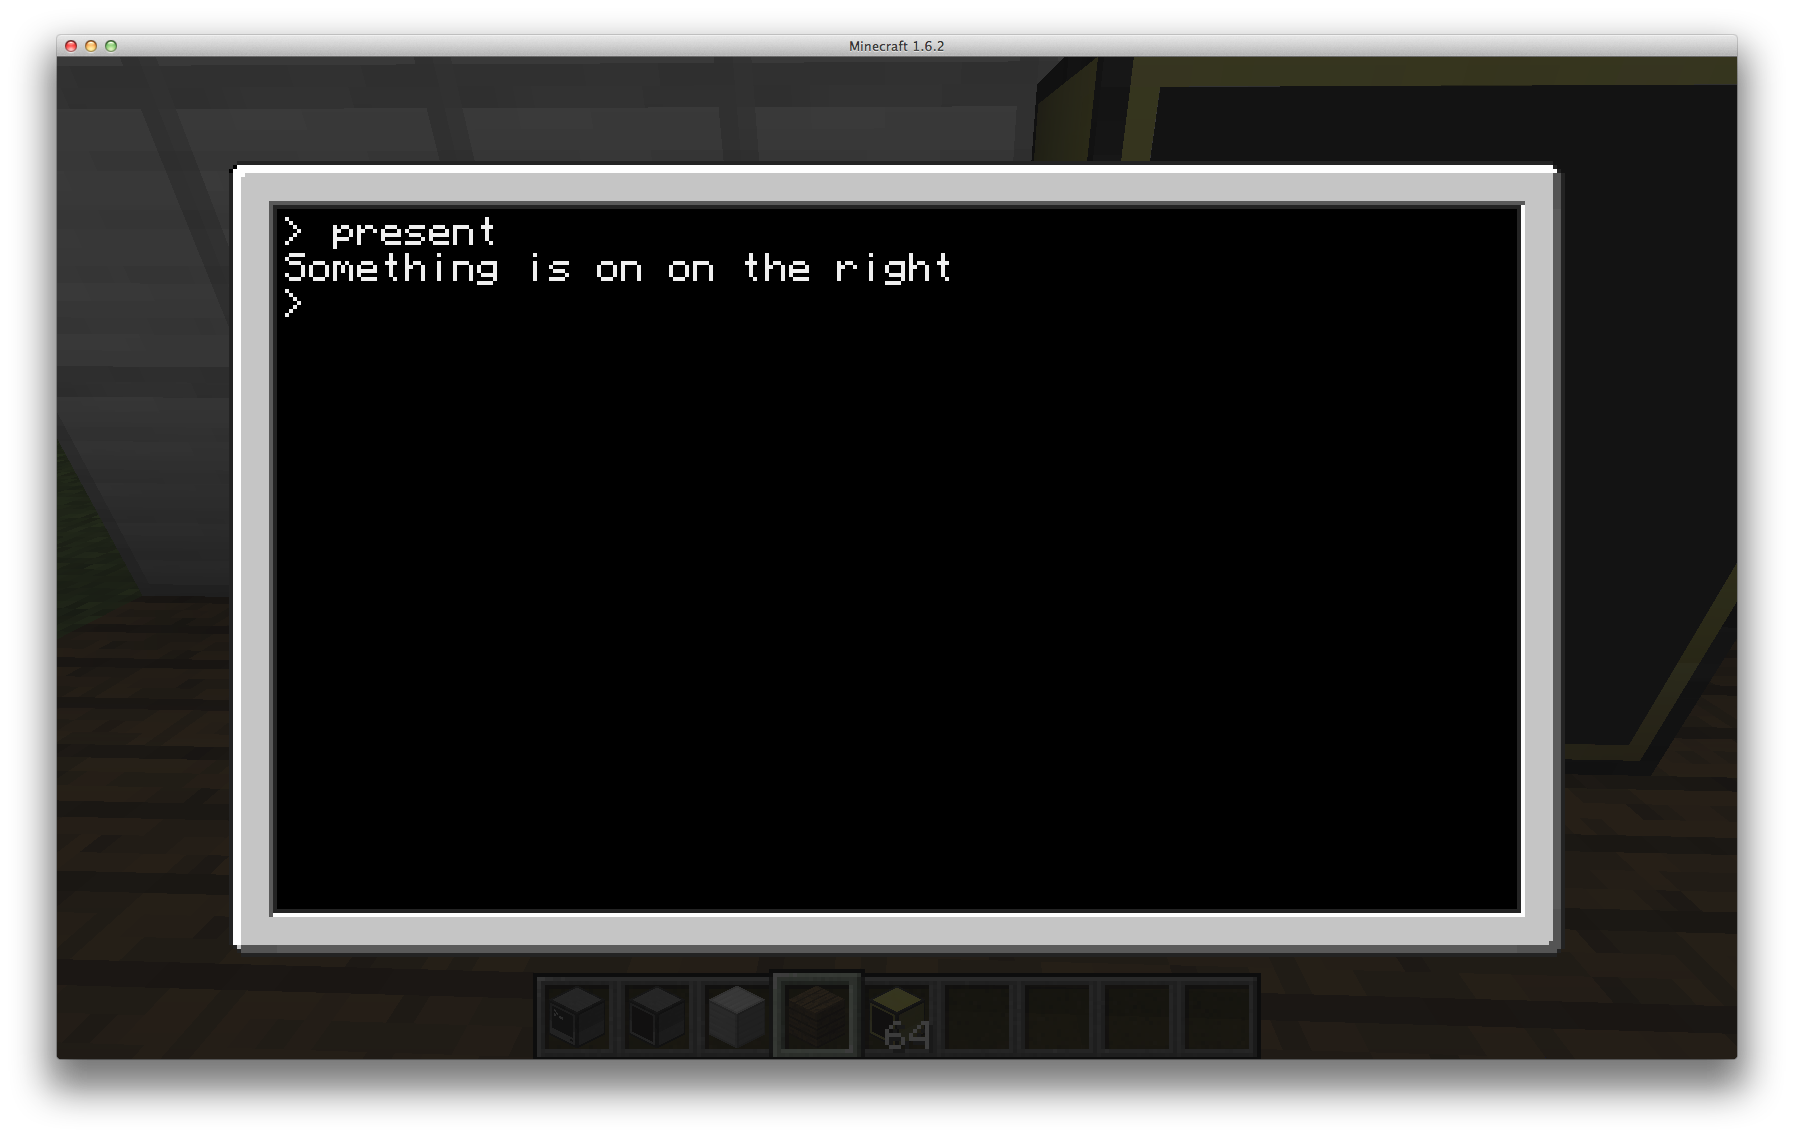
Congratulations, you have taken the first step towards making a program that automatically detects peripherals.
getType
Now that we know how we can locate peripherals we want to know what the peripheral is. For this task we have been provided it the function `getType`. This function will return us a string that is the peripherals type. These are the returned types of the peripherals shown in the first image of this tutorial;
- Computer or Advanced Computer is "computer"
- Any Turtle or any Advanced Turtle is "turtle"
- Wired Modem or Wireless Modem is "modem"
- Monitor or Advanced Monitor is "monitor"
- Disk Drive is "drive"
- Printer is "printer"
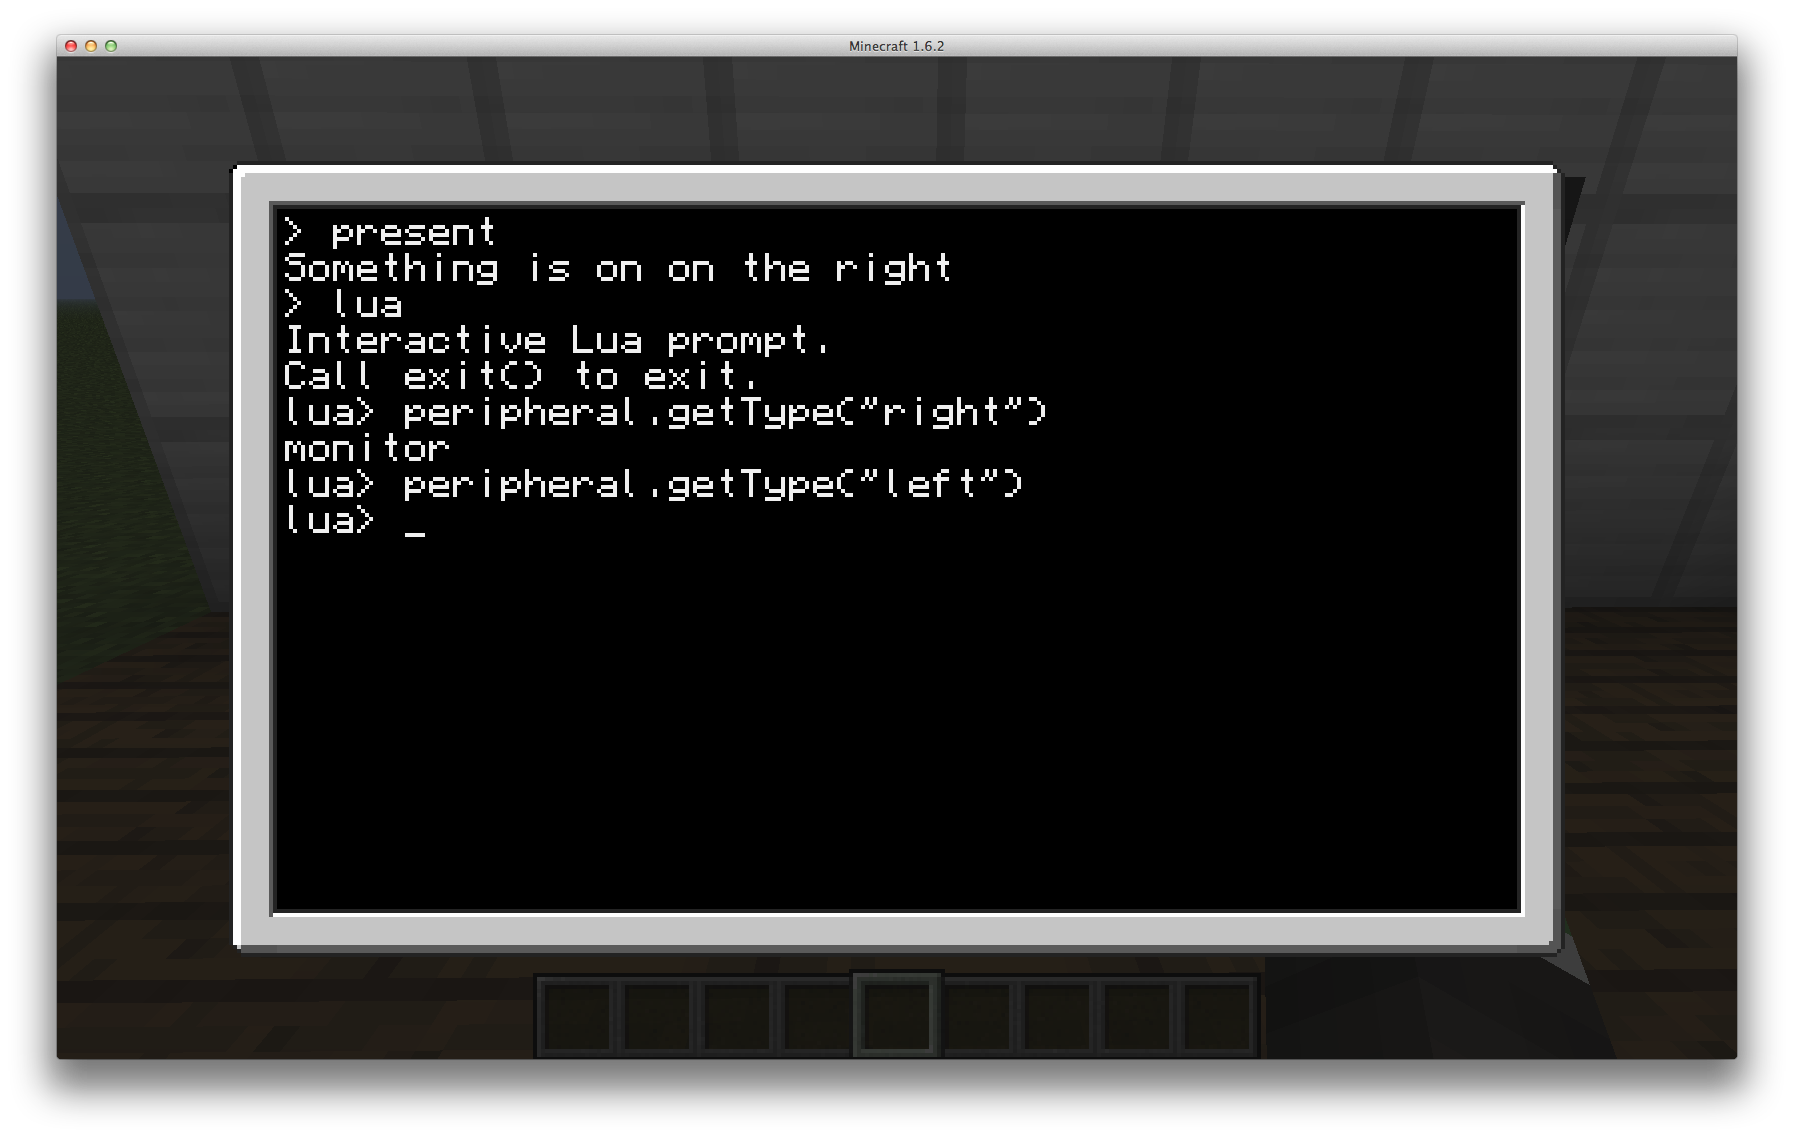
Now I will take a pause in the tutorial to allow you to have a play with the `getType` function with various peripherals on various sides.
Knowing how this function works now, we can expand the program from before and have it print what is on each side of the computer. Exit the Lua prompt and make a copy of the `present` program, and call it `type`. Now open `type` in edit and we shall begin.
Lets edit the program so that it will print the type of the peripheral as well as the side it is located. Scroll down to line six (6) and change it to say the following
print("A "..peripheral.getType(sides[i]).." is on the "..sides[i])
This time as we loop through the side names, and check that they are there, with isPresent, when we come to printing out the message instead of printing the static message "Something is on that side", we build a string that contains the name of the peripheral on that side, as well as the side that is on.
Save and run the program and you should now have an output like the following
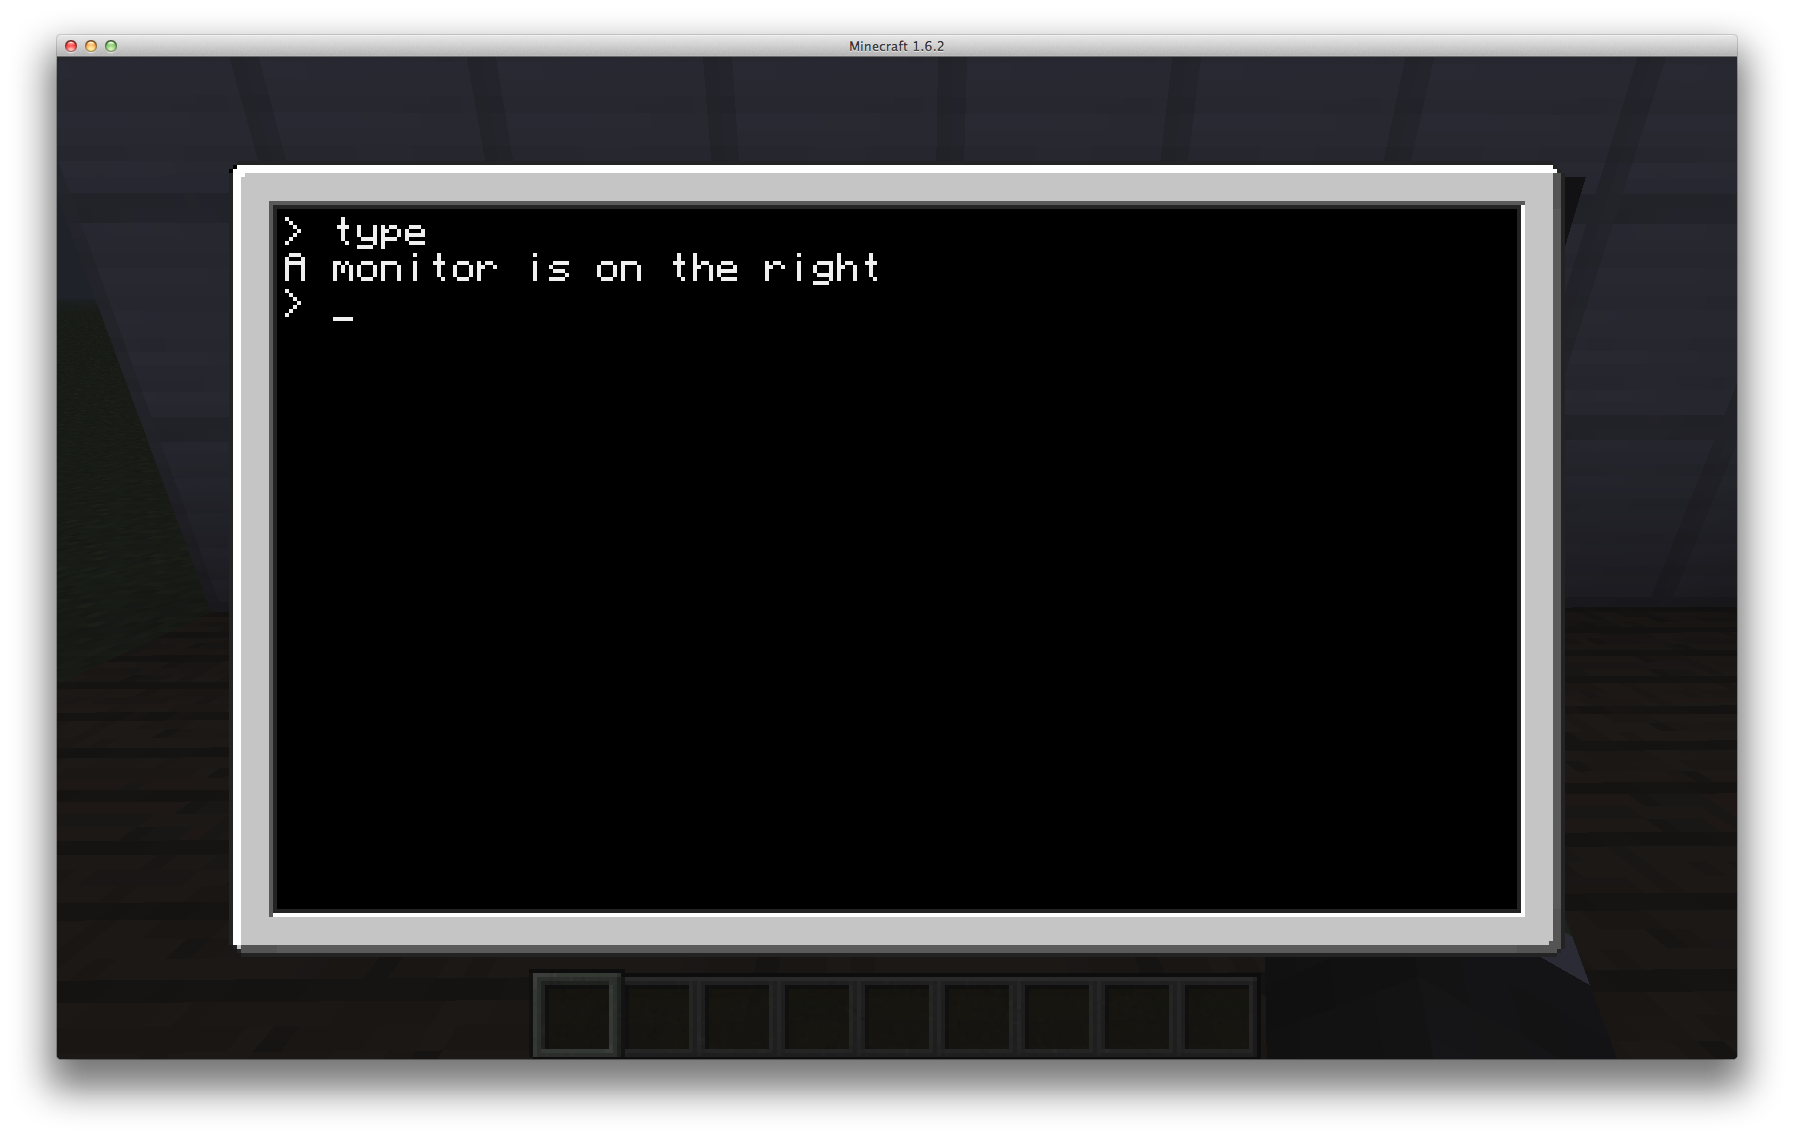
I will now take another short pause in the tutorial to allow you time to have a play around with the program, placing peripherals on other sides and seeing the output of the program.
Now lets make another program called `monitors`. This program will locate any monitors and print what side they are on. But only monitors.
local sides = { "top", "bottom", "left", "right", "front", "back" }

print("Finding monitors...")
for i = 1, #sides do
  if peripheral.isPresent(sides[i]) then
	if peripheral.getType(sides[i]) == "monitor" then
	  print("Found: "..sides[i])
	end
  end
end
It can be seen in the code above, that most of this is similar to the other loops we have been creating. Where it differs it that after we check if the peripheral is present we then proceed to check it's type as well, and compare that against what we expect: "monitor". If it then passes both of these tests we output the side the monitor was found on.
Before we run this program add a Disk Drive on any other side of the computer in order to test the program.
As seen below when we run this program you will notice that it outputs that it has located a monitor on the right side, but does not mention the disk drive, unlike the previous two (2) programs would have.
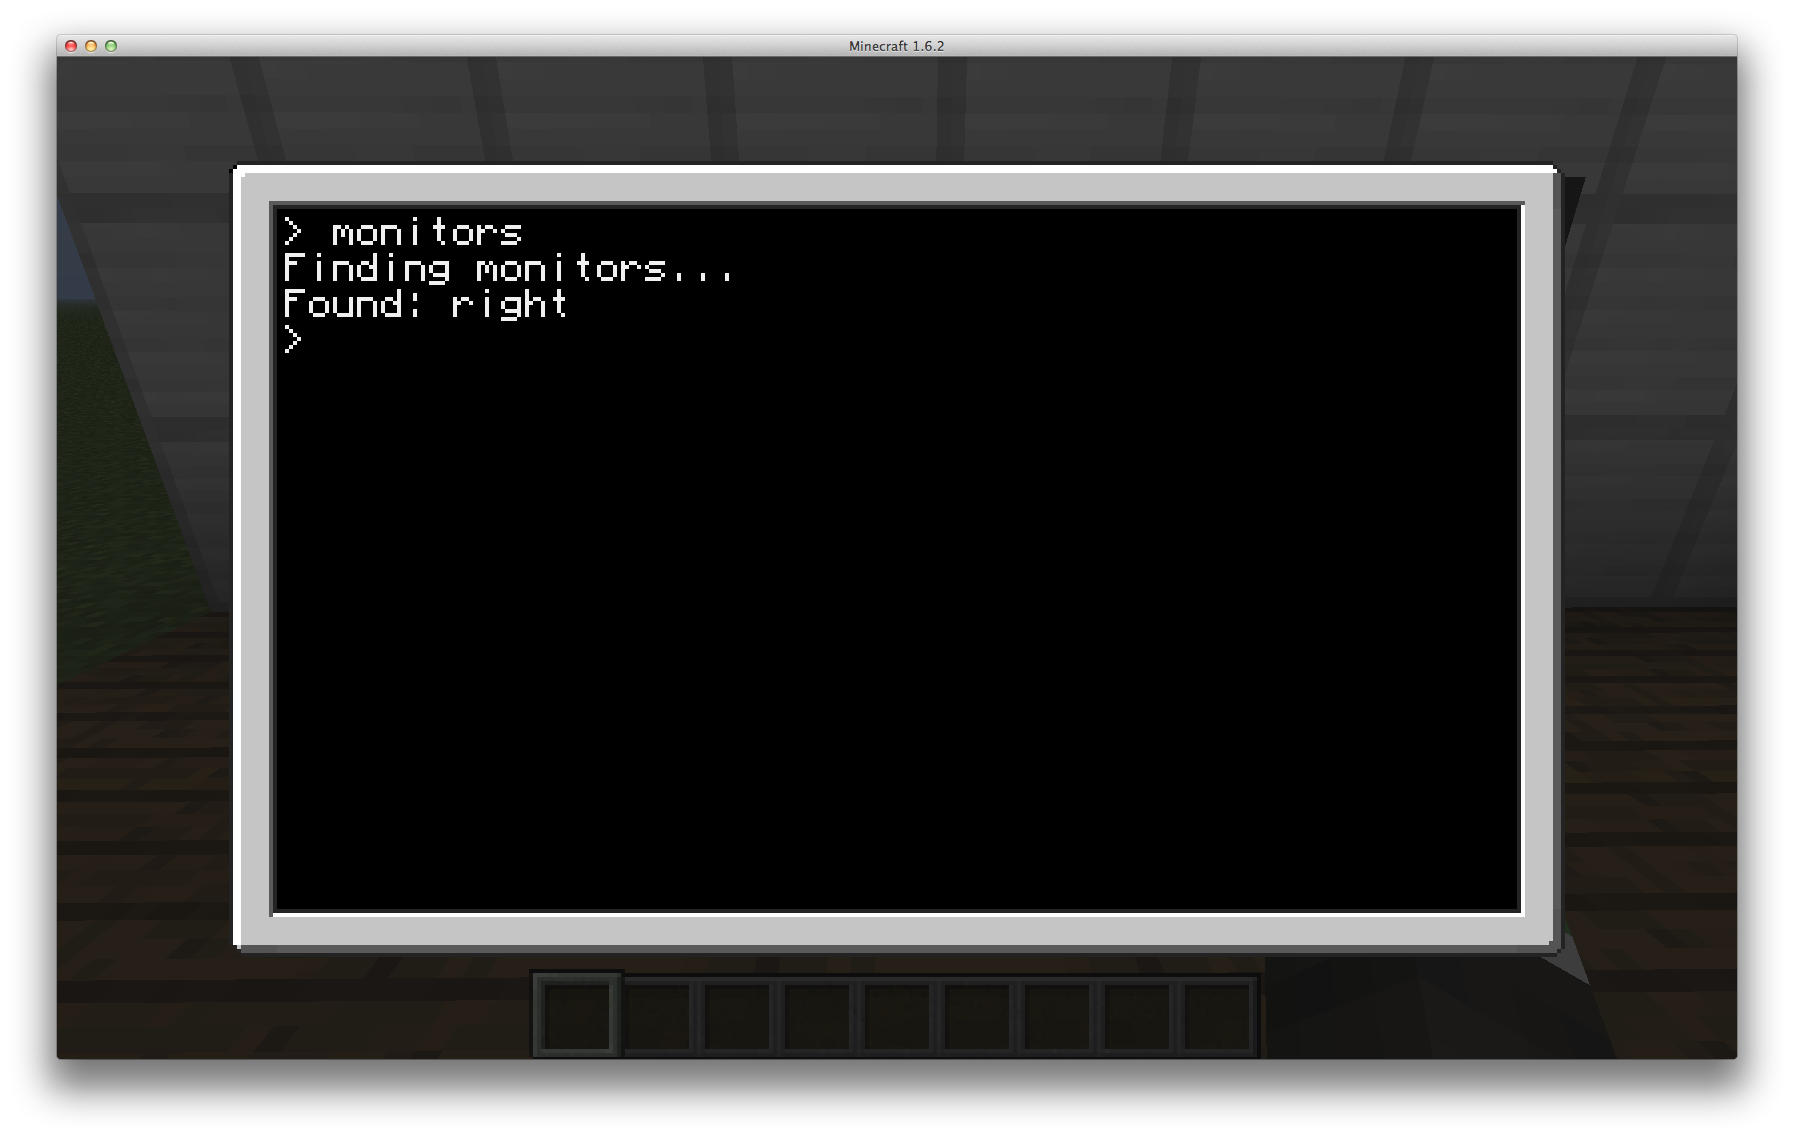
This loop that we just created is a very powerful tool in making very advanced programs that are able to locate the peripherals they require and when not found can inform the user they are required. As an example, this is a function that I use commonly when working with peripherals. You should be able to understand how this is working
local function findPeripheral( periphType )
  for _, side in pairs( rs.getSides() ) do
	if peripheral.isPresent(side) and peripheral.getType(side) == periphType then
	  return side
	end
  end

  error("Cannot find "..periphType.." attached to this computer", 0)
end
The above function allows you to supply what peripheral you're after and if it can find it, it will return which side it is located on (only the first it encounters, if there are 4 monitors, it will return the side that the first is found). For example findPeripheral("monitor") would search for a monitor, and from the setup we have would return "right". Other than specifying the type of peripheral you are after, it works no differently than the other loop we created just before.
getMethods
Note: For those who don't know why it is called `getMethods` instead of `getFunctions`, this is because the list that it returns is of the Java side methods, and not Lua functions. Until you learn more about programming just think of these as the same. As such I will be using both interchangeably in the rest of this tutorial
Now that we know how we can find peripherals attached to a computer, you are probably wondering how we can actually do anything useful with these peripherals. Well all the peripherals that we are provided supply us with some functions that we can use in order to interact with the peripheral. When we call the `peripheral.getMethods` function we will get back a table of all the functions we can interact with the peripheral through. As such the purpose of `peripheral.getMethods()` is not one that we would really use in released programs, however it is very useful for us as developers to be able to know what functions we can call on our peripherals to interact with them.
Lets now make a program that makes use of this function, and tells us what we can do with the a peripheral from the supplied side. Lets create a new file called `methods` and begin…
The `getMethods` function requires on argument, a side. So lets write call that and save it into a variable.
local side = ...
local methods = peripheral.getMethods(side)
In the above code we first get an argument from runtime, we then assume that it will be a valid side (this is bad, always validate) and then use that to get the methods of the peripheral.
Now in the methods variable we have a table of functions that can be called on the monitor, so lets see what they are by iterating this new table that we have and printing it's contents
local side = ...
local methods = peripheral.getMethods(side)

for i = 1, #methods do
  print( i.." = "..methods[i] )
end
Save, exit and run the program with the argument "right". You should have the following output.
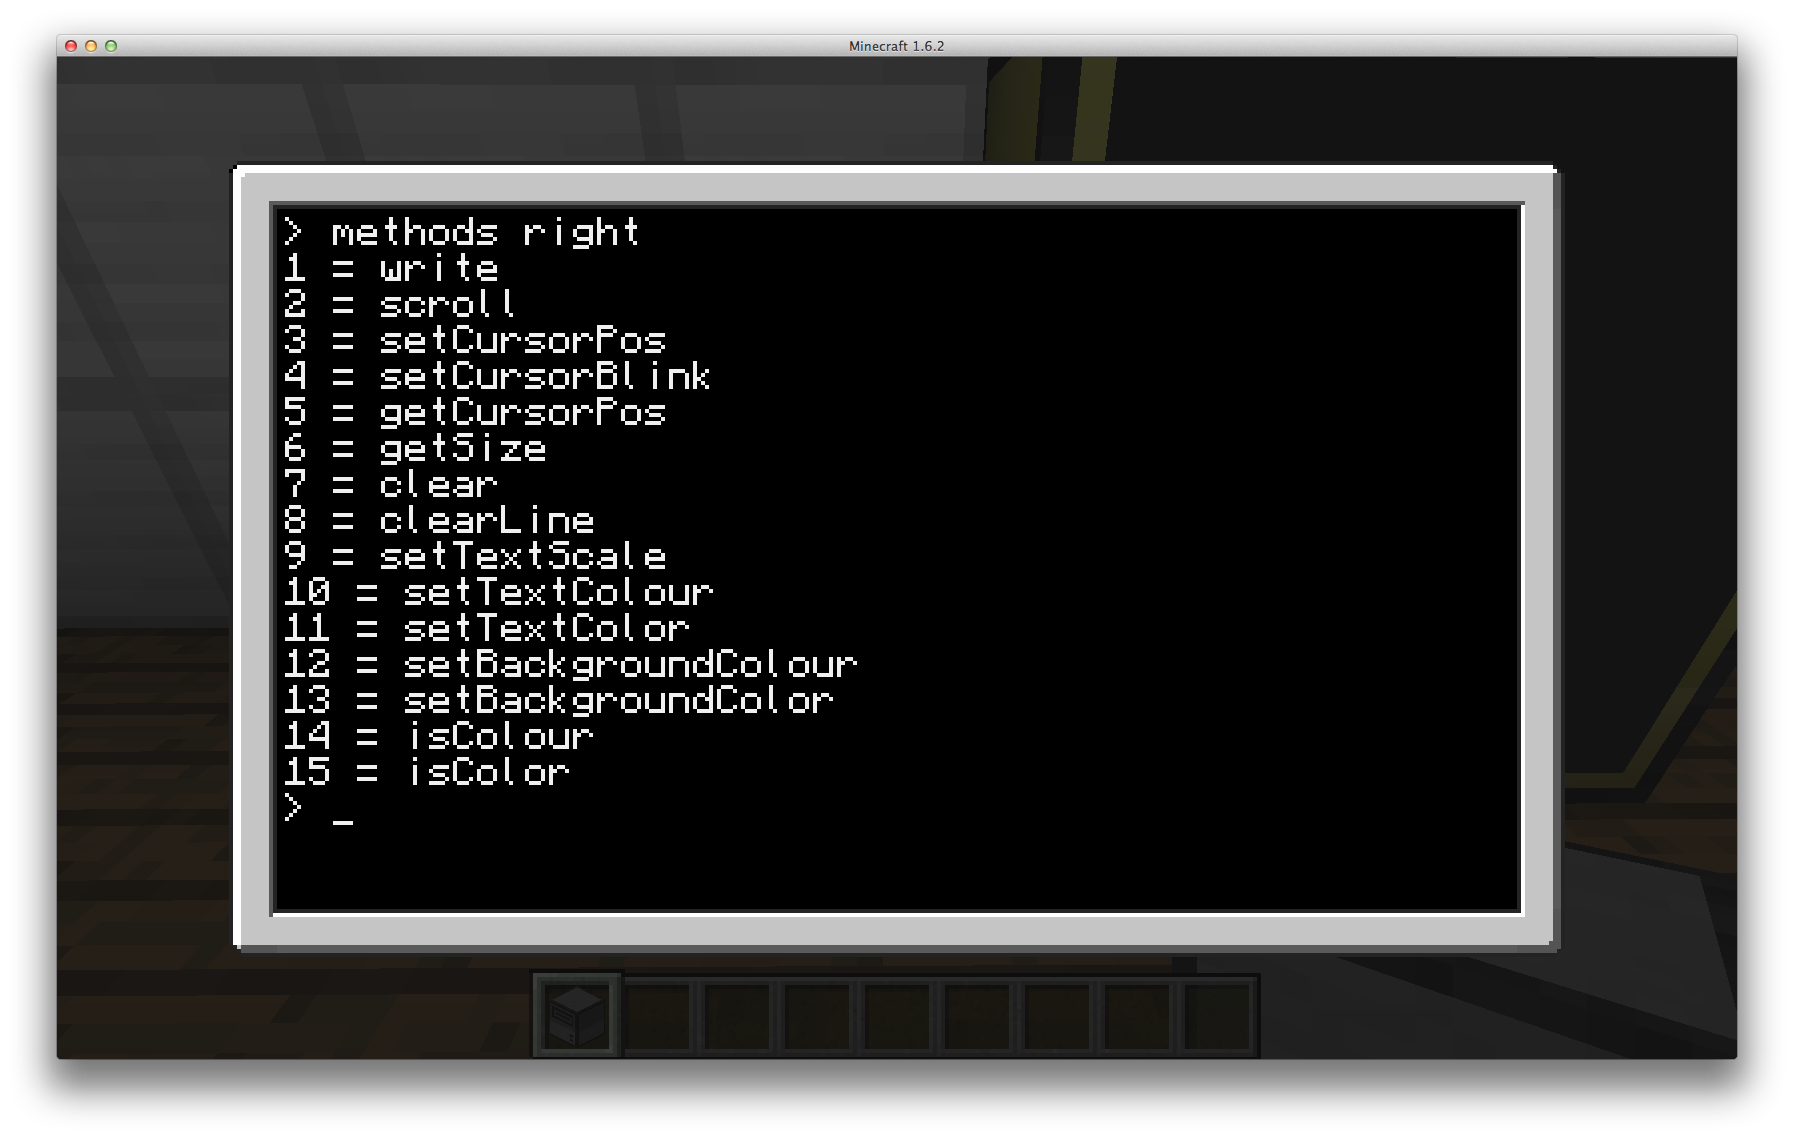
We now know all the things we can do with the monitor, looks a lot like the normal terminal doesn't it!
I will take a short pause in the tutorial again to allow you to have a play with the program we just created on various peripheral to see what can be done with them.
call
Now this is where we start using the knowledge of what functions we can interact with the peripheral. The `call` function allows us to interact with the peripheral by invoking the method on the peripheral. This function is an open ended function and allows us to give it an unlimited amount of arguments to it (also known as vararg function) as different peripheral calls require different things to operate, for example the `setBackgroundColor` on the monitor requires one (1) argument, the color, where as the function to set the cursor's position requires two (2), the x and y coordinates.
The `call` function does have a requirement of two arguments however, the side of the peripheral and the method to call on that peripheral. Any additional arguments supplied to it will be passed along to the method being called on the peripheral.
As a test of how to use this function, lets use that Disk Drive that we placed on the computer a while ago. We will detect if there is a disk inside of it, setting its label, and then eject it. Place a floppy disk inside and lets begin.
First lets, run the `methods` program with the side of the Disk Drive so that we can see what we are able to call on it. From that list you should see the two methods we will be using; "isDiskPresent", "setDiskLabel", and "ejectDisk". Open the Lua Prompt and type peripheral.call("right", "isDiskPresent") and press enter, that should have output true.
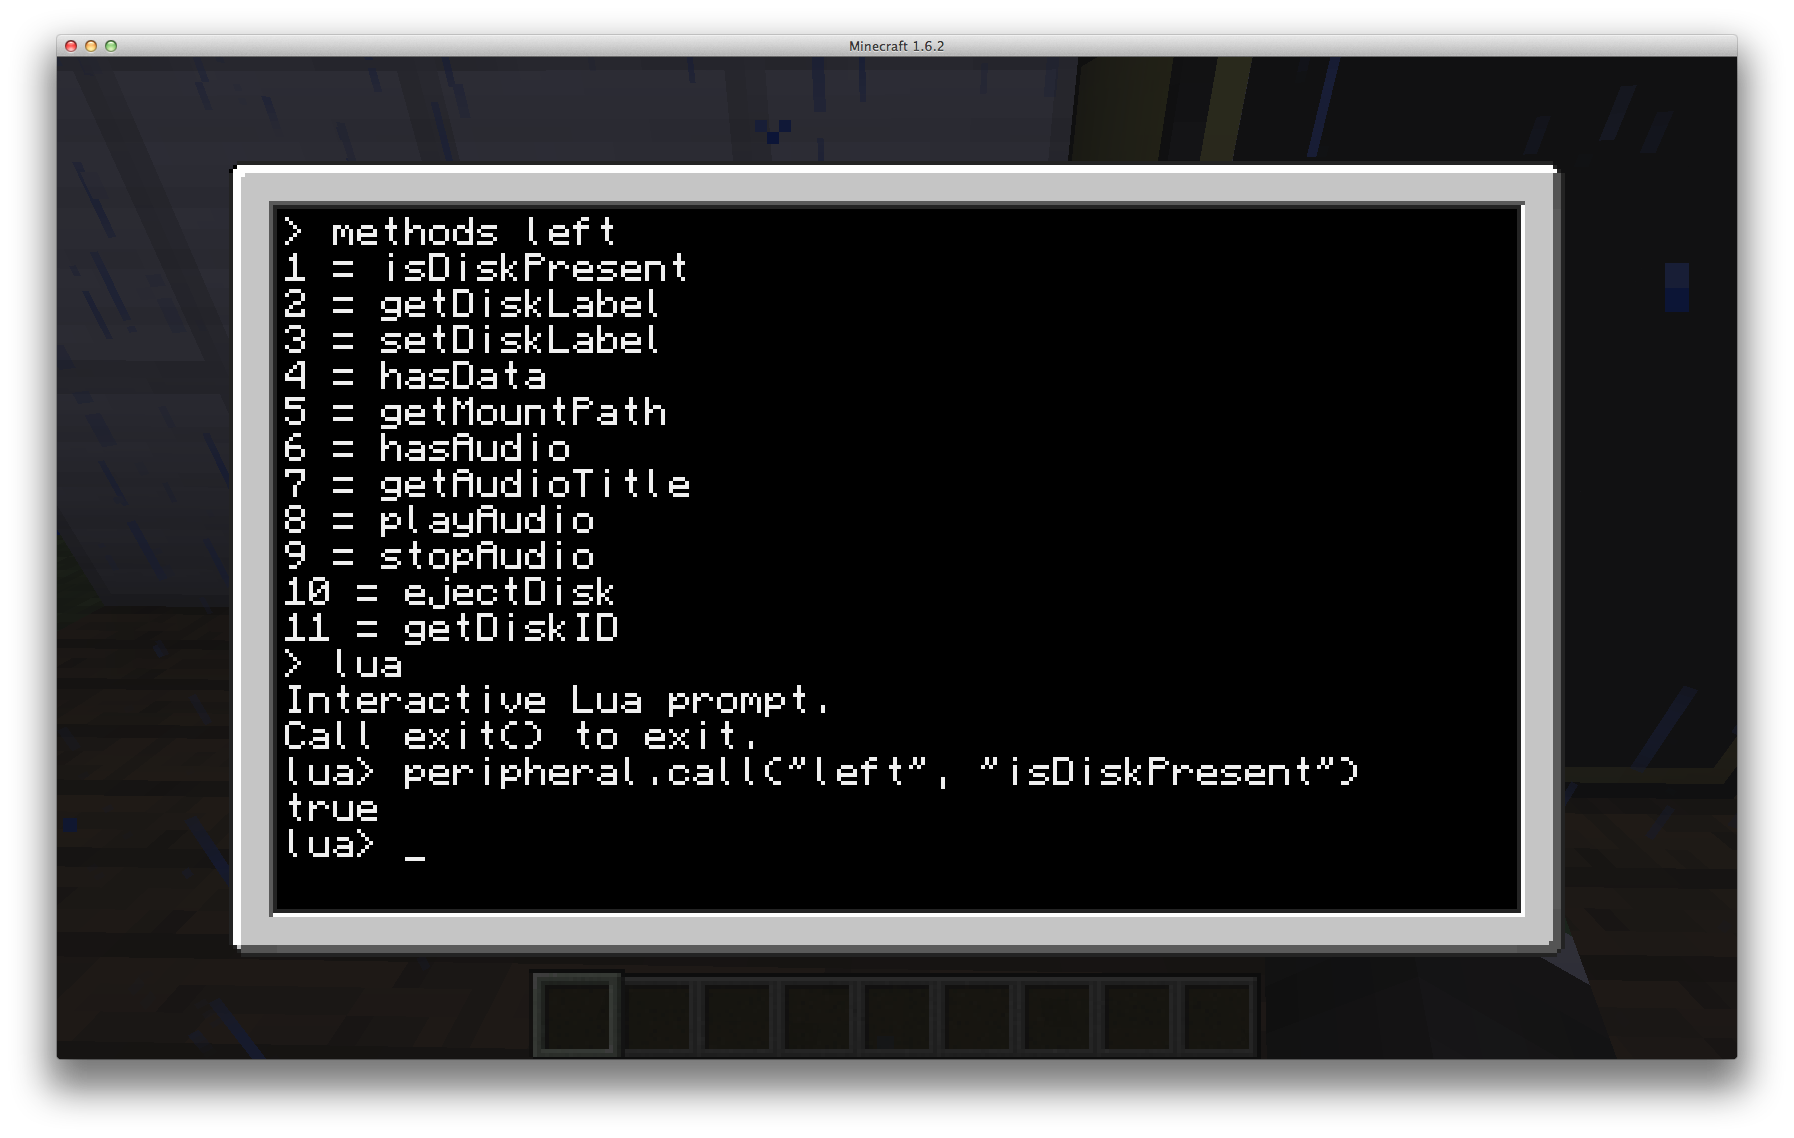
Now type peripheral.call("right", "setDiskLabel", "tutorial") and press enter. That should have been accepted. Now lets eject the disk and check. Type peripheral.call("right", "ejectDisk") and press enter, the disk should be ejected onto the ground in front of the Disk Drive, pick up the drive and hover over it, it should have the label "tutorial".
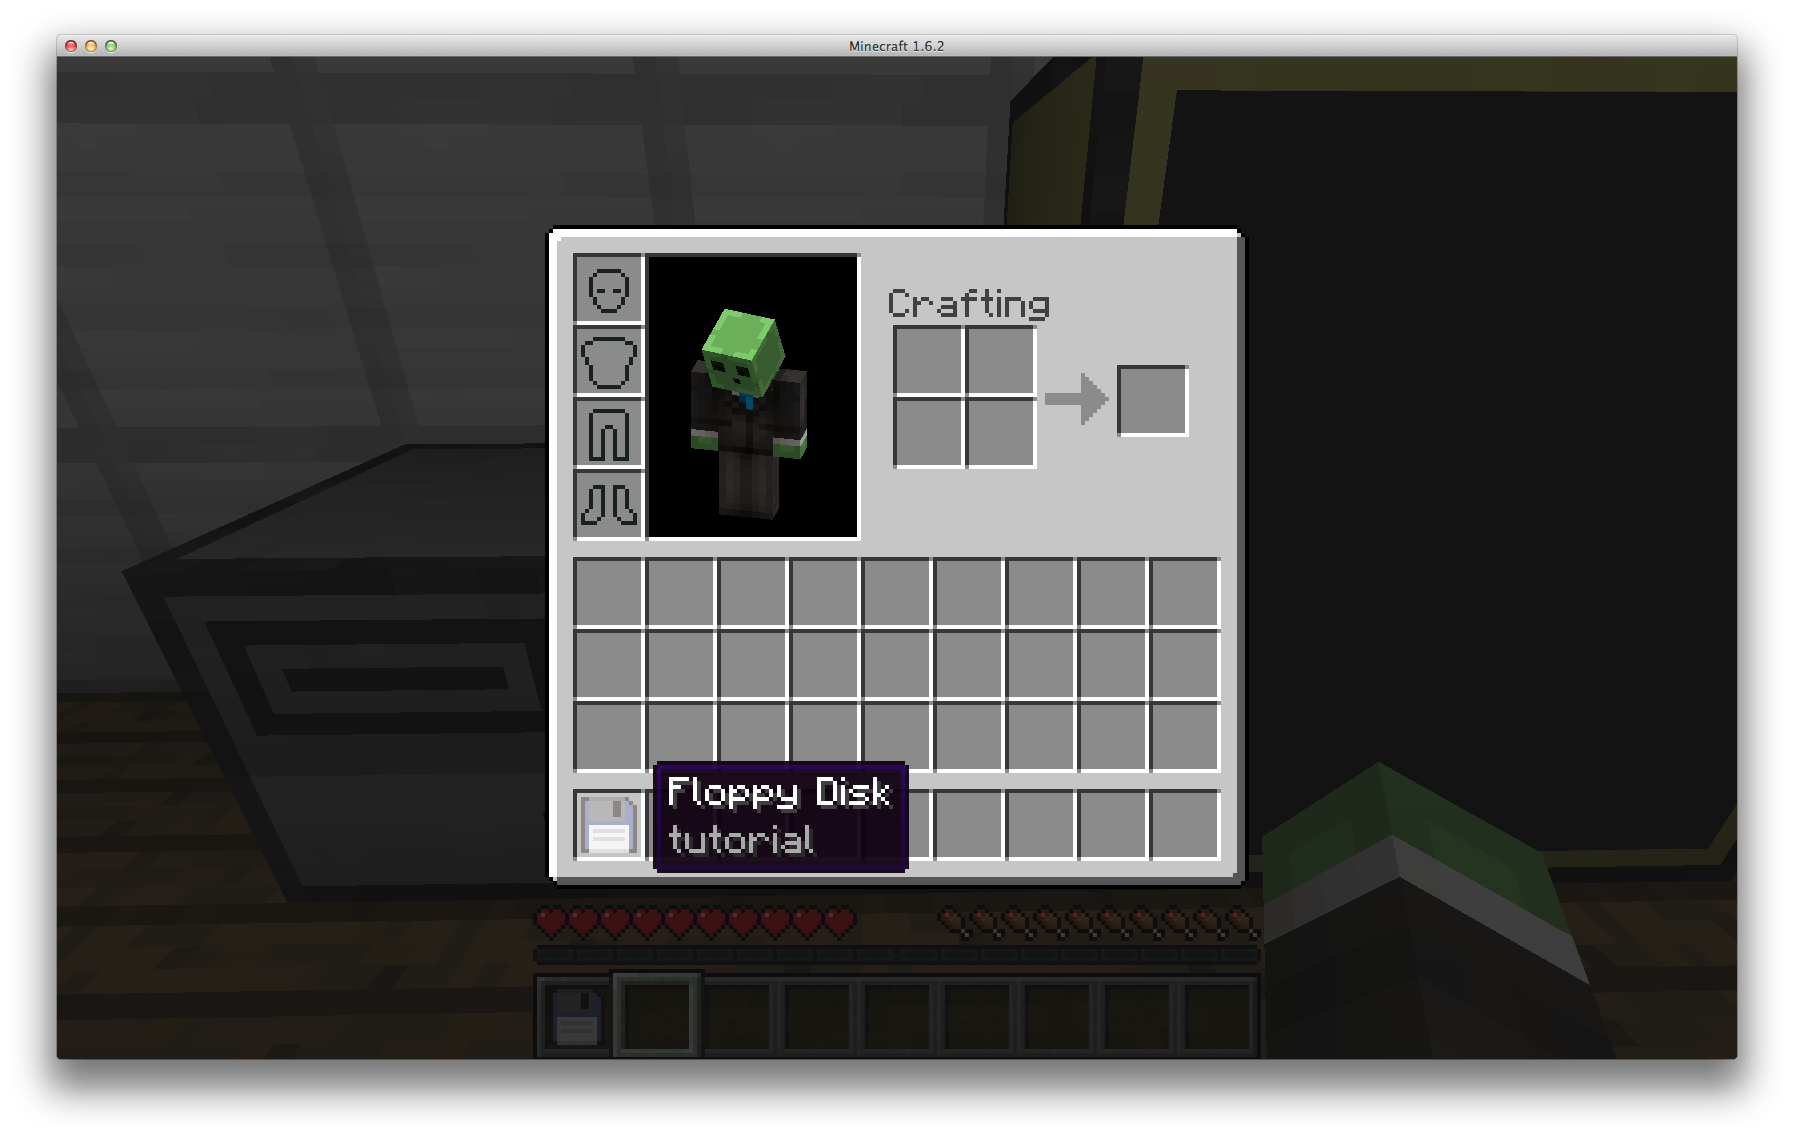
Note: You can actually remove the disk from the drive via the GUI, just like when you placed it in, we are just doing it via code to get used to peripheral calls.
wrap
Now while invoking the methods on the peripheral with the `call` function is fine, it can make our programs become very verbose and having to type `peripheral.call` and then specify the side of the peripheral each time can become quite annoying and tiresome. As such the peripheral API provides us with the last function we will be covering in this tutorial, `wrap`. The `wrap` function accepts one (1) argument, the side of the peripheral, and returns us a table containing all the methods we can call on the peripheral.
Lets use the same example as above and interact with the Disk Drive again. We will detect if there is a floppy disk present, label it, and then eject it from the drive. Place a different floppy disk in the drive and lets begin.
Still in the Lua Prompt lets wrap the peripheral into a variable, type drive = peripheral.wrap("left") and press enter, that should have been accepted. To test that our `drive` variable now has a table you can type drive and press enter, it should output something like the following
Note: The numbers and letters will vary, however the reason as to why is outside the scope of this tutorial.
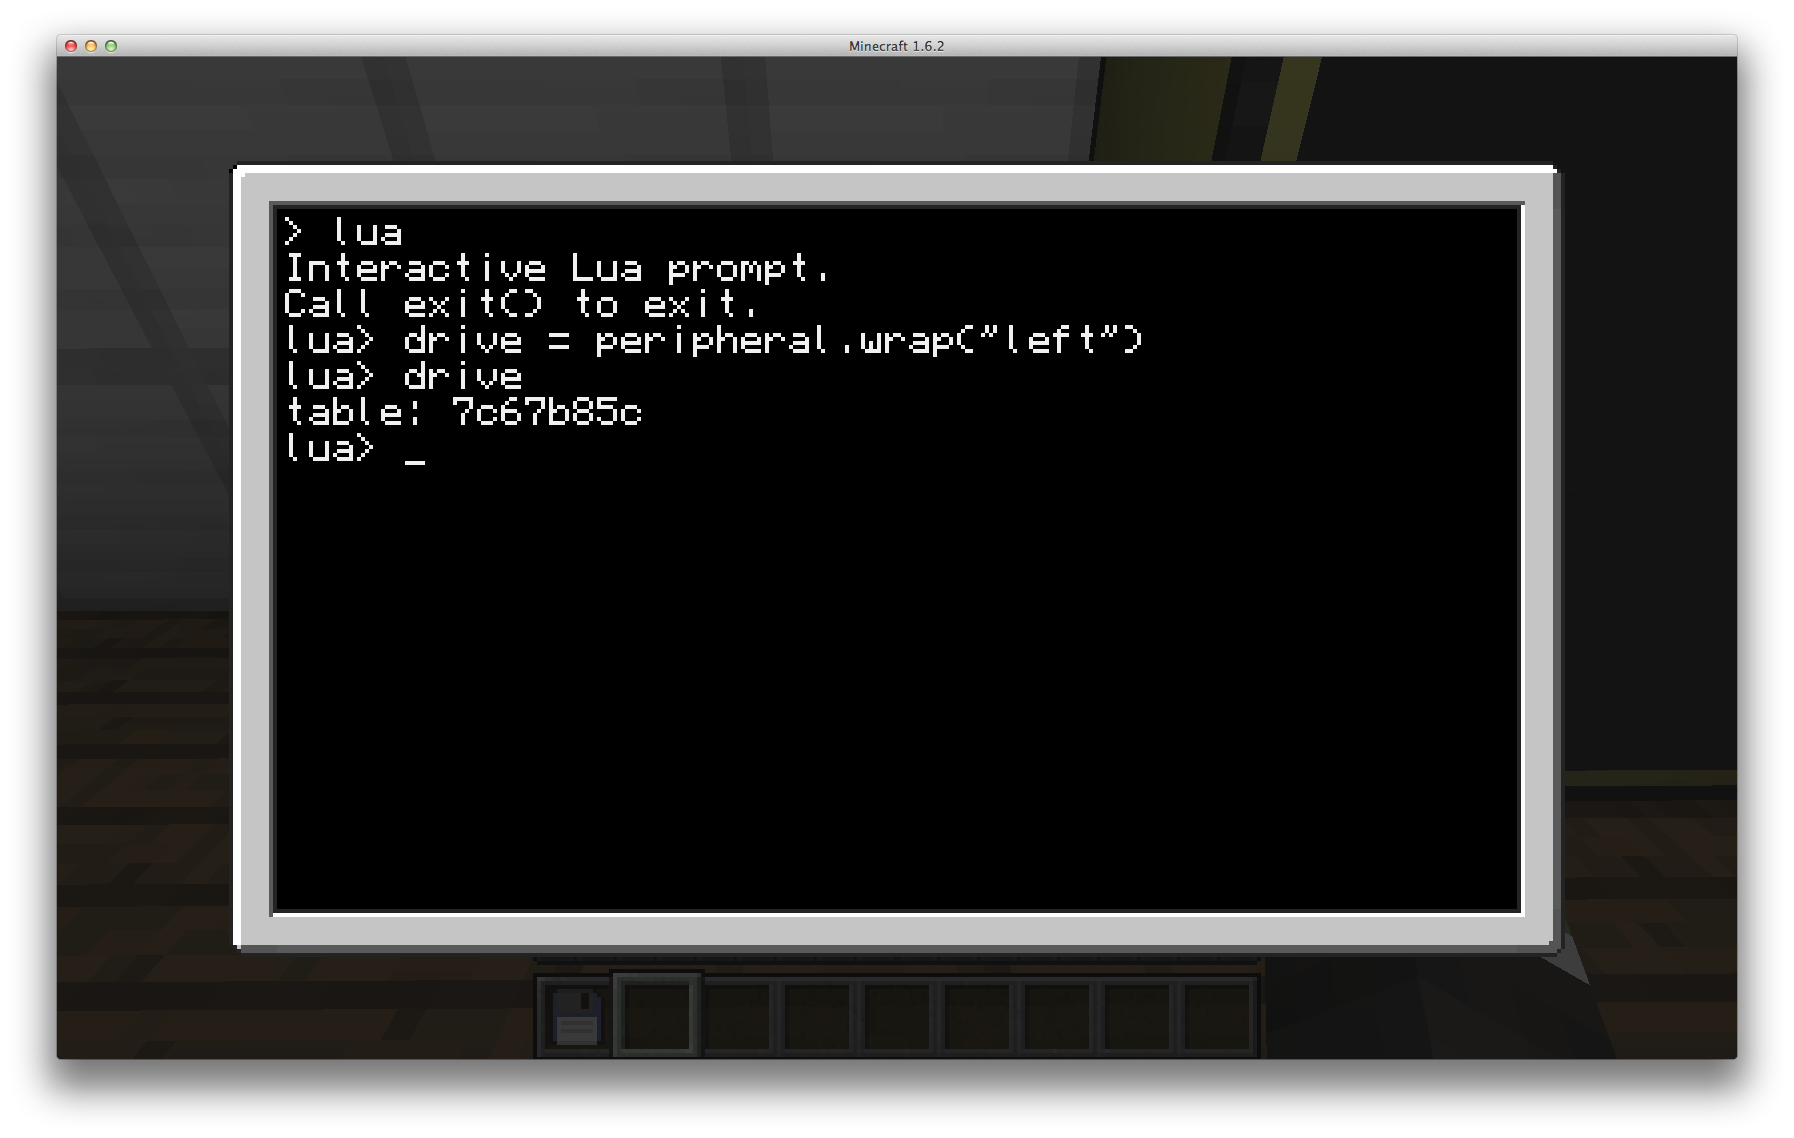
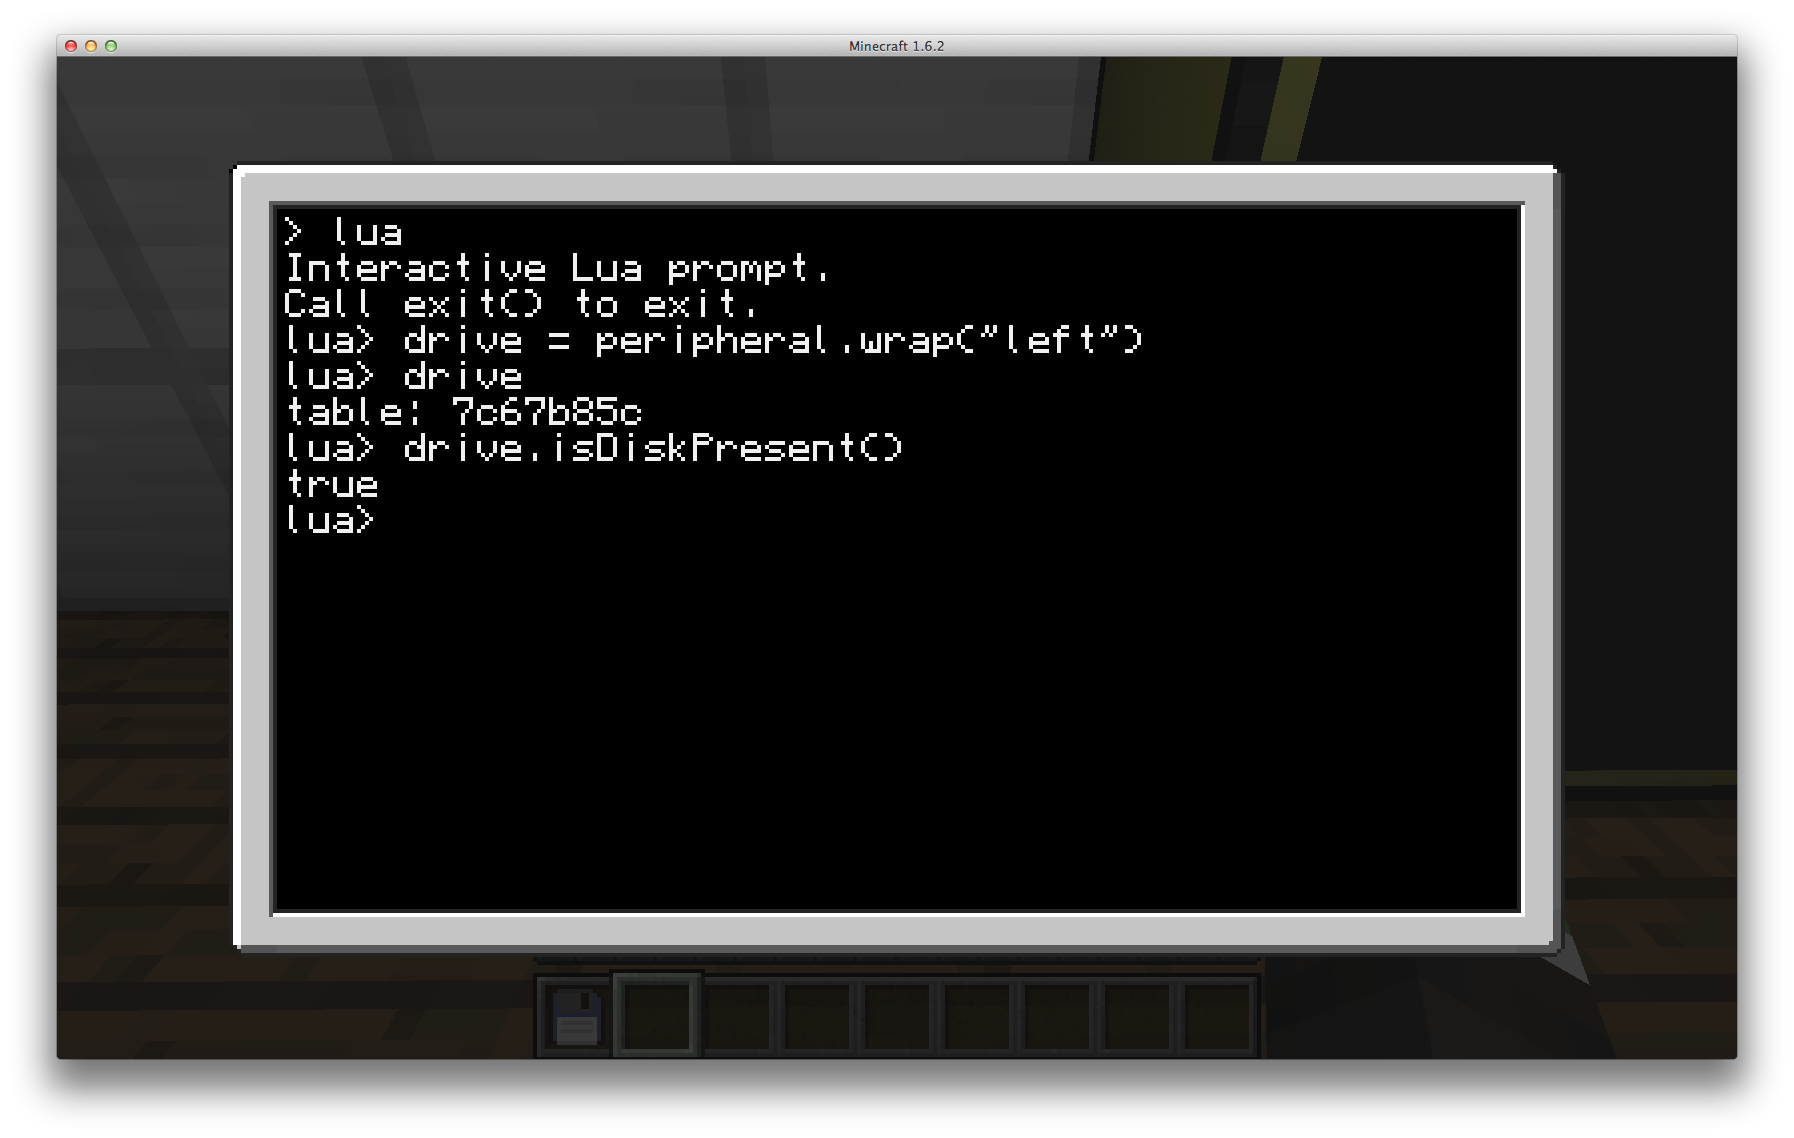
Now that we have wrapped the drive into a variable we can call the functions on this just like we do any API. Now type into the prompt drive.isDiskPresent() and press enter, it should output true just as before
Now lets label and eject the disk. Type drive.setDiskLabel("wrapped") drive.ejectDisk() and press enter, the disk should be labelled and ejected from the Disk Drive. Pick up the disk and check the label to confirm.
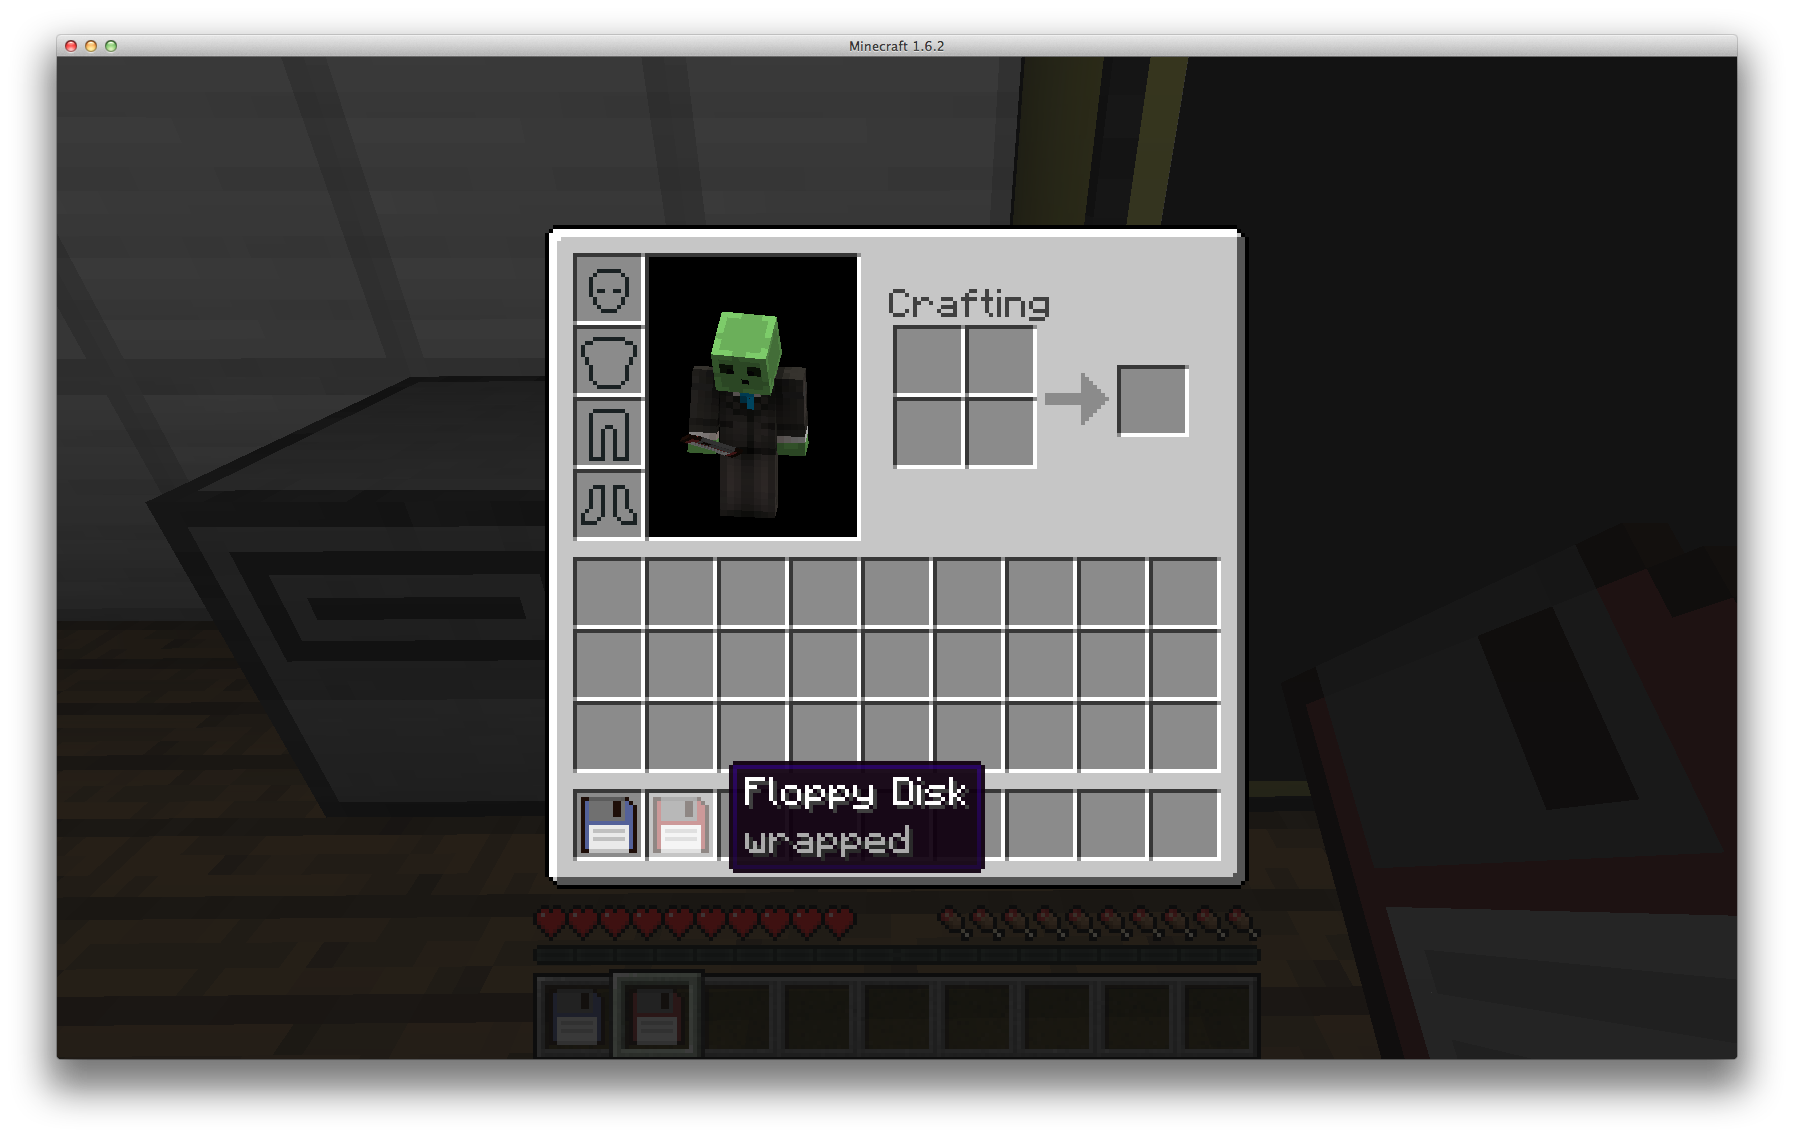
Congratulations, you have now successfully wrapped and interacted with a peripheral.
Conclusion
We have now come to an end to this tutorial. In this tutorial we learnt how to check for peripherals and detect what kind of peripheral they are, we then inspected the peripheral and checked how we could interact with it, which we then did two (2) ways; direct calling on the peripheral and through wrapping the peripheral into a variable.
Thank you for joining me in this tutorial, thanks for reading, enjoy playing with the peripherals, happy coding, and see you next time!

