167 posts
Posted 26 September 2013 - 05:02 PM
After coding my first demo, I decided to take it a step farther. I added proper polygon support and added a feature to import Blender files and render them. They render in wireframe, but it's the thought that counts!
HOW TO IMPORT A MODEL FROM BLENDER
If you haven't already, download blender from here
Step 2:
Download this plugin script io_export_babylon.py
Step 3:
Copy this file into the \script\addons directory where you’ve installed Blender (for instance “C:\Program Files (x86)\Blender Foundation\Blender\2.68\scripts\addons” in my specific case).
You need to activate the plug-in in the user preferences. Go to “File” –> “User Preferences” and the “Addons” tab. Search for “babylon” and activate it by checking the case.

(You may have to re-enable babylon.js every time you start blender)
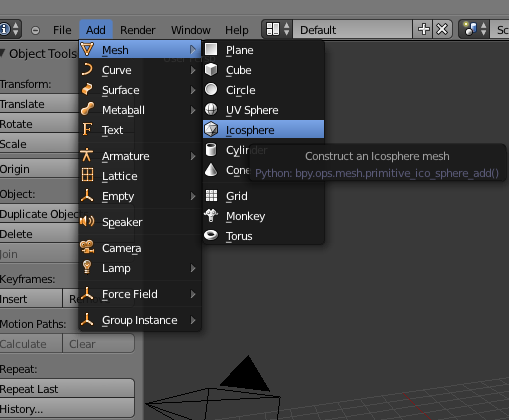
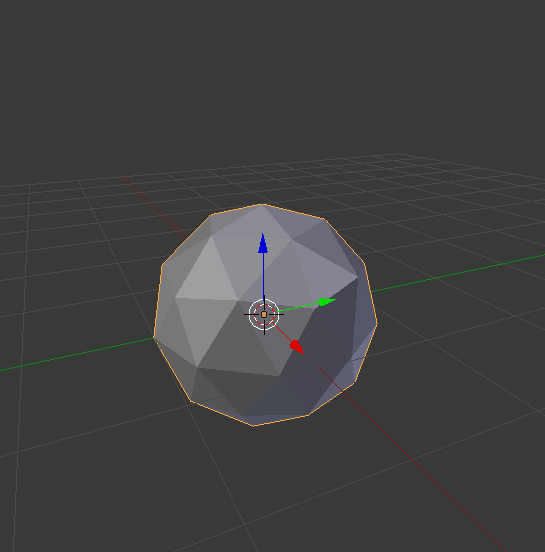
Step 4:
Add a mesh to blender, in this case i'll be using an icosphere
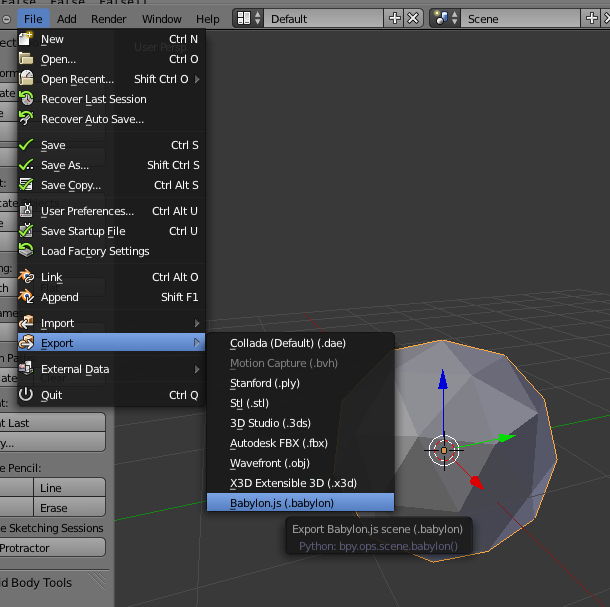
Step 5:
Click File/Export/babylon.js
Then save that file to a location of your choice
Step 6:
Close blender, and open the file in your preferred text editor
Step 7:
Go to the 3d demo file supplied in this post and create this:
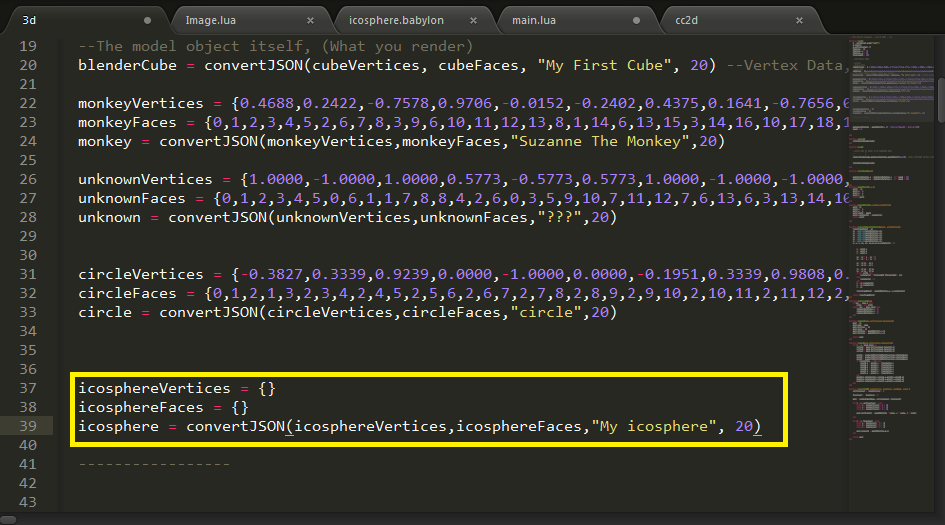
Important: Change the 20 to about 35 for this icosphere. It may vary depending on your model though (It's the scale)
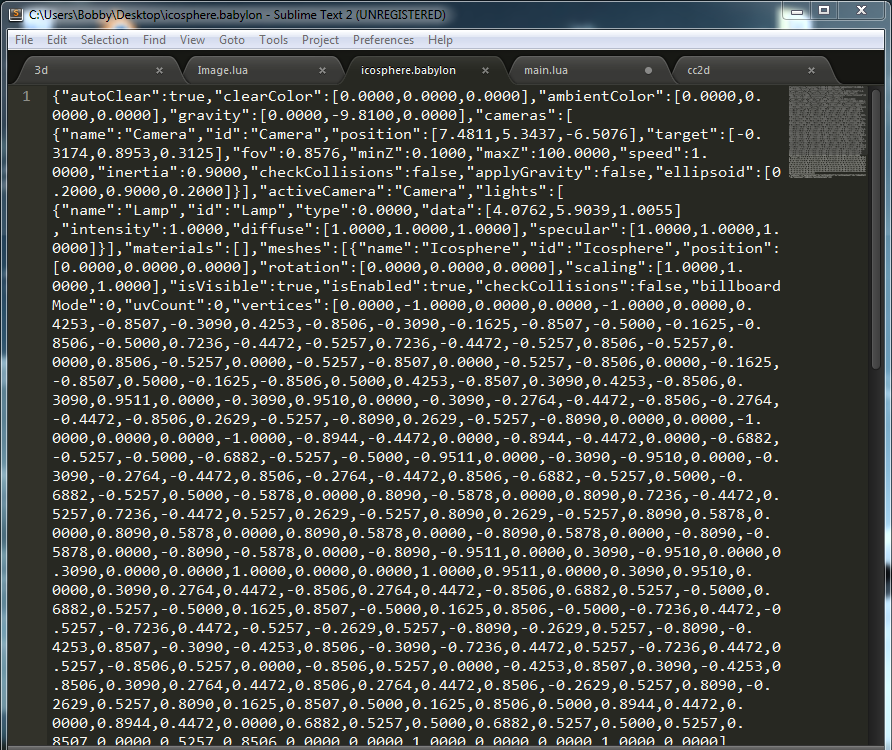
Step 8:
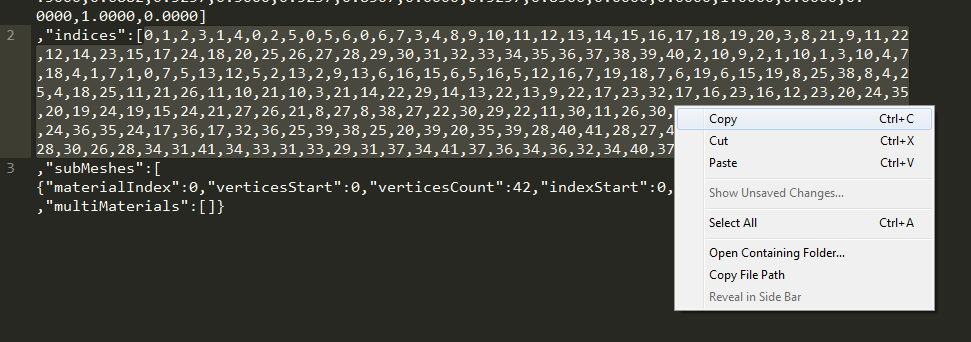
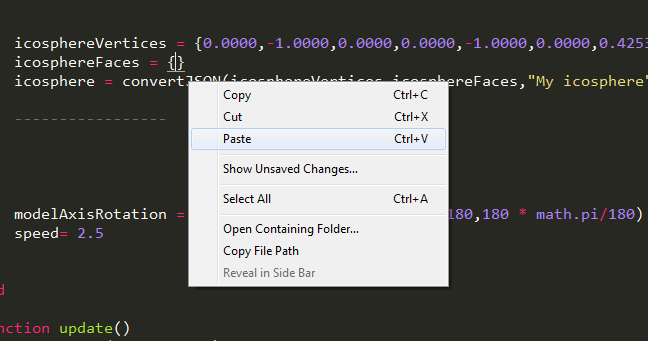
Go back to the icosphere.babylon file, find where it says "vertices":[a whole bunch of numbers]
and copy all the numbers into icosphereVertices
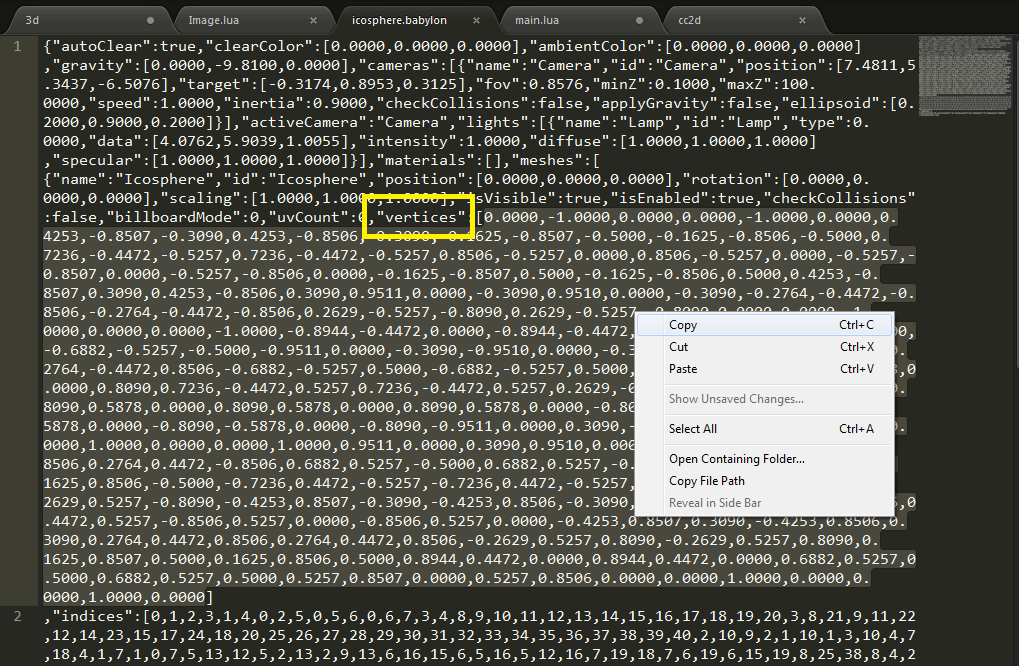
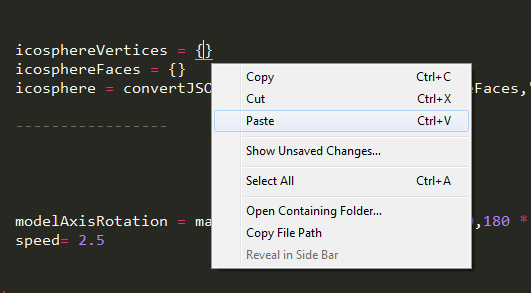
Do the same with indices, and copy it to icosphereFaces
Result

Step 9:
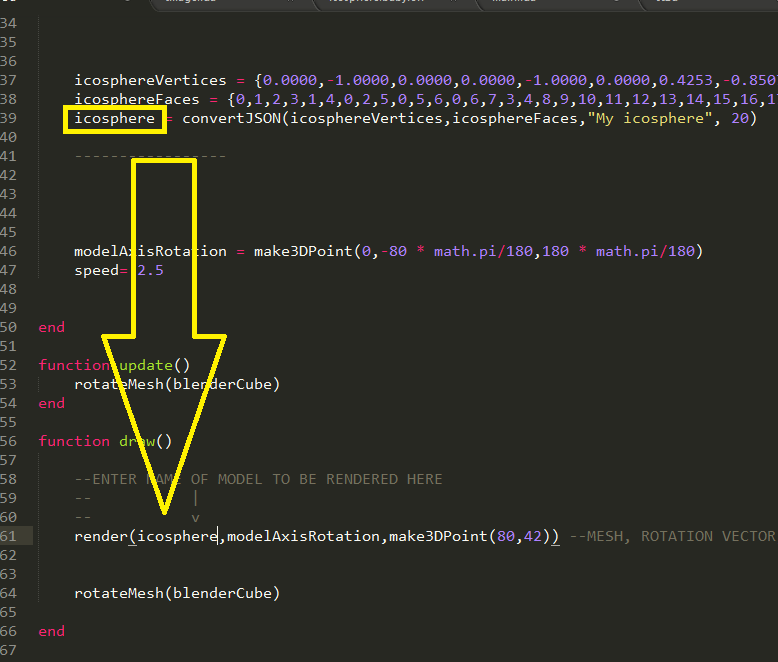
Scroll down to where it says "ENTER NAME OF MODEL TO BE RENDERED HERE" (in the 3d file, not the icosphere.babylon file) and paste the mesh name into
Step 10:
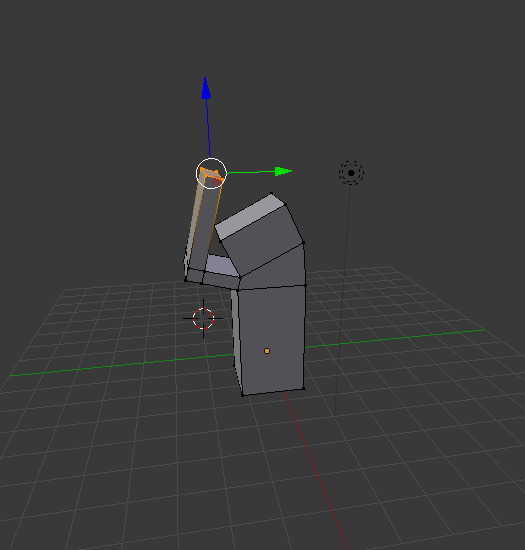
Open minecraft, Setup a computer and monitor like shown below, then run the 3d file in computercraft
Final Result:
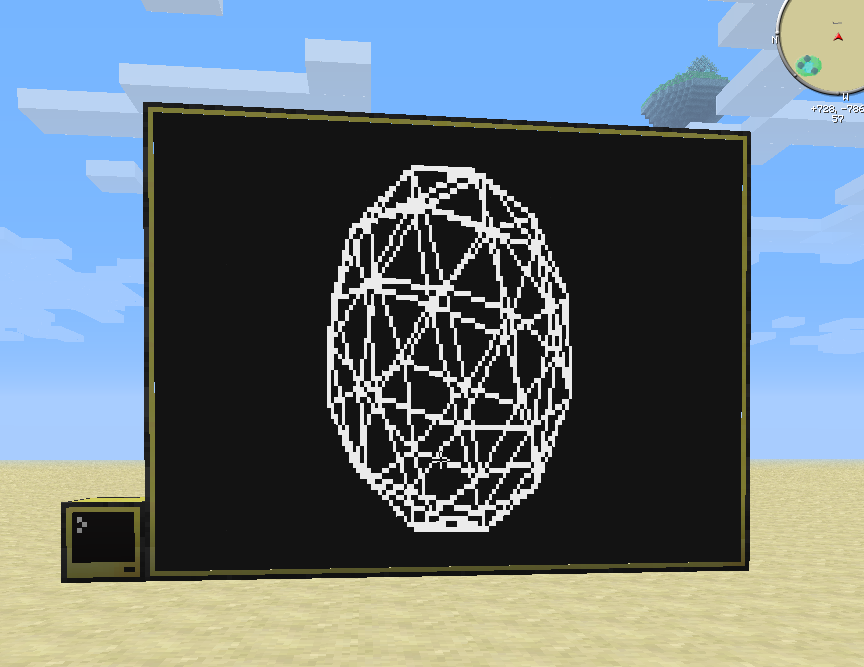
warning: keep the polygons simple. even this icosphere doesn't run that well.
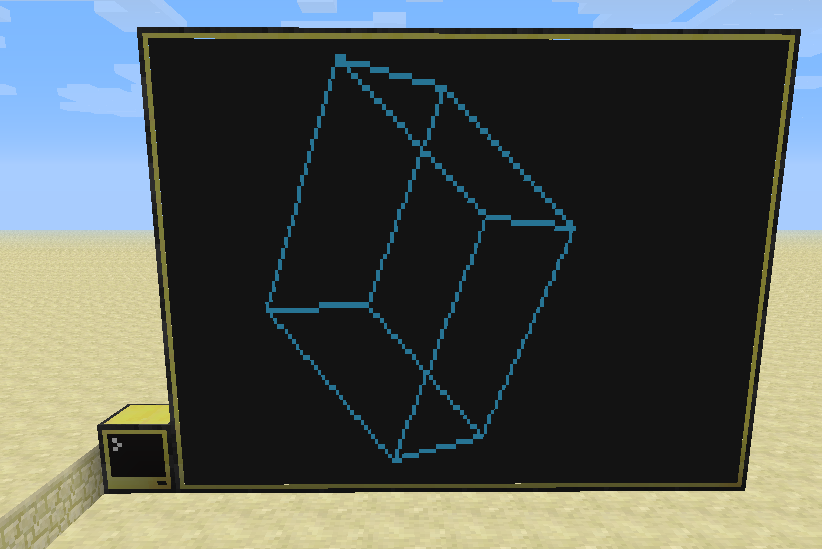
Demo 1: Blender Default Cube
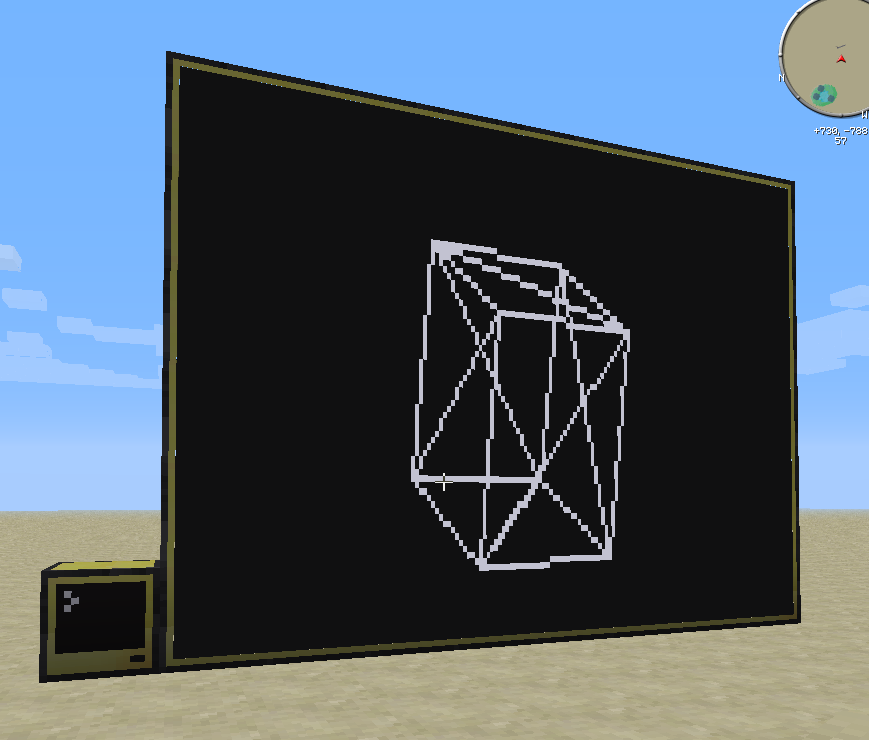
Nothing special, you saw this in the last demo. What makes it important though, is the fact that it was exported from Blender. Moving on…
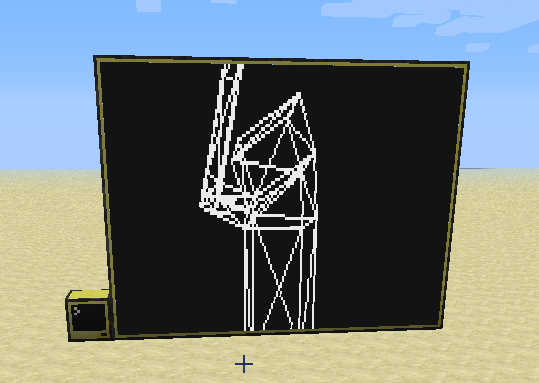
Demo 2: My model (warning, modeling is terrible. Proceed at own risk)
In Blender
Converted for CC:
Demo 3: Suzanne the monkey
Due to the shear amount of vertices/faces this one is about 0.5 fps

If that's not awesome, then… I give up. :P/>
JUST LIKE LAST TIME:
To use it, you need CC2D
Download it HERE
Download the 3D demo with this
TO RUN IT:
Make a setup like shown in the demo pictures (maximum size monitor will work fine)
Then run this:
Z to toggle between Perspective and Orthographic
OLD DEMO
Here's my attempt
However, unlike nitro's demo, I don't use matrices. Those still make my head hurt. :S
To use it, you need CC2D
Download it HERE
Download the 3D demo with this
TO RUN IT:
First make a setup like shown in the picture
Then run this:
Z to toggle between Perspective and Orthographic
HOW TO IMPORT A MODEL FROM BLENDER
Spoiler
Step 1:If you haven't already, download blender from here
Step 2:
Download this plugin script io_export_babylon.py
Step 3:
Copy this file into the \script\addons directory where you’ve installed Blender (for instance “C:\Program Files (x86)\Blender Foundation\Blender\2.68\scripts\addons” in my specific case).
You need to activate the plug-in in the user preferences. Go to “File” –> “User Preferences” and the “Addons” tab. Search for “babylon” and activate it by checking the case.

(You may have to re-enable babylon.js every time you start blender)
Step 4:
Add a mesh to blender, in this case i'll be using an icosphere
Step 5:
Click File/Export/babylon.js
Then save that file to a location of your choice
Step 6:
Close blender, and open the file in your preferred text editor
Step 7:
Go to the 3d demo file supplied in this post and create this:
Important: Change the 20 to about 35 for this icosphere. It may vary depending on your model though (It's the scale)
Step 8:
Go back to the icosphere.babylon file, find where it says "vertices":[a whole bunch of numbers]
and copy all the numbers into icosphereVertices
Do the same with indices, and copy it to icosphereFaces
Result
Step 9:
Scroll down to where it says "ENTER NAME OF MODEL TO BE RENDERED HERE" (in the 3d file, not the icosphere.babylon file) and paste the mesh name into
render([mesh],modelAxisRotation,makeA3DPoint)Step 10:
Open minecraft, Setup a computer and monitor like shown below, then run the 3d file in computercraft
monitor right cc2d 3d
Final Result:
warning: keep the polygons simple. even this icosphere doesn't run that well.
Demo 1: Blender Default Cube
Nothing special, you saw this in the last demo. What makes it important though, is the fact that it was exported from Blender. Moving on…
Demo 2: My model (warning, modeling is terrible. Proceed at own risk)
In Blender
Converted for CC:
Demo 3: Suzanne the monkey
Due to the shear amount of vertices/faces this one is about 0.5 fps
If that's not awesome, then… I give up. :P/>
JUST LIKE LAST TIME:
To use it, you need CC2D
Download it HERE
Download the 3D demo with this
pastebin get 4r4RVhE9 3d
TO RUN IT:
Make a setup like shown in the demo pictures (maximum size monitor will work fine)
Then run this:
monitor right cc2d 3d
Z to toggle between Perspective and Orthographic
OLD DEMO
Spoiler
Well, after seeing NitrogenFingers' 3D demo, I was intrigued. So I set out to find a way I could learn/do it myself.Here's my attempt
However, unlike nitro's demo, I don't use matrices. Those still make my head hurt. :S
To use it, you need CC2D
Download it HERE
Download the 3D demo with this
pastebin get camy46mt 3d
TO RUN IT:
First make a setup like shown in the picture
Then run this:
monitor right cc2d 3d
Z to toggle between Perspective and Orthographic
Edited on 28 September 2013 - 01:00 PM