Turtle Architect allows you to easily plan and draw your Minecraft construction using a CC computer. Then have turtles build them wherever and whenever you desire.
Tutorial
This tutorial will teach you the basics of using Turtle Architect V2, henceforth referred to as TA. First we’ll get started with the install. Unlike most CC programs, TA spans multiple files and as such uses a separate installer software to properly download and organize its files. Therefore you should use “pastebin run”, instead of “pastebin get” when downloading it. Alternatively you could save the installer for later usage, but that’s not the point here. Regardless, the pastebin code for the installer is “VTZ6CqWY”, so on your CC computer you simply enter “pastebin run VTZ6CqWY” to begin the installation. If you wish, you may specify what folder to install to by writing it after the pastebin code, like this “pastebin run VTZ6CqWY ‘Turtle Architect¨”. If no folder path is given, it will install to your root directory.
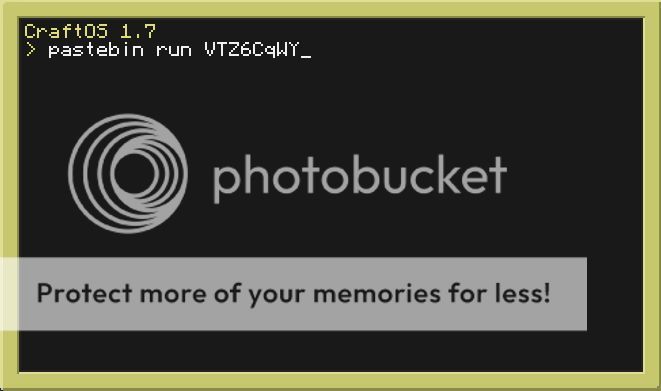
Once the installation is complete you simply enter “folderPath/arc” to run TA, or just TA if no path was given during installation.
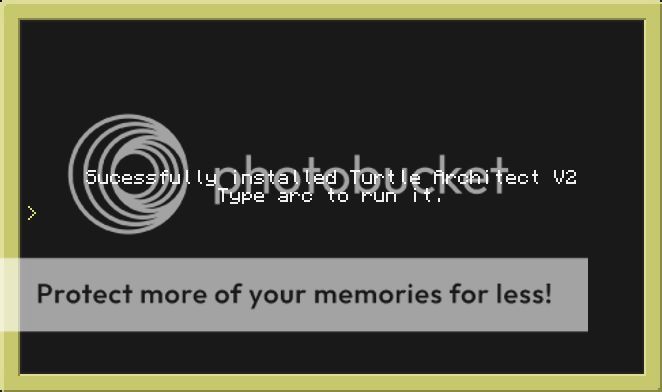
Alright so now that we’re up and running, let’s go through the GUI elements. We’ll start with the right-hand menu, as it’s the most important, and skip the canvas as it should be obvious. First things first, the layer buttons.
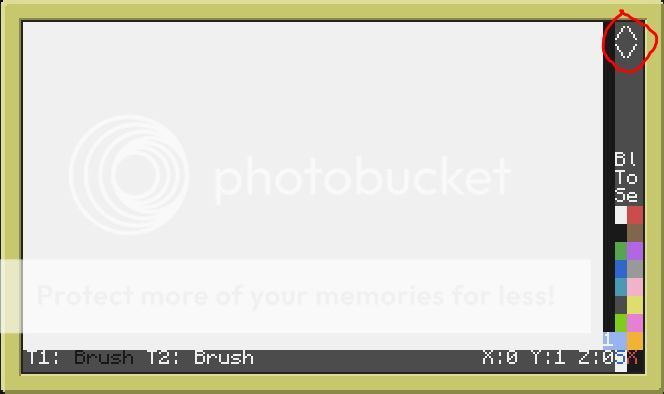
These provide quick access to layer changes, the top arrow moves the editor one layer up, while the bottom arrow moves the editor one layer down. Obviously it won’t be able to go below layer 1, but if you attempt to go above the top layer (1 in this case), it will create a new layer automatically. Alternatively, you can also use page up and page down on your keyboard, instead of these buttons.
The next thing we’re going to look at is the menus.
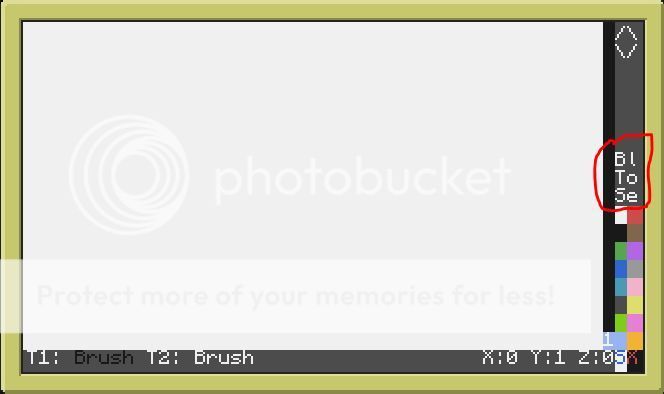
Depending on what kind of computer you’re running on, it might feature some extra buttons, but these are the basics and the ones we’ll be focusing on for now. Each set of horizontal letters is one menu, and clicking on them opens the respective menus.
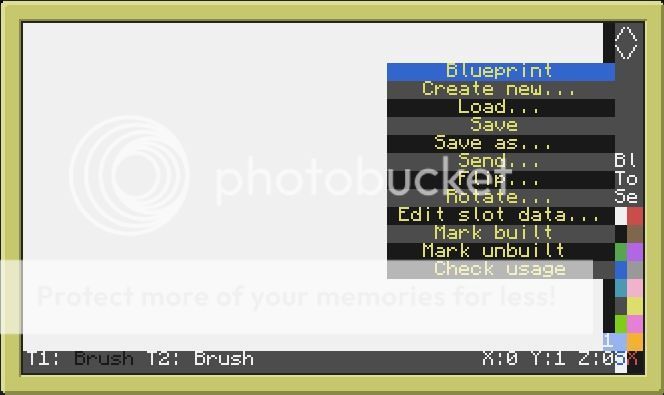
The blueprint menu is the same as the file menu in most windows software, with a few additions. Here you can create new, save and load files, as well as send them via Rednet. Basically standard fare for any program. It also holds a few functions for managing your entire blueprint. Use the help tool, detailed in the Tools menu section for more information.
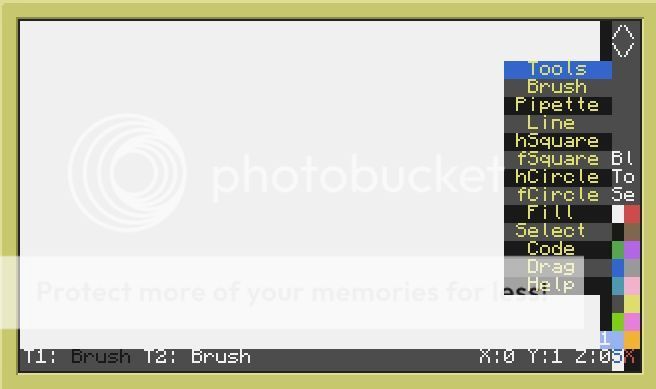
The tools menu holds all your available editing tools, like Brush, Select, Line etc.. Left-clicking on a tool here will equip it to your left mouse button, and right clicking will equip it to your right mouse button. However some tools require both buttons, and will therefore equip to both regardless. The only tool that will be explained in this tutorial is the Help tool, as it can tell you about all the other tools. Once you’ve clicked on the help tool in this menu, the menu will close. With the Help tool equipped, you can click on any GUI element or menu item you desire more info on, and a helpful window will pop up telling you more about it. This may be used for more information on the other tools.
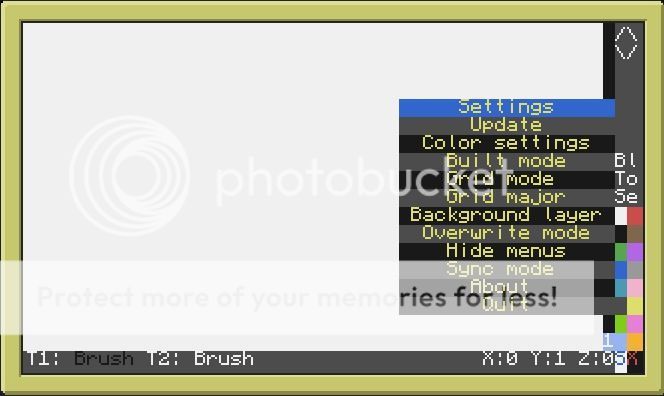
The Settings menu is where you set your preferences. Keep in mind that most of these will be saved between sessions. For more information on each individual setting, either click on them or use the help tool.
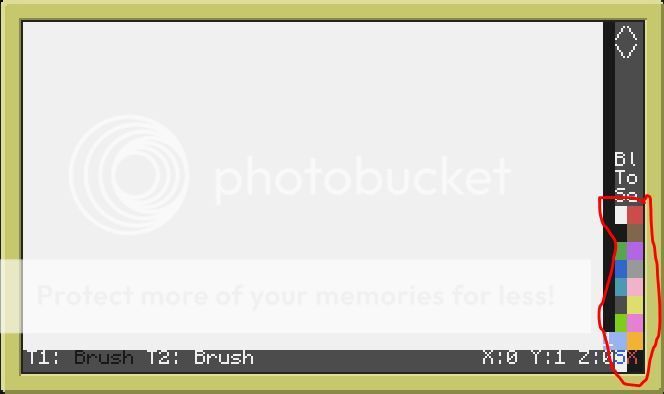
It features the standard 16 Minecraft colors, as well as 2 additional ones at the bottom. To equip a color, simply click it with the mouse button you wish to equip it on. The Blue “S” on white is the scan color, any block marked with this color will be scanned by the turtle during construction and added to the blueprint. The red “X” on black is the break color, any block marked with this color will be broken and collected by the turtle during construction.
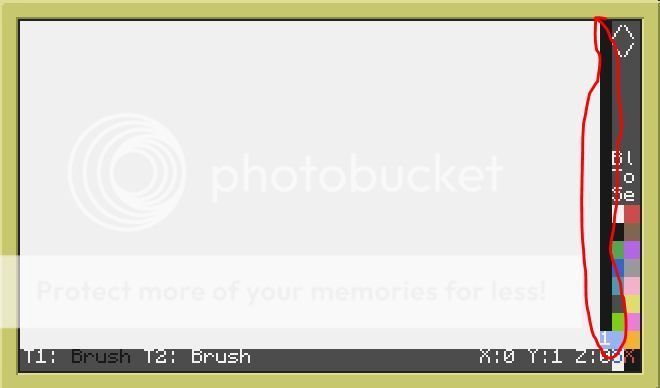
Think layer menu in Photoshop, here you can instantly change layers simply by clicking on the desired layer. You can also select multiple target layers by shift or ctrl clicking on them, letting you cut/copy, delete, flip etc. All of them at the same time. Right clicking on the layer bar opens the layer menu.
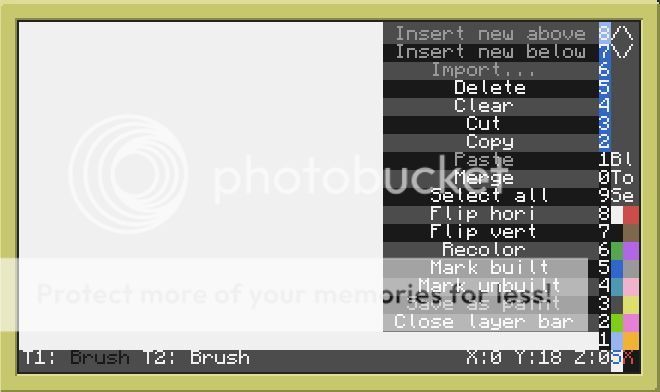
It should be pretty self-explanatory, however clicking “Close layer bar” will hide the whole bar from the GUI. If you want to get it back, you can re-enable it in the La(short for Layer) menu that pops up in the menu bar.
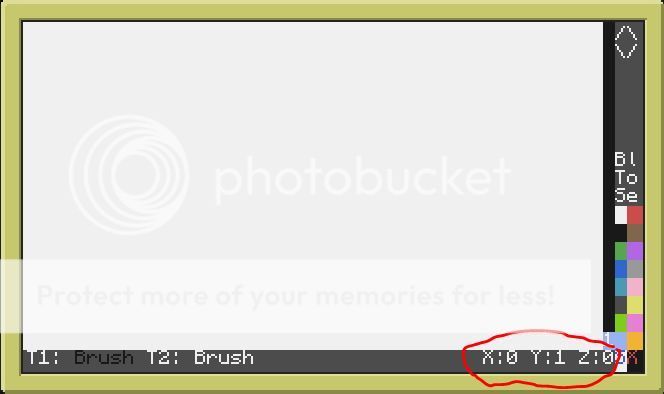
This shows the current editor offset, X is to the right, Y is the layer, and Z is downwards. You can also click it to instantly jump to any point on the canvas.
Finally we have the tool indicators.
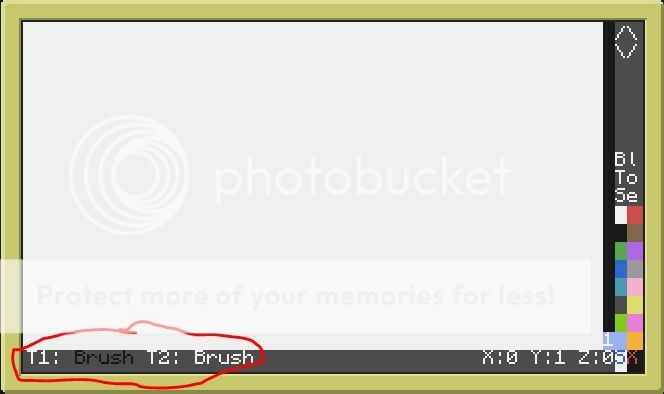
These show which tool and color is equipped to which mouse button. The text color indicating the tool color.
At this point you should have a pretty good handle on navigating the menus as well as what most of them do, so let’s try building something! Obviously you’re going to need to draw a blueprint to build, once that’s done you might need to transfer it from your computer to a turtle. The easiest way is to hook up a wireless modem to your computer and turtle, then make sure TA is running on both of them, then go to “bl/send…”. If your turtle has a modem and is running TA, it should show up along with its ID. Simply select it and hit OK. Once that’s done, head on over to your turtle and click “Load” in the new window that’s popped up to load it into your active session.
Now, as Im sure you’ll notice, the turtle has an extra menu called Tu(short for Turtle). This menu allows you to direct the turtle’s motions, as well as commence building. Our goal here it to build, so select “Build blueprint…” from this menu.
First things first, if you haven’t saved the blueprint to the turtle previously, you will be asked to do so now. Enter a suitable name, and hit enter or “Ok”.
Next up we select the layers to build, by default they’re all selected, so if you want to build all of them, just click “Ok”.
This next step is important, if you haven’t already configured the slot data, you will be asked to do so now. There will be one window for each un-configured color in your blueprint. Simply select the slots holding the blocks you want the turtle to use for that color and hit “Ok”. Keep in mind that you can select multiple slots in any order you want.
Once the slots are taken care of, you will be asked to input the build coordinates. This is where the turtle will build the blueprint in relation to the Minecraft world. If you’re happy with the turtle’s current placement, simply click self pos. The turtle will consider the given coordinates the upper left of your blueprint, where side to side motion is the X axis, up and down is the Z axis and each layer is one block along the Y axis.
After selecting the coordinates, you will also need to specify the build directions. These are given as either a “+” or a “-“ sign. Think of them as a final chance to flip your blueprint. Using a + sign will make the turtle move along the given axis in the positive direction during construction. A – sign will make it move in the negative direction. Funnily enough, you can make it build upside down by setting Y to “-“.
Next up it will ask you whether you want to enable ender chest usage. Select “No” for now, as this will be explained in greater detail later.
The next question is whether you want to enable break mode. This decides whether your turtle should break blocks obstructing its construction path, or wait for them to be cleared. Unless it’s critical that your turtle does not break blocks during construction, select “Yes”.
Finally we have auto resume. If this is enabled, the turtle will modify its startup file, by appending a line of code which continues the construction where it left off. It’s generally a good idea to enable this, in case the turtle gets unloaded during construction. With this enabled, it will continue right where it left off, without any intervention from you.
Now, once you’re finished in the Auto-resume window, the turtle will start building. You can monitor its progress from the world, or by watching it’s screen. Each time it builds a block, it will mark it with a “B”. This means the block has been placed in the world.
If your turtle runs out (<2) of a required block, it will pause construction and display a message requesting more of the color in its specified slots. It will periodically re-check its inventory for blocks, so if you’ve devised some automated way of re-stocking it, just let it do its thing. Otherwise, you may click “Ok” when you’ve restocked it, or “Cancel” to stop the current construction.
That's it for now! I might do some sections on automatically restocking the turtle via enderchests, as well as multi turtle building using the sync function later, provided there's any interest.
Unique features
Unique features- Code tool This tool allows you to code your very own tool/script to draw your construction. Using regular old CC Lua, it makes repetetive tasks amazingly quick and patterns awesomely simple. The code tool is so sophisticated you could replicate the built in tools using it. Its thourghly documented below, for those interested. It's uses for probably 90% of my personal builds.
- Sync mode Lets you sync your current canvas across multiple computers/turtles. This means any change made on a synced computer, is replicated on the others. This mode can also be used to remotely control synced turtles. Doing so allows you order them to build while synced. This means the turtle will mark blocks as built while it builds, and this will be reflected on the synced computers aswell, however the truely awesome part of this is…
- Multi turtle building Using sync mode, you can order multiple turtles to build the same construction together. The blueprint is divided into parts, and each turtle gets it's own part which it then starts building. These are completely valid blueprints on their own, meaning that any of the turtles can resume their progress regardless of any crashes, unloads or even server reboots.
- Command computer functionality For quick prototyping you can use command computers to instantly build/dismantle your blueprint, aswell as scanning already built structures onto a blueprint.
Turtle functionality
Turtle- Coordinate movement.
- Supports GPS.
- Specify directions to build the blueprint, even upside down
- Saves current location locally.
- Build session persistence, quit and resume your build as desired. Even server crashes won't affect the construction, simply start him up again.
- If you wish your turtle to automatically resume building on boot, add the following line to the bottom of the startup file "shell.run('arc.Lua blueprintName -r')".
- Build sessions and slot colors are saved to file, this means you can switch between multiple on-going builds with the same turtle. Or even resume the build with a different turtle
- Easy inventory management, when blocks are required the turtle will list the slot range, and you can refill and resume, or cancel the build and resume it later.
- Simple refueling, when the turtle requires fuel, simply select the slot to refuel from and hit Ok.
- Restock and refuel the turtle using the same enderchest! Note that the enderchest mirrors the turtle's inventory configuration, while all the remaining slots(17+) can be used for fuel
Blueprint functionality
Blueprint- Save and load blueprints both locally or on pastebin
- Transfer blueprints via rednet
- Upload/download blueprints to pastebin from within the software
- Calculate blocks and fuel required to build any given blueprint
- Flip entire blueprints 90 degrees along any axis
Layer functionality
Layers- Copy, cut, add and delete layers.
- Stretch copies of the same layer across multiple layers.
- Import layers from other blueprints.
- Scan, import your layer from the minecraft world.
- Flip layers horizontally and vertically.
- Merge layers (optional color highlights).
- Mark specific layers as built/not built.
- Convert layers to fully functional cc paint files.
Drawing functionality
Drawing- Simple 1 block brush,
- Pipette tool, select a color from the canvas
- Line tool,
- Hollow circle tool,
- Filled circle tool,
- Hollow square tool,
- Filled square tool,
- Fill tool, note that it stops at the edge of the canvas due to the way the canvas is created as you go.
- Code tool, god i love this.
- Select tool, copy, cut, delete, flip and recolor specific areas
- Multi tool support, each mouse button is it's own tool, this means it can have it's own type, and color independent of the other. Though a lot of the tools use 2 buttons.
- Protect mode, prevents drawing on any colors other than white. This is works with every tool, including the code tool.
Visualization and ease of usage
Visualization- Drag tool, for easier scrolling of the canvas
- Help tool, using this you can click any menu item or screen area and a helpful window describing what it does pops up.
- Grid mode, adds numbers and a grid to the canvas for ease of visualization
- Background layer, renders the given layer beneath the one you are currently working on in gray, for easier comparison
- Unlimited canvas size and layers
- Supports all colors! Each color may be set to represent it's own range of inventory slots which the turtle will use when building that color.
Shortcuts
key shortcuts- left ctrl will change the tool on button 1, while right ctrl changes the tool on button 2.
- All tool shortcuts will switch back to the previously equipped tool if it's used while the tool it equips is already euqipped on the button it's affecting.
- default shortcuts
- ctrl+B, brush tool.
- ctrl+F, fill tool.
- ctrl+C, code tool.
- ctrl+S, select tool.
- ctrl+P, pipette tool.
- ctrl+L, line tool.
- ctrl+D, drag tool.
- ctrl+N, create new layer above current layer.
- ctrl+H, hides the menu bars.
- pageUp, scroll up 1 layer.
- pageDown, scroll down 1 layer.
- home, jump to bottom layer.
- end, jump to top layer.
- select tool specific shortcuts the conflicting ones override the default shortcuts.
- ctrl+S, switch back to the previous tools.
- ctrl+C, copy selection to clipboard.
- ctrl+X, cut selection to clipboard.
- ctrl+V, paste clipboard.
- ctrl+R, recolor selection or clipboard.
- ctrl+B, mark selection or clipboard as built.
- ctrl+U, mark selection or clipboard as unbuilt.
- delete, clear selection or clipboard.
Code tool documentation. My personal favorite, i recommend any avid user of this software to learn about it.
Code tool documentation- The environment The code tool is executed it it's own sandboxed environment with access to most of the default CC functionality. Note that this environment is never reset, so any non-local variables will persist between tool calls until the program is rebooted. The color table in this environment is modified to return the characters TA uses in it's blueprint instead of the regular numbers. Any attempt at using a disabled function will result in an error informing you of the function or API being disabled. By default the following APIs and functions are disabled fs, term, turtle, loadfile, dofile, io, paintutils, window, shell, multishell, print, write
- Classes A new object is created by calling class.className() and it's subsequent functions are called by colon notation, obj:function(…). By default the following classes are avilable
- layer, a 2D table representing a layer, where the first dimension is the x axis and the second is the z axis. It's meta __index automatically creates x-axis tables where there are none, so there is no need to check for or create new ones. It includes the following functions:
- new(tData), same as class.layer().
- size([sDir]), Returns the size of the layer in the specified direction("X" or "Z") or both if none is given.
- copy([nX1,nZ1,nX2,nZ2]), Returns a copy of the layer, optionally a specific area.
- paste(tLayer,[nX,nZ,bMerge]), Combines the layer with tLayer with an optional offset nX,nZ. bMerge will keep the layer on top, otherwise tLayer becomes the top.
- markBuilt([nX1,nZ1,nX2,nZ2]), Marks the blocks in the layer as built, optionally just within the given area.
- markUnbuilt([nX1,nZ1,nX2,nZ2]), Marks the blocks in the layer as unbuilt, optionally just within the given area.
- flipX([nX1,nZ1,nX2,nZ2]), Flips the layer along the x axis, optionally just a given area of the layer
- flipZ([nX1,nZ1,nX2,nZ2]), Flips the layer along the z axis, optionally just a given area of the layer
- recolor(sColor,[nX1,nZ1,nX2,nZ2]), Changes every block in the layer to the given sColor, optionally just a given area of the layer
- delete([nX1,nZ1,nX2,nZ2]), Clears the entire layer or the given area of it.
- blueprint, a 3D table where the first dimension is a layer. It includes the following functions:
- new(tData,bAuto), same as class.blueprint(). Enabling bAuto means the table automatically creates layers when they are acessed.
- size([sDir]), Returns the amount of layers, the largest x axis and the largest z axis
- copy([nX1,nZ1,nX2,nZ2]), Returns a copy of the blueprint, optionally a specific area.
- paste(tBlueprint,[nX,nZ,bMerge]), Combines the blueprint with tBlueprint with an optional offset nX,nZ. bMerge will keep the blueprint on top, otherwise tBlueprint becomes the top.
- markBuilt([nX1,nZ1,nX2,nZ2]), Marks the blocks in the blueprint as built, optionally just within the given area.
- markUnbuilt([nX1,nZ1,nX2,nZ2]), Marks the blocks in the blueprint as unbuilt, optionally just within the given area.
- flipX([nX1,nZ1,nX2,nZ2]), Flips the blueprint along the x axis, optionally just a given area of the layer
- flipZ([nX1,nZ1,nX2,nZ2]), Flips the blueprint along the z axis, optionally just a given area of the layer
- Functions
- overlay(tLayer,[nX,nY]) Renders blinking overlays like the shape tools. Simply pass it a layer object and the optonal offset coordinates, and it will handle the rest. By default the offset is 1,1 which is the upper left corner of the blueprint.
- getOverlay() Returns the current overlay layer. Use this to edit it directly for better performance. Note that the overlay function has to be used first to create an overlay layer.
- getCanvas() Returns the full currently loaded blueprint, for direct editing.
- getLayer(nLayer) Same as above, for a specific layer. Defaults to the clicked layer.
- tool.select(sToolName,nButton1,[nButton2]) This is the function used when changing tools through the menus. Simply pass it the string name of the tool and the buttons to equip it to(1,2 and or 3). I doubt there's much use for it here really, but i included it anyways.
- tool.toolName(…) Any tool that has a codeFunc field may be called like this. By default this includes the following
- brush(nX,nZ,[sColor,nLayer])
- line(nX1,nZ1,nX2,nX2,[sColor,nLayer])
- fSquare(nX1,nZ1,nX2,nX2,[sColor,nLayer])
- hSquare(nX1,nZ1,nX2,nX2,[sColor,nLayer])
- fCircle(nX1,nZ1,nX2,nX2,[sColor,nLayer])
- hCircle(nX1,nZ1,nX2,nX2,[sColor,nLayer]) Note that nLayer may either be the layer number in the blueprint, or a layer object
- Variables
- click This is a table containing the click information regarding how the code tool was used, using the following indexes:
- event, string type of click used("mouse_click" or "mouse_drag")
- button, number mouse button used(1,2 or 3)
- x, number absolute x coordinate of the click
- z, number absolute z coordinate of the click
- color, string color equipped to the button used for the click
- layer, number layer the tool was used on
- settings This is a table where the execution settings are configured, using the following indexes:
- overwrite bool defaults to the current overwrite setting. Change this locally for your tool if needed, and it will affect all the changes made to the blueprint provided settings.direct is set to false. Otherwise it will only affect the tool functions.
- direct bool defaults to false. This decides how the changes your tool makes should be applied. If it's set to false, anything your tool does will affect a proxy blueprint, which is then pasted onto the actual blueprint once the tool is finished. This has no effect if you use getLayer or getCanvas and edit them directly ofcourse.


