
154 posts
London, England
Posted 17 July 2014 - 02:07 PM
I've seen a couple of people here impatiently waiting for CC to be compatible with bundled cables again, so I thought I'd share my workaround (currently used to control a big variety of spawners)
While this only allows output, input is possible but a lot more complex but I'll write that up if people are interested. Also while it does only output directly to MFR, you can create a "transfer box" where you link RedNet cables with their equivalent PR colours
The solution: the Programmable RedNet Controller from MFR (never said it was a cheap solution)
Code
http://pastebin.com/w3Ykgd8t
The Explanation
The reason this is split up into two different functions is that they require different programming of the PRC, the first function mfrOutput allows output to up to all 16 colours, though only one colour can be on at once, and I do mean only one. So if you want to turn all of your outputs off, you can only (easily) do that by turning a colour you don't use on. The second function requires a more advanced PRC (installation of the PRC Card expansions) and can only handle max 5 outputs, however it can turn each of these on and off independently of the others.
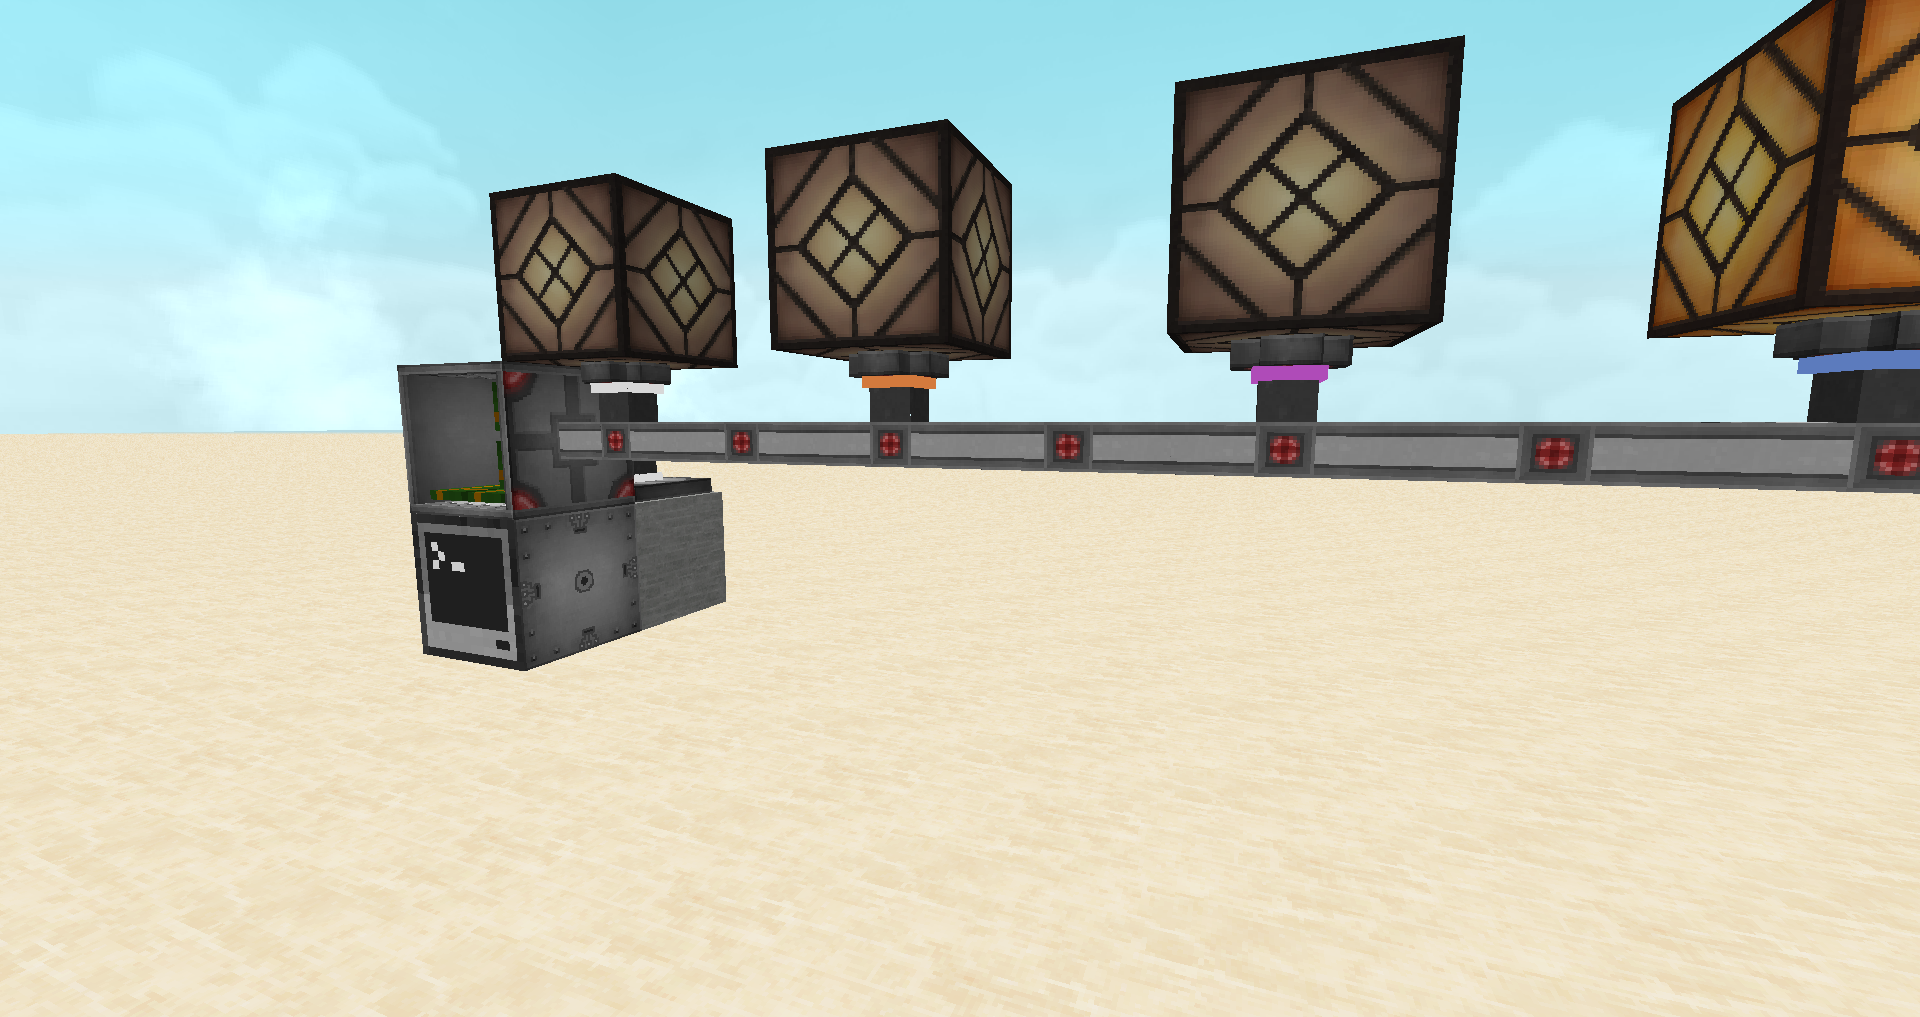
This shows the basic setup I use, the computer outputs a signal to the back face (the stone), this is picked up by a rednet cable on forced connection mode and goes into a PRC sitting on top of the computer which then de-multiplexes it and outputs it down the required coloured cable, explained below
mfrOutput
The PRC coding for this is pretty simple as well
I've only set the outputs for 4 of the colours here, but you get the idea. The PRC has I/O tied to (B)ack, ®ight, (L)eft, (U)p and (D)own and your inputs and outputs can go to any of them through any colour, just loop through and select the one that takes your fancy. As for the Inputs, I is the value that is passed to the output selected by analog input S, so I tend to leave that as a constant 1. You can however connect that up to another computer output and have a "switch all off" option. I haven't yet needed to use all 16 colours so haven't coded that.
mfrToggleOutput
This is a bit more complex, or at least can be. The above is the most basic implementation of this technique, you can get a bit more efficient by passing a table of the values you want to toggle and looping through them before terminating at a "null colour" but this works just fine for demonstrating
So to the PRC:
As you can see, instead of passing out the I value of 1, we are passing it to one of 5 internal variables, the reason we need to do this is so that for each signal we can put it through a T-flipflop like so:
This takes the internal variable 0 and on a rising edge will toggle the output to the Up face White cable (you will note at the top of this picture, 2 lamps are on instead of just the single one in the original setup). This is why we need to use the PRC expansion cards as by default a PRC will only do one function, with the cards it can do up to 6 (which is why we are limited to 5 outputs)
Anyway, I hope this may help some of you, and even if it doesn't, maybe it got you a bit interested in the PRC which is a very fun piece of kit.
Also to the mods: I wasn't sure if this should go here or in the Tutorials or what, sorry if I was wrong
While this only allows output, input is possible but a lot more complex but I'll write that up if people are interested. Also while it does only output directly to MFR, you can create a "transfer box" where you link RedNet cables with their equivalent PR colours
The solution: the Programmable RedNet Controller from MFR (never said it was a cheap solution)
Code
local mfr_side = "back"
local colours = {white=0, orange=1, magenta=2, lightblue=3, yellow=4, lime=5, pink=6, grey=7, lightgrey=8, cyan=9, purple=10, blue=11, brown=12, green=13, red=14, black=15}
local mfr_null = "black"

function mfrOutput(colour_val)
	rs.setAnalogOutput(mfr_side,colours[colour_val])
end

function mfrToggleOutput(colour_val)
	rs.setAnalogOutput(mfr_side,colours[colour_val])
	sleep(0.05) --#this is required due to how the controller works, it ensures it covers a PRC clock cycle
	rs.setAnalogOutput(mfr_side,colours[mfr_togglenull])
end
http://pastebin.com/w3Ykgd8t
The Explanation
The reason this is split up into two different functions is that they require different programming of the PRC, the first function mfrOutput allows output to up to all 16 colours, though only one colour can be on at once, and I do mean only one. So if you want to turn all of your outputs off, you can only (easily) do that by turning a colour you don't use on. The second function requires a more advanced PRC (installation of the PRC Card expansions) and can only handle max 5 outputs, however it can turn each of these on and off independently of the others.
This shows the basic setup I use, the computer outputs a signal to the back face (the stone), this is picked up by a rednet cable on forced connection mode and goes into a PRC sitting on top of the computer which then de-multiplexes it and outputs it down the required coloured cable, explained below
mfrOutput
function mfrOutput(colour_val)
	rs.setAnalogOutput(mfr_side,colours[colour_val])
end
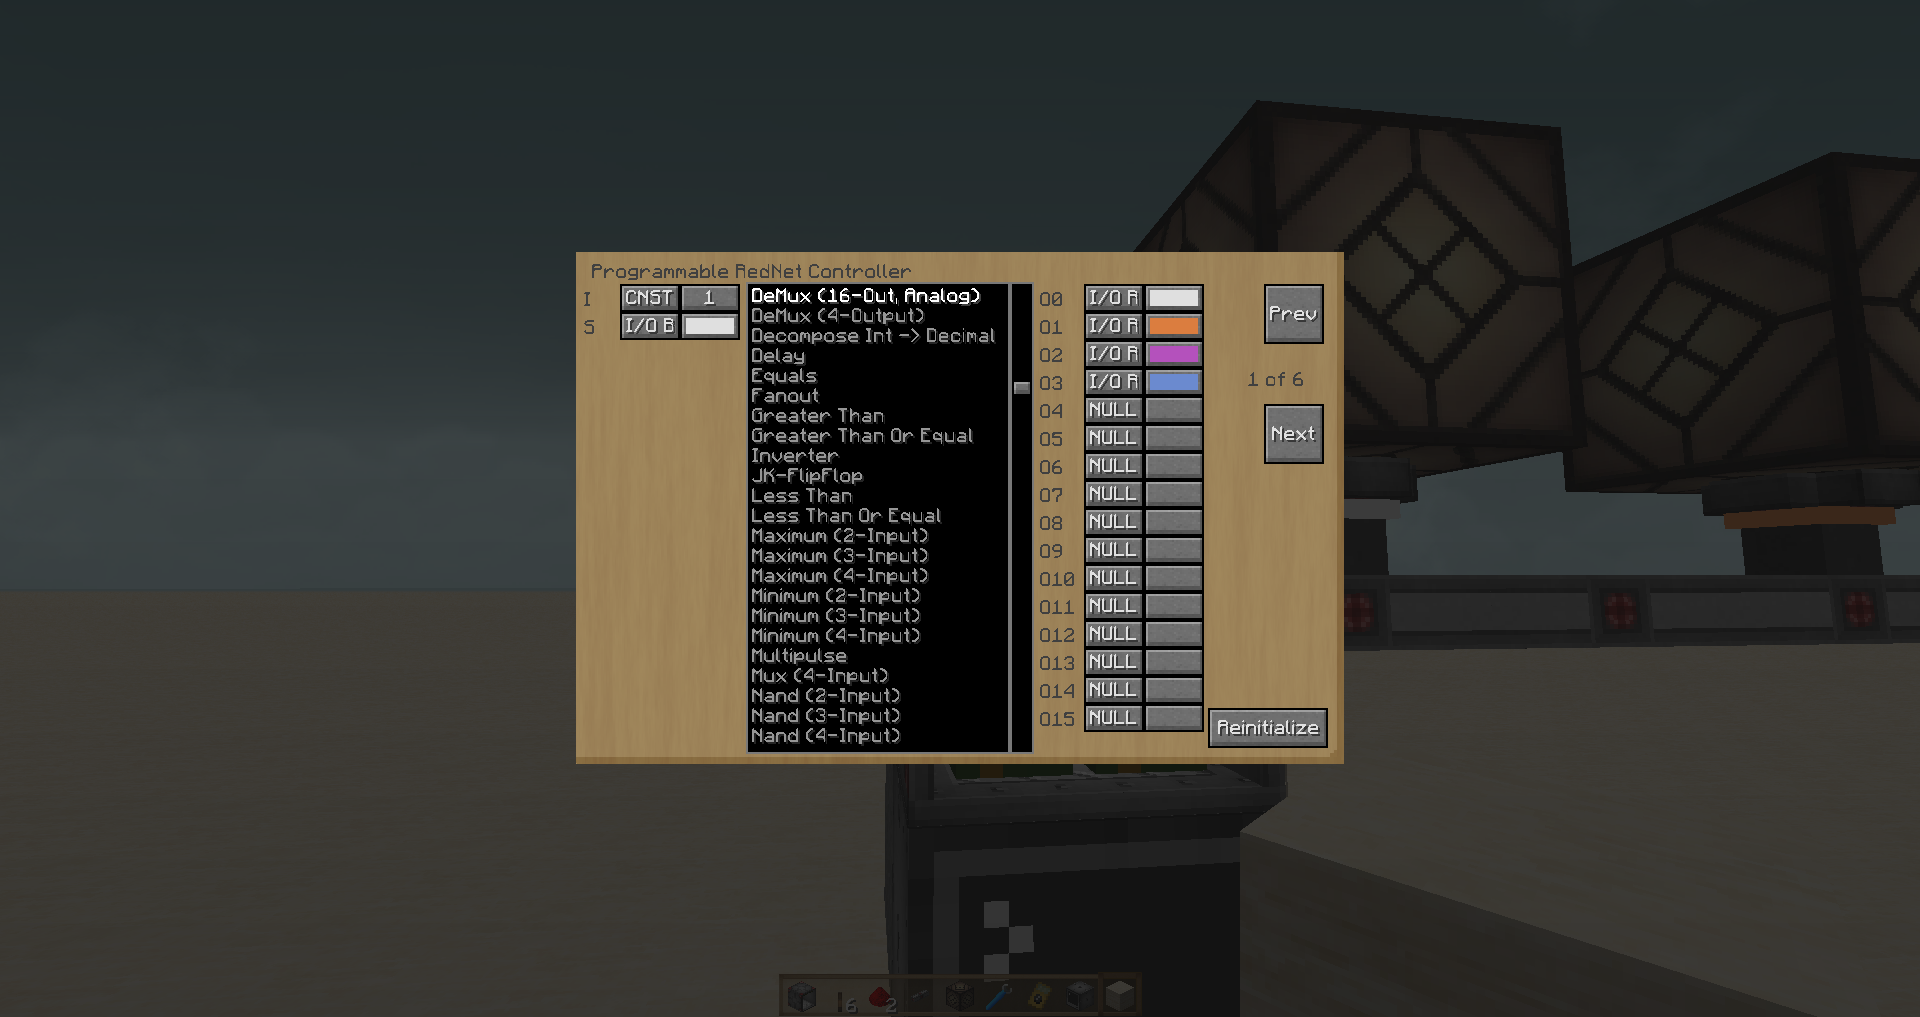
The PRC coding for this is pretty simple as well
I've only set the outputs for 4 of the colours here, but you get the idea. The PRC has I/O tied to (B)ack, ®ight, (L)eft, (U)p and (D)own and your inputs and outputs can go to any of them through any colour, just loop through and select the one that takes your fancy. As for the Inputs, I is the value that is passed to the output selected by analog input S, so I tend to leave that as a constant 1. You can however connect that up to another computer output and have a "switch all off" option. I haven't yet needed to use all 16 colours so haven't coded that.
mfrToggleOutput
function mfrToggleOutput(colour_val)
	rs.setAnalogOutput(mfr_side,colours[colour_val])
	sleep(0.05) --#this is required due to how the controller works, it ensures it covers a PRC clock cycle
	rs.setAnalogOutput(mfr_side,colours[mfr_togglenull])
end
This is a bit more complex, or at least can be. The above is the most basic implementation of this technique, you can get a bit more efficient by passing a table of the values you want to toggle and looping through them before terminating at a "null colour" but this works just fine for demonstrating
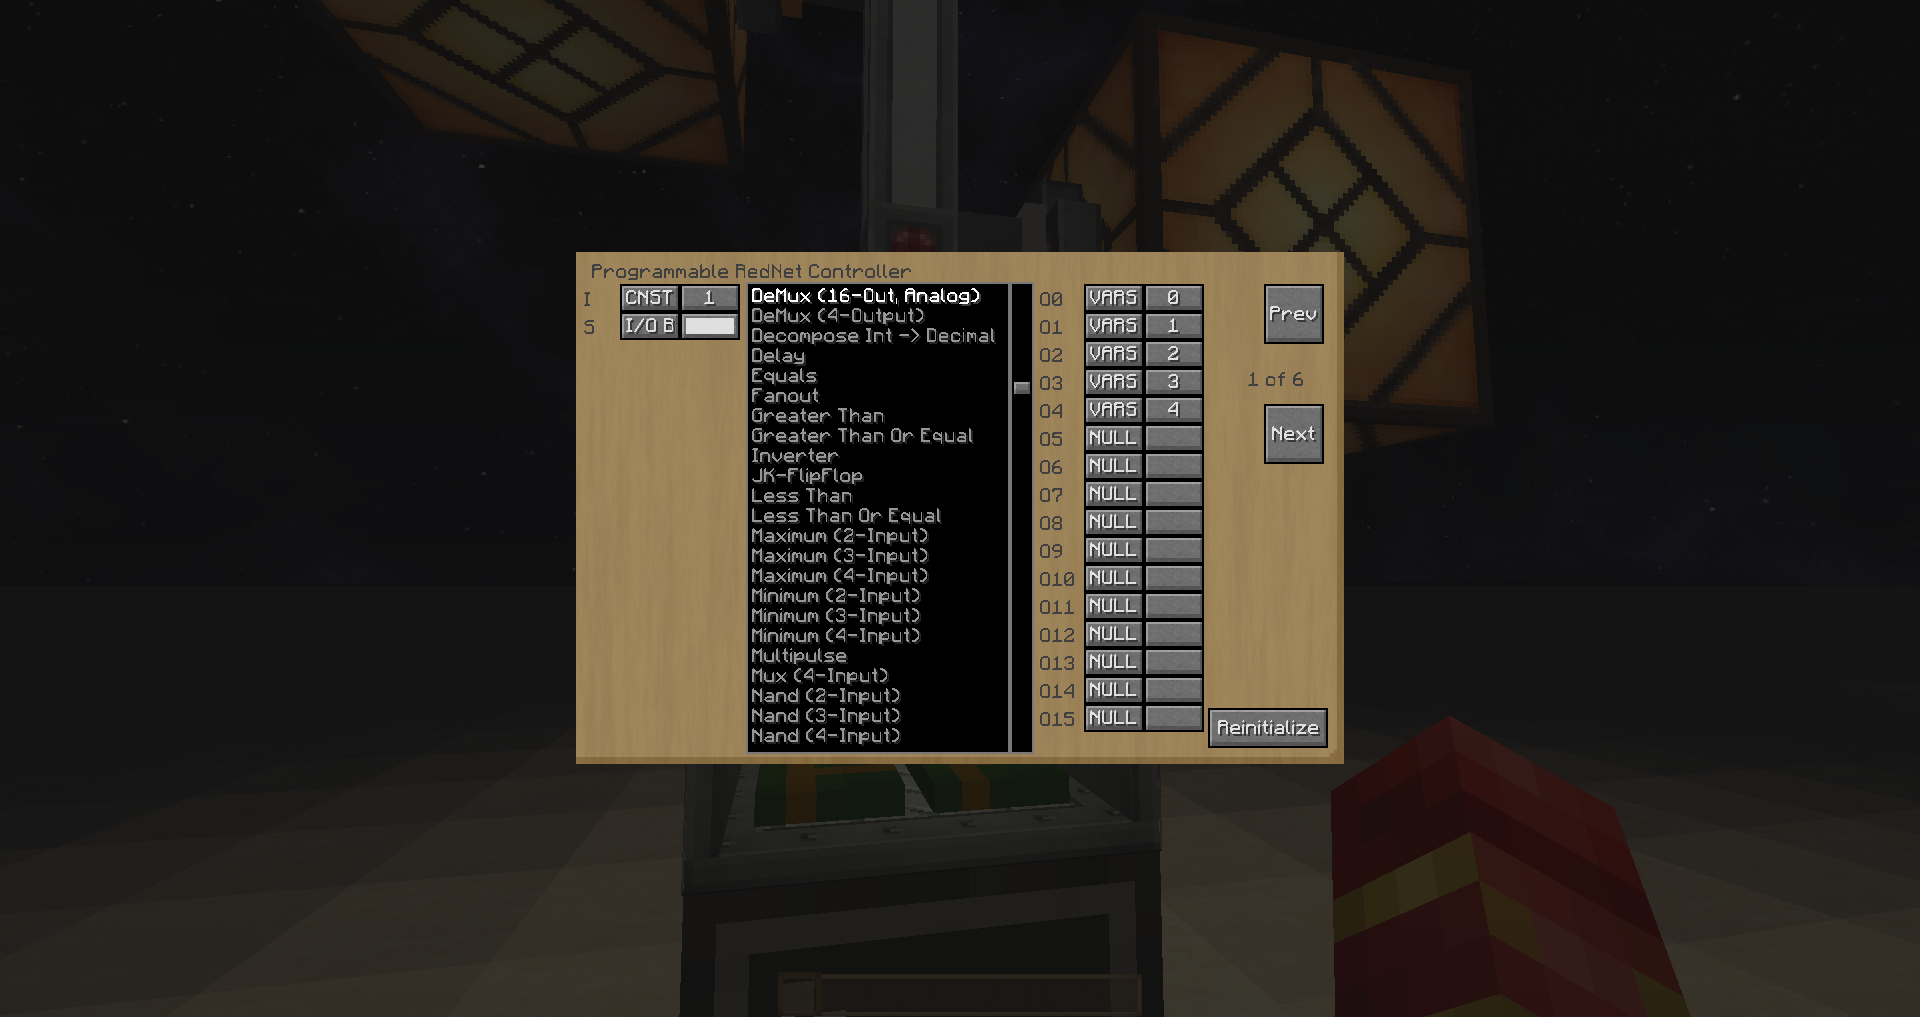
So to the PRC:
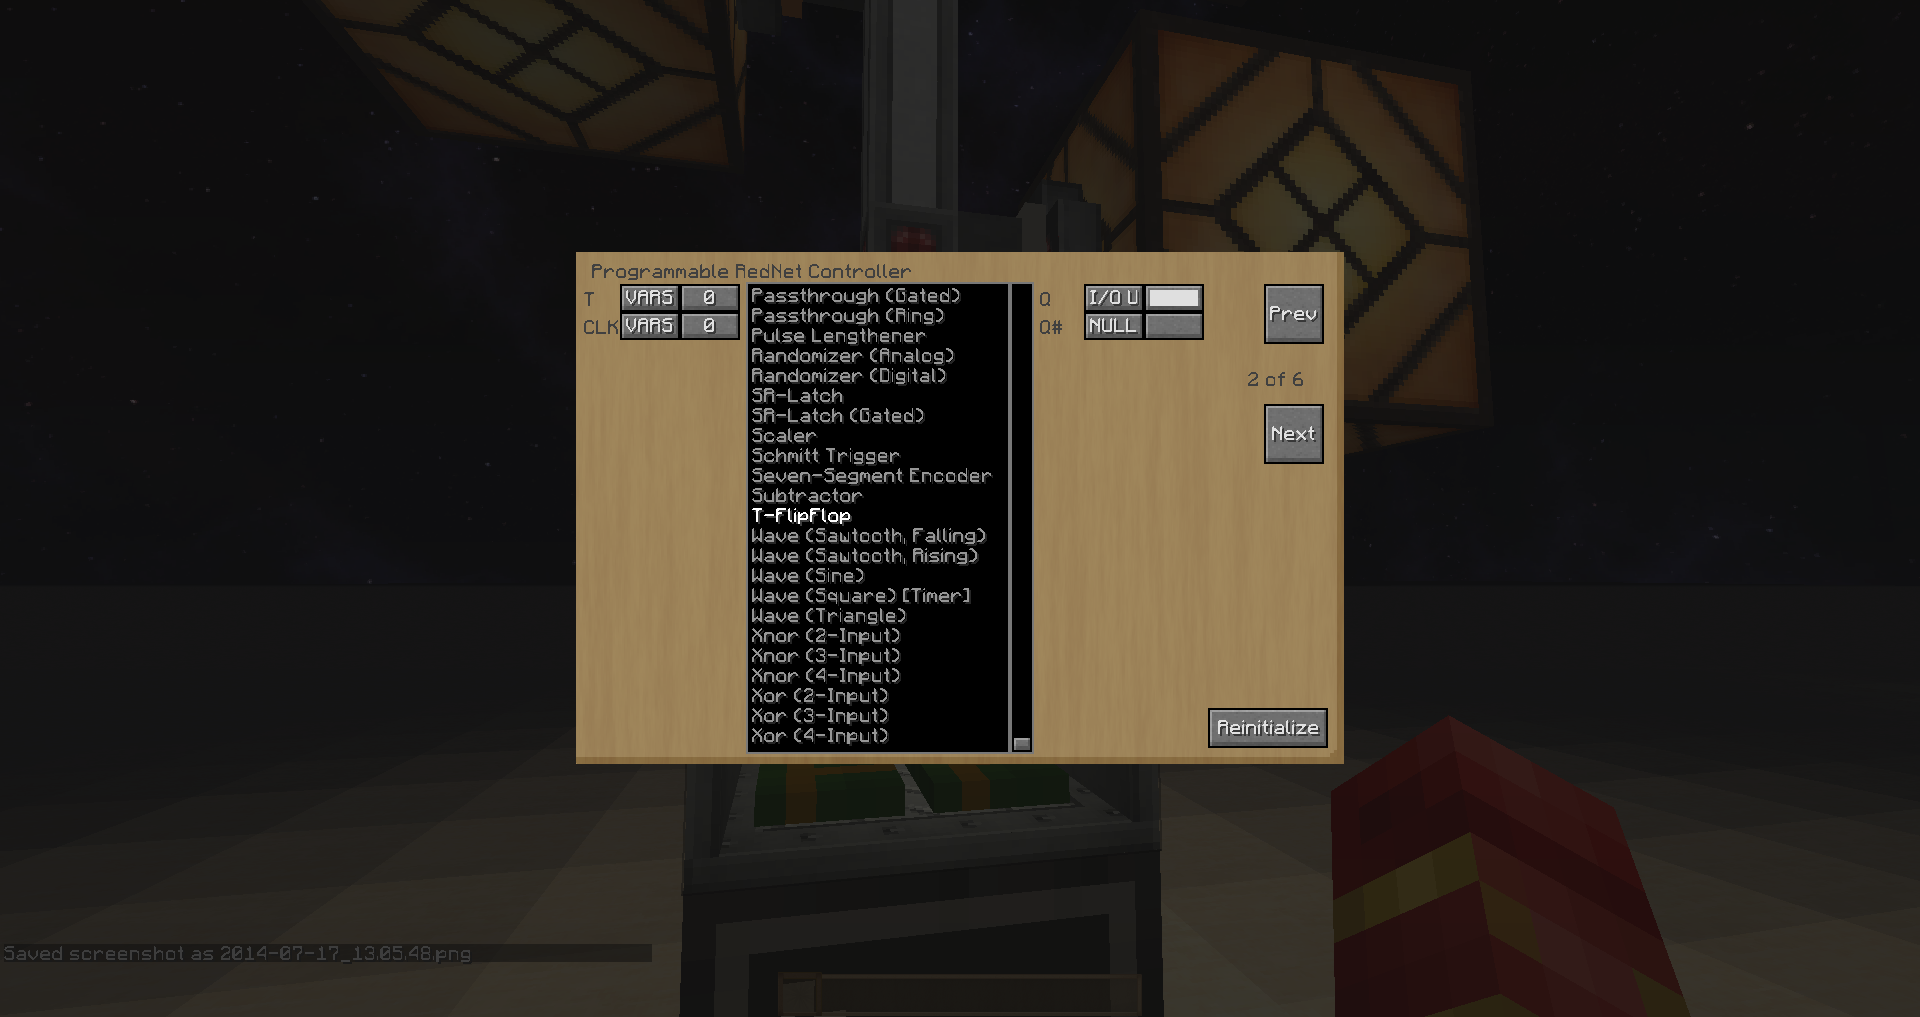
As you can see, instead of passing out the I value of 1, we are passing it to one of 5 internal variables, the reason we need to do this is so that for each signal we can put it through a T-flipflop like so:
This takes the internal variable 0 and on a rising edge will toggle the output to the Up face White cable (you will note at the top of this picture, 2 lamps are on instead of just the single one in the original setup). This is why we need to use the PRC expansion cards as by default a PRC will only do one function, with the cards it can do up to 6 (which is why we are limited to 5 outputs)
Anyway, I hope this may help some of you, and even if it doesn't, maybe it got you a bit interested in the PRC which is a very fun piece of kit.
Also to the mods: I wasn't sure if this should go here or in the Tutorials or what, sorry if I was wrong
Edited on 17 July 2014 - 12:09 PM

