Posted 06 November 2014 - 05:00 AM
This is a tutorial in the Ask a Pro Renewal Project series.
Prerequisite Tutorials:
Computer Basics I
Computer Basics II
In this tutorial, we will craft a disk drive and a disk, attach the drive to the computer, learn how to insert a disk into the drive, label the disk and re-color the disk with some dye. To complete this tutorial, you will need seven smooth stone, three redstone dust, one paper, and one dye of any color, in addition to a computer.
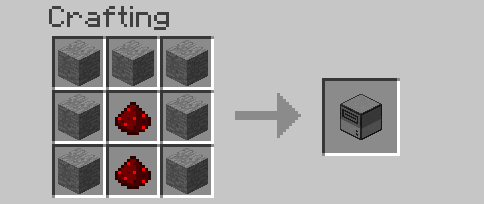
To craft a disk drive, you will need seven smooth stone and two redstone dust. Arrange these items in the crafting grid like so:
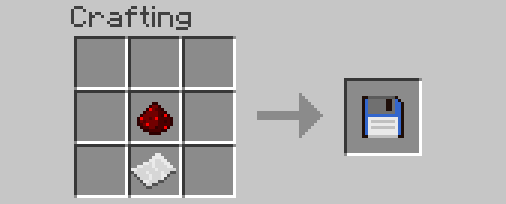
To craft a floppy disk, you will need one redstone dust and one paper. This recipe is shapeless, so any combination of one paper and one redstone dust in an otherwise empty crafting grid will create a floppy disk.
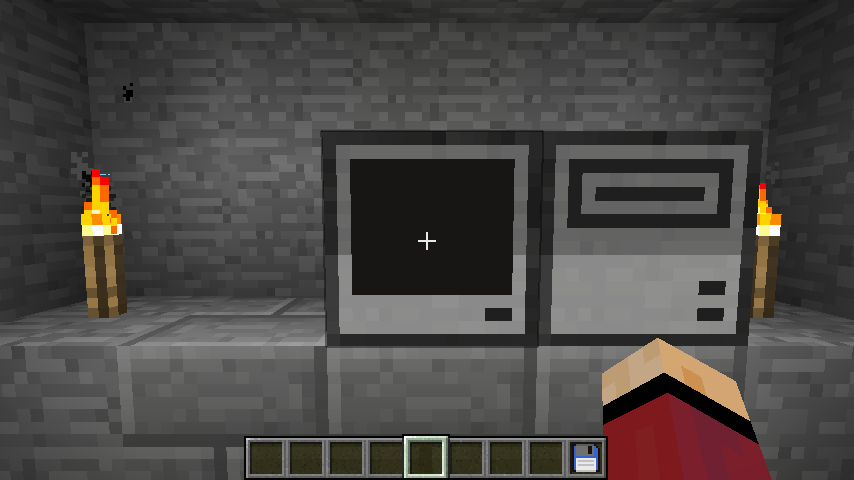
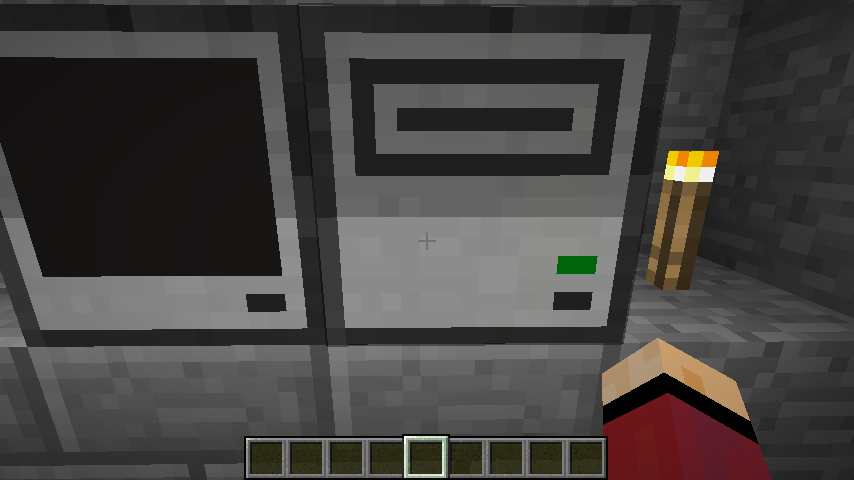
To attach the disk drive to the computer so that it can be used, you must simply place it directly adjacent to the computer. In the screenshot below, the disk drive has been placed immediately to the right of the computer.
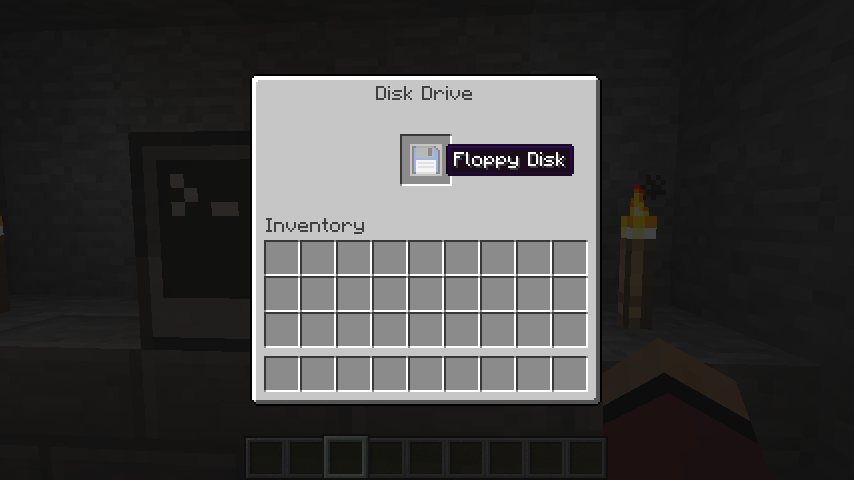
When placing a floppy disk into an empty disk drive, you have two options. If you hold your crouch key (usually Shift), right-clicking an empty disk drive with a floppy disk in your hand will place the disk into the drive. Alternatively, you can right-click the disk drive while not crouching to open its inventory interface, which works even if you do not have a floppy disk in your hand.
Once you've placed a disk in the drive, the texture of the disk drive changes to show one of the indicators lit up green, as you can see below. This means that you've placed a valid disk into the drive. An invalid object would cause that indicator to be red.
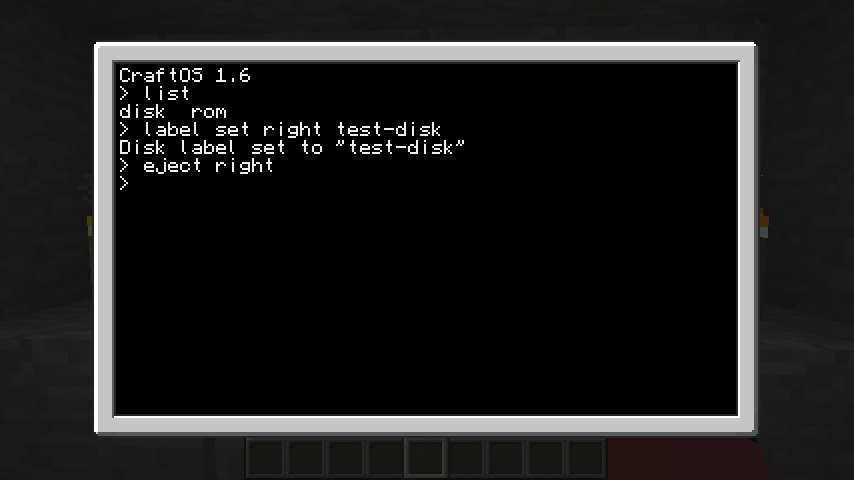
Now that you have a disk drive attached to the computer, with a disk inside it, open up the computer's interface and use the list command. You should see that a new folder called "disk" has appeared:
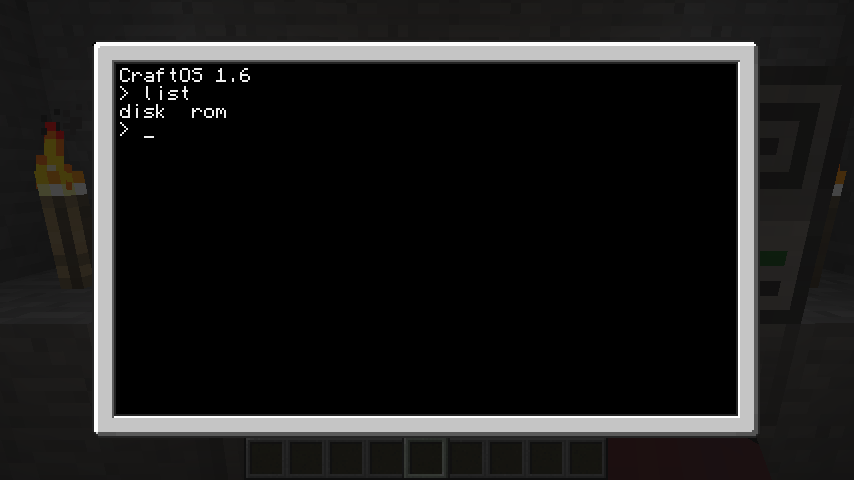
This folder is where the contents of the disk are mounted for use with the computer. You can use this folder just like any other folder on the computer, as far as file operations are concerned. For instance, to move or copy files onto the disk, you simply move or copy the files into that folder.
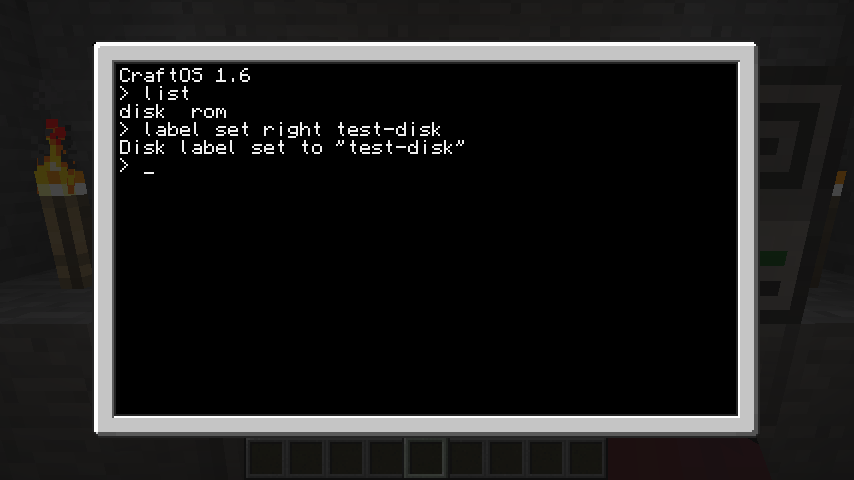
You can assign this disk a label so that it is easier to tell what's on it without having to put it into a computer. The same label command you used to set the computer's label can be used to set the disk's label. You must include the name of the side that the disk drive is on in order to set the disk's label rather than the computer's. If your disk drive is on the right side of the computer, you would use the command `label set right test-disk` to set the disk's label to "test-disk":
For more detail about what the label program is doing internally, you may wish to read through the Peripheral Basics tutorial at a later date.
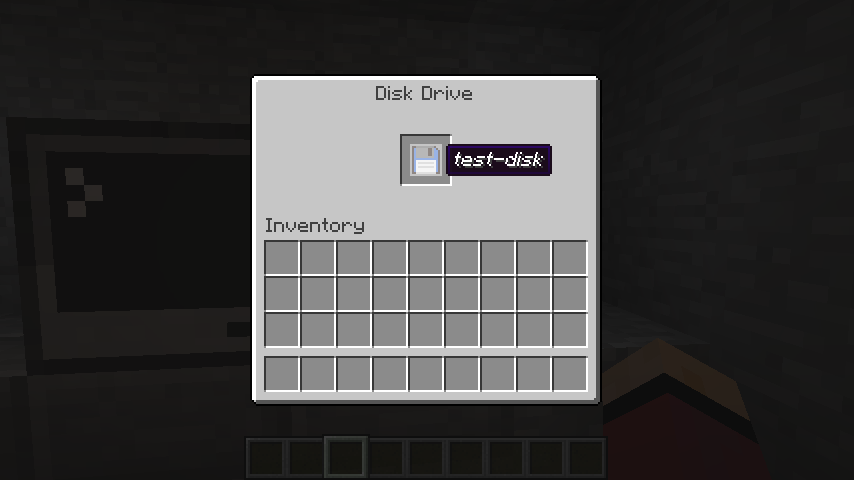
You can now see the label of the disk when looking at it in an inventory. Open up the disk drive's interface and you should see a label like this when hovering over the disk:
To eject a disk, you can open up the drive's interface and remove the disk manually, or you can run the eject program on the computer. The eject program will forcibly eject the disk from the drive, spitting it out into the world as a dropped item. It requires the side of the computer that the drive is on as an argument:
For more detail about what the eject program is doing internally, you may wish to read through the Peripheral Basics tutorial at a later date.
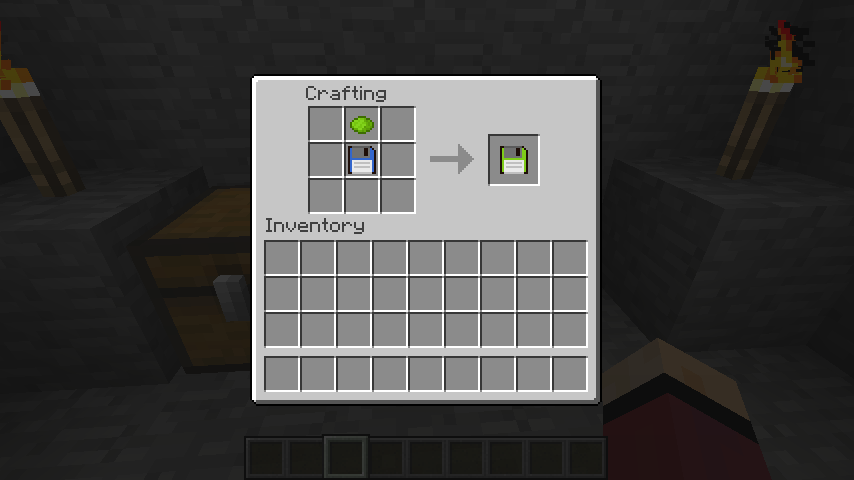
To make disks even more visually identifiable, they can be dyed any of the 16 standard colors. This recipe is also shapeless:
In this tutorial, we learned how to create disk drives and floppy disks in ComputerCraft. We learned the different ways to insert and remove floppy disks from disk drives. We learned how to label and color disks to make them easier to identify. Thanks for reading!
Prerequisite Tutorials:
Computer Basics I
Computer Basics II
In this tutorial, we will craft a disk drive and a disk, attach the drive to the computer, learn how to insert a disk into the drive, label the disk and re-color the disk with some dye. To complete this tutorial, you will need seven smooth stone, three redstone dust, one paper, and one dye of any color, in addition to a computer.
To craft a disk drive, you will need seven smooth stone and two redstone dust. Arrange these items in the crafting grid like so:

To craft a floppy disk, you will need one redstone dust and one paper. This recipe is shapeless, so any combination of one paper and one redstone dust in an otherwise empty crafting grid will create a floppy disk.

To attach the disk drive to the computer so that it can be used, you must simply place it directly adjacent to the computer. In the screenshot below, the disk drive has been placed immediately to the right of the computer.

When placing a floppy disk into an empty disk drive, you have two options. If you hold your crouch key (usually Shift), right-clicking an empty disk drive with a floppy disk in your hand will place the disk into the drive. Alternatively, you can right-click the disk drive while not crouching to open its inventory interface, which works even if you do not have a floppy disk in your hand.

Once you've placed a disk in the drive, the texture of the disk drive changes to show one of the indicators lit up green, as you can see below. This means that you've placed a valid disk into the drive. An invalid object would cause that indicator to be red.

Now that you have a disk drive attached to the computer, with a disk inside it, open up the computer's interface and use the list command. You should see that a new folder called "disk" has appeared:

This folder is where the contents of the disk are mounted for use with the computer. You can use this folder just like any other folder on the computer, as far as file operations are concerned. For instance, to move or copy files onto the disk, you simply move or copy the files into that folder.
You can assign this disk a label so that it is easier to tell what's on it without having to put it into a computer. The same label command you used to set the computer's label can be used to set the disk's label. You must include the name of the side that the disk drive is on in order to set the disk's label rather than the computer's. If your disk drive is on the right side of the computer, you would use the command `label set right test-disk` to set the disk's label to "test-disk":

For more detail about what the label program is doing internally, you may wish to read through the Peripheral Basics tutorial at a later date.
You can now see the label of the disk when looking at it in an inventory. Open up the disk drive's interface and you should see a label like this when hovering over the disk:

To eject a disk, you can open up the drive's interface and remove the disk manually, or you can run the eject program on the computer. The eject program will forcibly eject the disk from the drive, spitting it out into the world as a dropped item. It requires the side of the computer that the drive is on as an argument:

For more detail about what the eject program is doing internally, you may wish to read through the Peripheral Basics tutorial at a later date.
To make disks even more visually identifiable, they can be dyed any of the 16 standard colors. This recipe is also shapeless:

In this tutorial, we learned how to create disk drives and floppy disks in ComputerCraft. We learned the different ways to insert and remove floppy disks from disk drives. We learned how to label and color disks to make them easier to identify. Thanks for reading!


