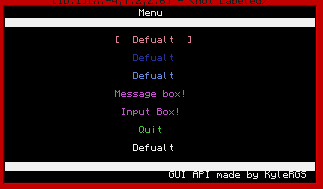
Almost everything is customisable, but it can become a bit complicated if you want to do things seamlessly.
There is same automatic function built in but for more interactive menus you should set it up yourself.
Here are the functions:
Spoiler
Where 'guiapi' is the name of the loaded API:guiapi.msgBox(table Messages)
–>> Draws a message box in the center of the screen
–>> Each line should be an entry in a table
guiapi.inpBox(table Messages)
–>> The same as a message box except returns an inputed value
guiapi.printCentred(string text, integer y-value)
guiapi.printLeft(string text, integer y-value)
guiapi.printRight(string text, integer y-value)
–>> Prints the 'text' value at the height 'y-value' on the left, right or center of the screen respectively
guiapi.defineDefaultColour(<See Description>)
–>> This will define a different set of default colours, these need to be in the correct order
–>> This is:
> Background of Header/Footer, Background of Menu, Header / Footer Text Colour
> Default item colour, msgBoxTextolour, msgBox Background,inpBoxText,inpBoxBackground,inpBox Input Text colour
–>> This is not necessary - Only for experienced users!
–>> If you want to use the easier way of doing you can use:
> defineDefaultColourTable(tColours)
–>> With tColours as a table in the correct form shown around Line 10
guiapi.defineDefaultValues(<See Description>)
–>> Same as above but with:
> Header Text, Footer Text, Item Name
–>> Arguments - Also not neccaccry but useful sometimes for reducing code
–>> Remember that overlay Header / footers use tables for text so arguments must be tables - see later
guiapi.newOverlay()
–>>For custom header / footer values, returns an object as a table
guiapi.newItem()
–>> Creates an individual item for a list, returns an object
guiapi.newMenu()
–>> Creates the Menu Object, again is returned
———
An example Item wrap
exampleItem = guiapi.newItem()
Now here are the overlay functions
Spoiler
Where 'overlay' is the saved object
overlay:setHeaderTitle(...)
-->> you can define any number of strings as arguments. Each one gets a line above the menu ( like a header )
overlay:setFooterText(...)
-->> Same as the above, but on the bottom on the screen
overlay:setOverlayColour(number/colour)
-->> Self explanatory , use the colour API or an equivalent number (sets the colour of the overlay)
overlay:setBackgroundColour(colour)
-->> same as above except changes the colour of the background of the overlay
overlay:setBackgroundHF(colour)
-->Sets the header/footerbackfround
overlay:draw()
-->> Prints the overlay, may or may not be useful (done automatically as is shown later)
-->> [b]Does [/b]clear the term before-hand.
Item commands
Spoiler
Where 'item' is the saved object
Each entry in a menu is an item, this item contains everything that is returned when you click that entry

item:newName(string name)
-->> changes the displayed text for that item/ entry
item:newType(string type)
-->> changes one of the returned values
-->> A few spacial cases that are shown later
item:newColour(number colour)
-->> changes the colour of the entry
item:setData(table data)
-->> sets the data table to what is entered (the data table is returned along with the type)
item:addData(anything)
-->> adds an item to the table
-->> this table is returned when the item is selected
Menu Commands
Spoiler
Where 'menu' is the saved object

menu:newOverlay(object overlay) -->> Changes the overlay for that menu
menu:resetItems() -->> clears the menu of items
menu:newItem(object item) -->> adds an item to the menu
menu:draw() -->> draws up the menu and allows the user to navigate
Automatic use:
There is a little bit of automation available here.
Initially, you do not need an Overlay, a small, default one is created automatically
Secondly, in a few cases, you can use item types to navigate menus better
e.g.
if the type is "text" (default) - Nothing will happen on click/ enter
if the type is "menu" and a menu (the object itself) is saved to the data, it will automatically link there.
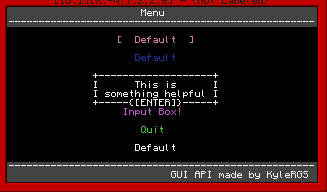
if the type is "msgbox" and there is a table in the data, a msg box will be drawn
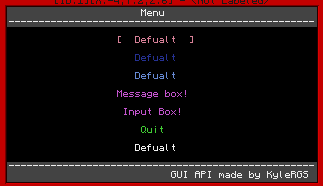
Finally, an image
Spoiler
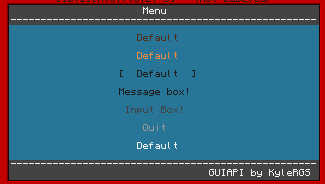
And the message box
Spoiler
And the code:
http://pastebin.com/PmCUHuTr
and the code I used for that menu shown:
http://pastebin.com/s8PkZRjs
Enjoy and please respond with any suggestions / bugs / comments!


